This guide covers the operational fee collection workflow available from the finance workspace in the current Smart School UI.
Before you start
- Make sure the student already exists in the system.
- Confirm the relevant fee item has been assigned to the student.
- Prepare the payment date, payment mode, and any notes needed for audit purposes.
- Decide whether discount or fine values must be entered during collection.
Navigation path
Fees Collection -> Collect Fees
Step 1: Open the fee collection workspace
Go to Fees Collection from the sidebar and open Collect Fees. This workspace combines student search, filtering, payment collection, and receipt tools in one place.
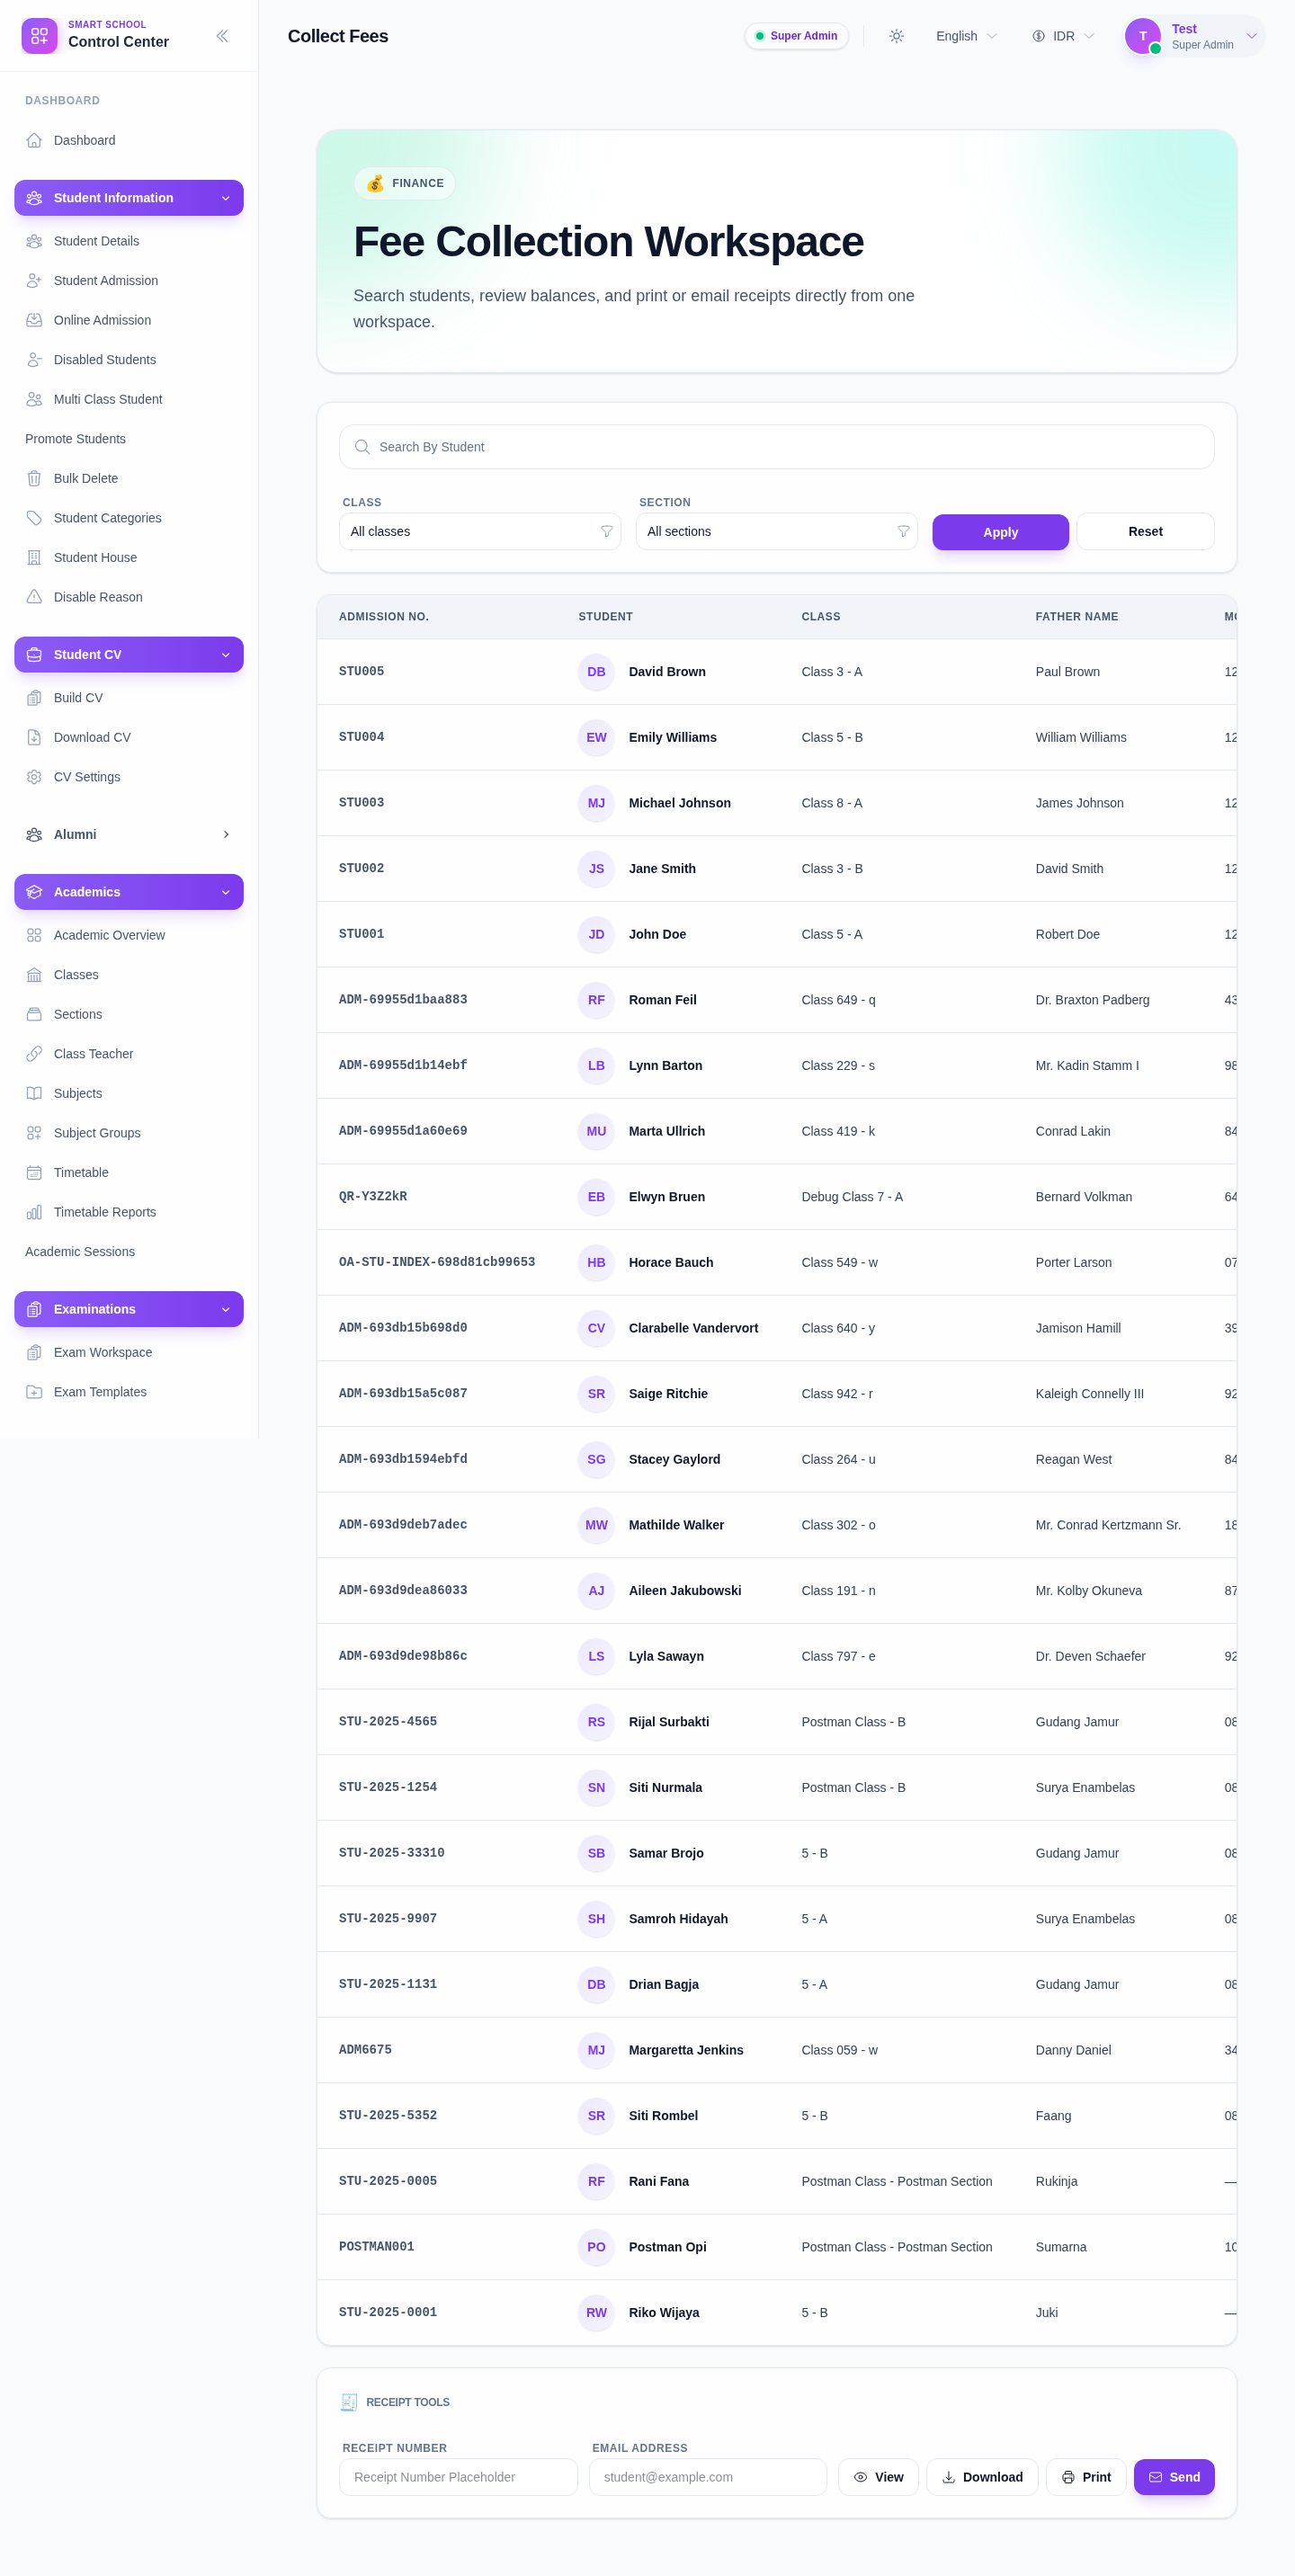
Step 2: Find the student
Use the workspace filters before opening the drawer:
- search by student
- filter by class
- filter by section
- apply or reset the board filters
Once the correct student appears in the list, click Collect Fees in that row.
This step is important because the workspace is designed to open payment collection per student rather than collecting directly from a global form.
Step 3: Review the student balance and payment history
After clicking Collect Fees, the drawer opens for the selected student.
The current drawer shows:
- student information
- admission number
- payment history
- remaining balance
- print actions for due items
Review the balance first so you do not collect against the wrong item or the wrong student.
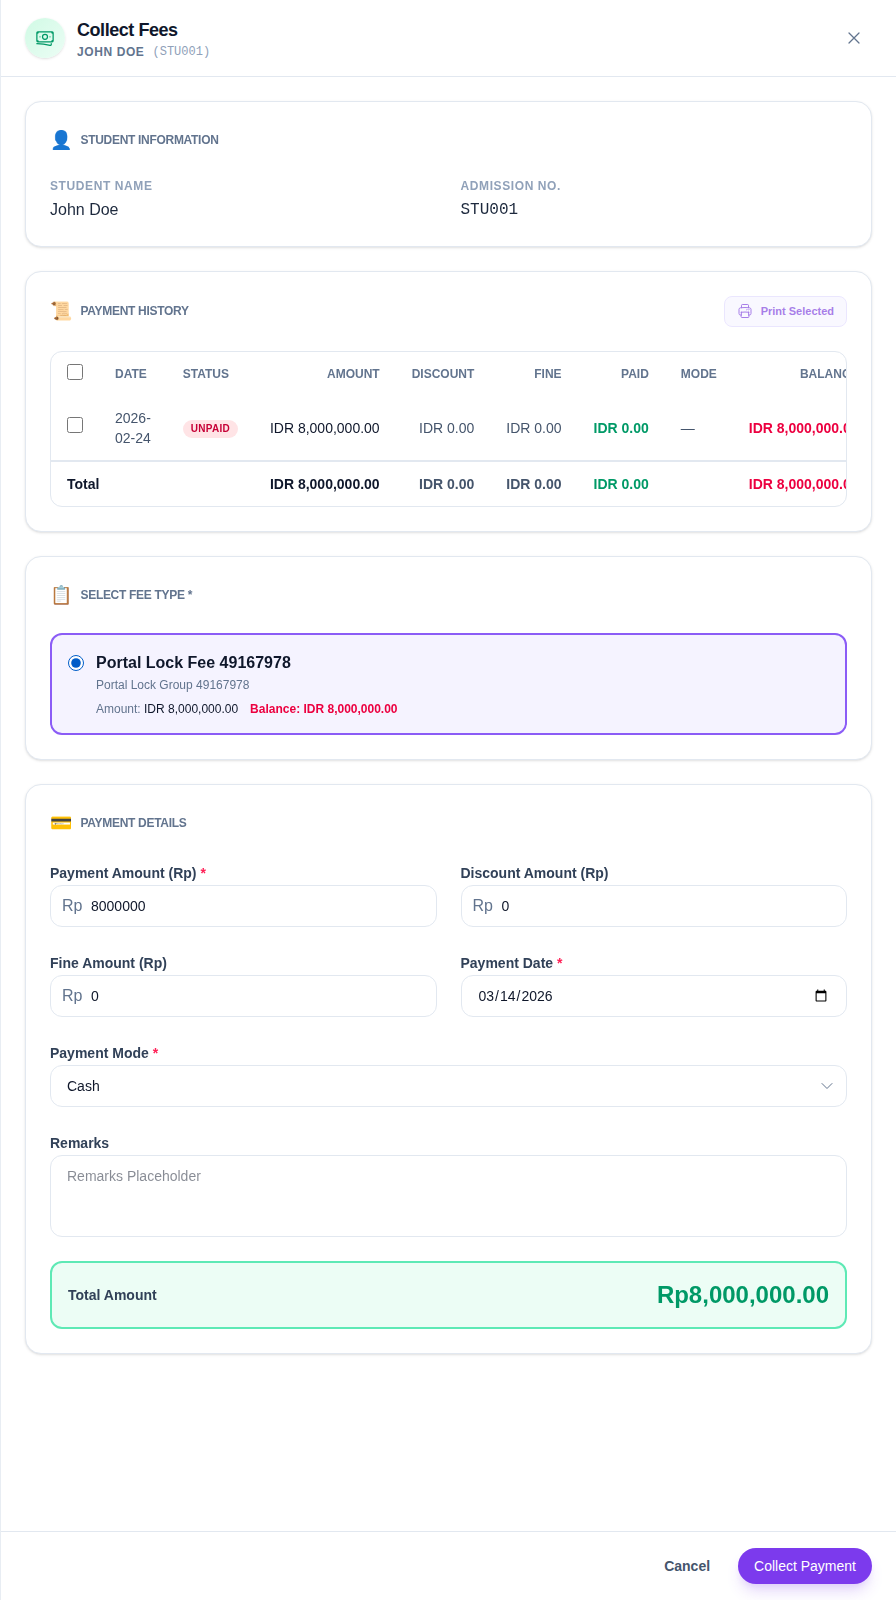
Step 4: Select the fee type
In the Select Fee Type block, choose the fee item you want to collect.
The current UI shows:
- fee name
- fee group
- amount
- outstanding balance
The payment form remains incomplete until a fee type is selected. This protects the workflow from recording money without a fee target.
Step 5: Fill the payment details
Once the fee type is selected, the payment form becomes available. The current drawer supports:
- Payment Amount
- Discount Amount
- Fine Amount
- Payment Date
- Payment Mode
- Remarks
Current payment mode options visible in the UI:
- Cash
- Cheque
- DD
- Bank Transfer
- UPI
- Card
The total amount updates in the drawer so staff can confirm the transaction value before submitting.
Step 6: Record the payment
After reviewing the numbers, click Collect Payment.
Before submission, verify:
- the correct student is open
- the correct fee item is selected
- the payment amount matches the amount received
- discount and fine values are intentional
- the payment mode and remarks are suitable for later audit
If your school prints or sends receipts immediately, keep the finance operator at the drawer until the transaction completes successfully.
Step 7: Work with receipts
The fee workspace also includes Receipt Tools for:
- viewing a receipt by number
- downloading a receipt
- printing a receipt
- emailing a receipt
Inside the drawer, unpaid entries can also expose print actions such as due-printing or selected print batches, depending on permission and the fee item state.
Operational note: the receipt tools remain most useful after a payment has already been recorded and a receipt number is available.
Verify the result
After collection:
- confirm the payment appears in the student’s payment history
- confirm the remaining balance changed
- record or copy the receipt number if your process requires it
- use the receipt tools if the guardian needs an immediate copy
Expected result: the selected fee item reflects the new payment, the balance updates, and the receipt workflow is available for follow-up.
Troubleshooting
| Issue | Likely cause | What to do |
|---|---|---|
| Student does not appear in the workspace | Filters are too narrow or the student record is incomplete | Reset filters, search again, and confirm the student exists in the active data set |
| Drawer opens but no fee type is available | Fee items have not been assigned or there is no collectible balance | Review fee setup and assignment before attempting collection |
| Collect Payment stays disabled or should not be used yet | No fee type is selected or payment details are incomplete | Select the fee type first and recheck required payment fields |
| Receipt actions are disabled | No receipt has been loaded yet | Use a valid receipt number after payment is recorded |
| Amount looks wrong | Discount or fine was entered incorrectly | Recheck the amount inputs before submission and confirm the calculated total |