This guide explains how to use the Income Group branch inside Finance Reports to review non-fee income totals by head and jump into the underlying ledger when you need row-level detail.
Before you start
- Use this guide for non-fee income only. Tuition-fee reporting is covered in the separate fees report guides.
- Confirm the date range first, because the finance console loads and exports by the active reporting window.
- Use the optional income-head filter only when you want one head instead of the grouped whole.
- Keep the range practical. The backend caps oversized windows, so a focused period is better for accurate review.
Important: the Finance Reports console also includes Daily Collection and Payroll Summary. Those tabs share the same shell, but the income workflow in this guide is specifically for the Income Group branch.
Navigation path
Reports -> Finance Reports -> Income Group
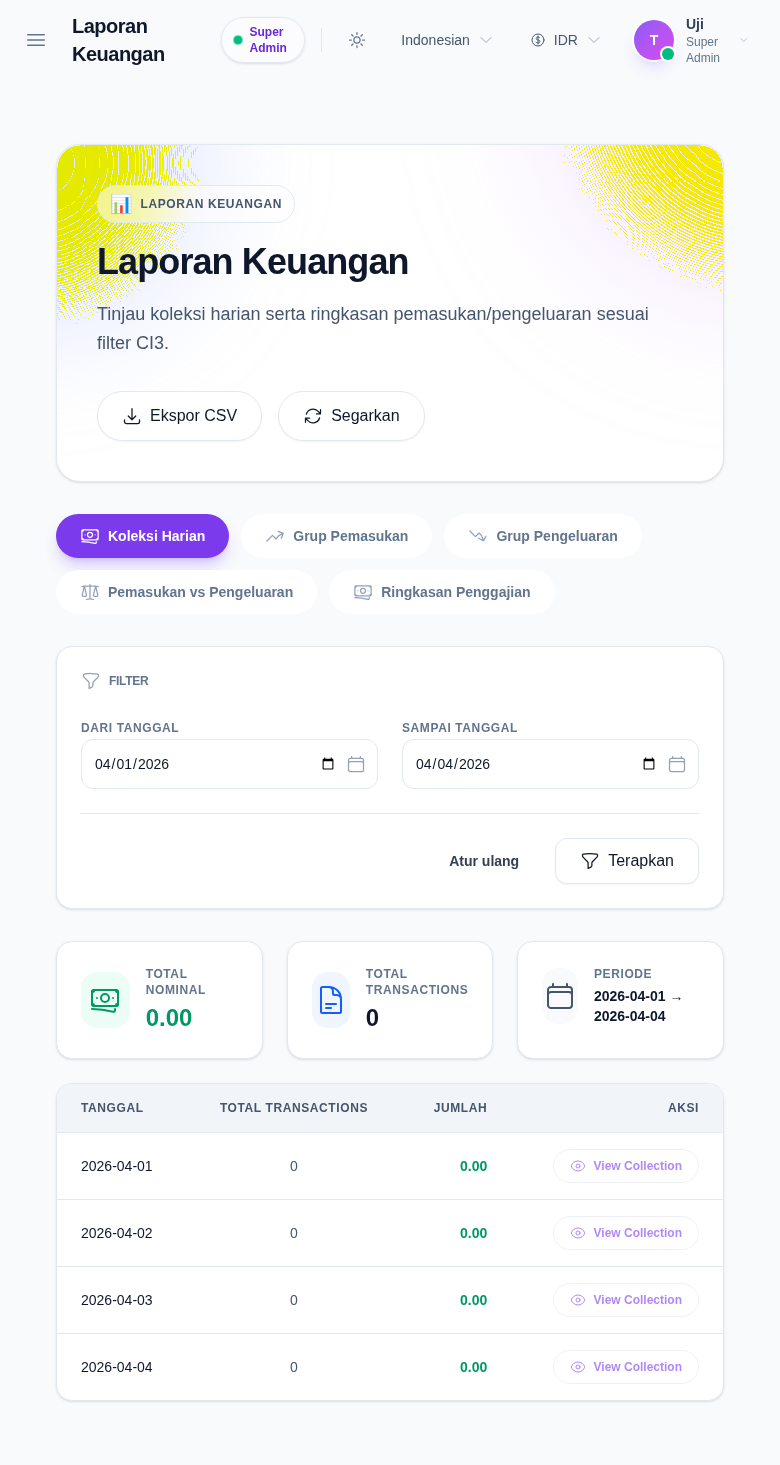
Step 1: Open Finance Reports and switch to Income Group
Open Finance Reports from the Reports menu, then select Income Group. The report lives in the same shared console as Daily Collection, Expense Group, Income vs Expense, and Payroll Summary.
The shared shell gives you:
- Export CSV
- Refresh
- a date range filter
- tab switching for other finance report branches
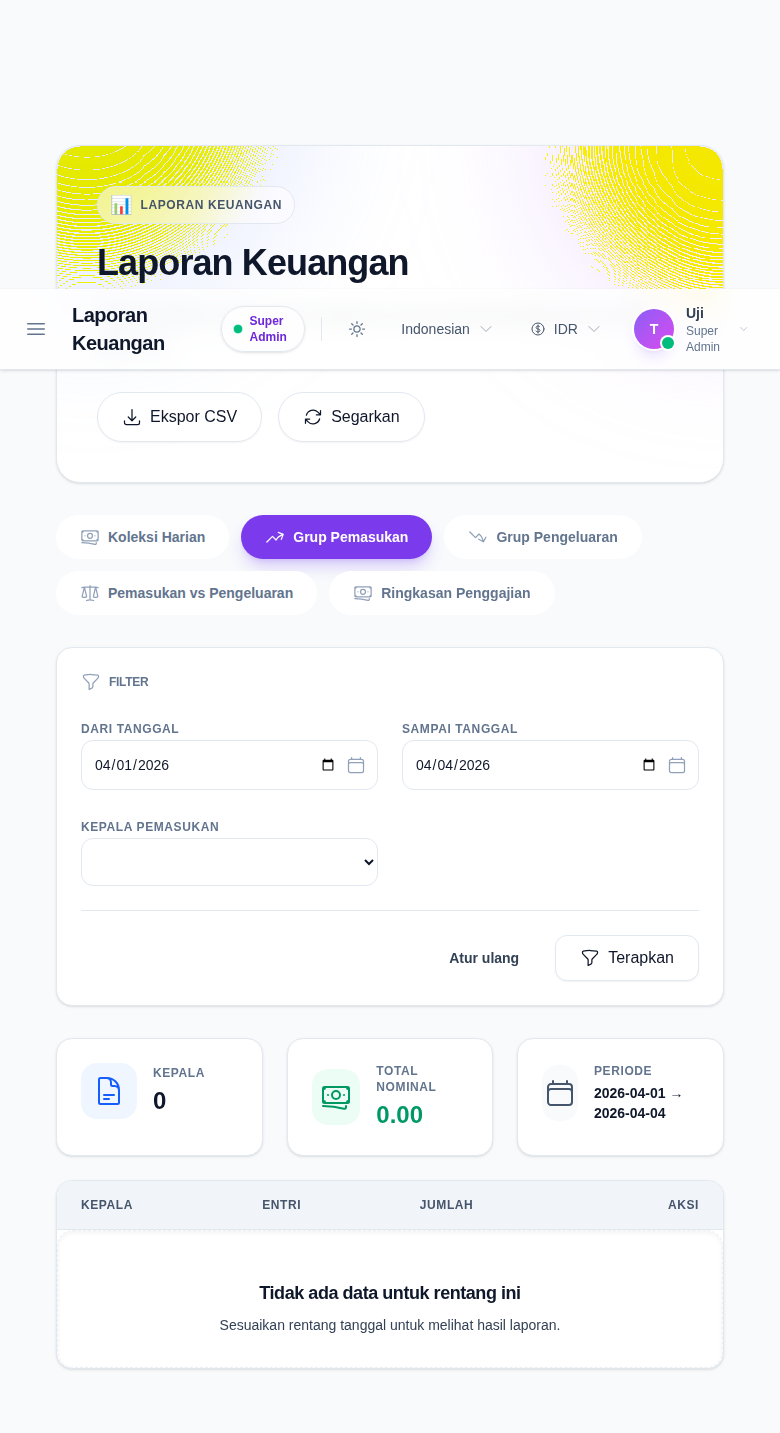
Step 2: Apply the income reporting filters
The Income Group branch adds one branch-specific filter on top of the shared date range:
- From Date
- To Date
- Income Head
Use the date range when you want to review a period such as the current month or one audit window. Use the head selector only when you want one head rather than all grouped results.
Click Apply after changing the filters, or Reset to return to the default current-month window.
Step 3: Review the grouped income summary
The Income Group branch summarizes income from the income table grouped by income_head_id.
The workspace currently shows:
- Heads
- Total Amount
- Period
- a grouped table with Head, Entries, and Amount
Each row represents one income head. The table subtotal and footer total let you compare which heads contributed most to the current reporting window.
Step 4: Use View Details to open the underlying ledger
Each grouped row includes View Details.
Use it when:
- the grouped total looks unusual
- you need the underlying transactions behind one income head
- you want to continue the review in the operational income workspace
The button hands off to the Income Console search view with the current date range and selected head prefilled in the route.
Step 5: Export only after the branch and filters are final
Click Export CSV only after confirming:
- you are on Income Group
- the date range is correct
- the optional income-head filter is correct
The export is queued from the current report state, so changing the filters changes the file contents.
Verify the result
Use this checklist after your review:
- confirm the report branch is Income Group
- confirm the date range matches the intended audit or reporting window
- confirm the optional income-head filter matches the question you are answering
- confirm the grouped totals make sense before exporting
- confirm the ledger handoff opens the matching income search context when deeper review is needed
Expected result: you can review grouped non-fee income totals by head, narrow the output with the current filters, export the current result as CSV, and open the matching ledger in the Income Console.
Troubleshooting
| Issue | Likely cause | What to do |
|---|---|---|
| The table is empty | No income records match the current filters | Broaden the date range or clear the income-head filter |
| The totals look too small | The selected period is too narrow | Re-run the report with a wider date range |
| The wrong rows appear after switching tabs | The shared shell preserved only the shared date range, not another branch’s logic | Reconfirm that Income Group is the active branch |
| The CSV does not match what you expected | The filters changed before export | Recheck the active date range and income-head filter, then export again |
| You need row-level transactions | You are still on the grouped report | Use View Details to open the Income Console ledger |