This guide explains how to manage the student template workspace inside Certificates.
Before you start
- Confirm the school name, address, and branding details that should appear on the card.
- Prepare the background, logo, and signature image files you want to upload.
- Decide which student fields should stay visible on the template.
- Check whether the template should be active immediately after saving.
- Confirm that the users managing templates have permission to work with official identity data.
Important: template changes affect official-looking cards. Keep the wording, field visibility, and branding consistent with your school identity standard before you save a template as active.
Navigation path
Certificates -> Student ID Card Templates
Step 1: Open the Student ID Card Templates page
Go to Certificates in the sidebar and choose Student ID Card Templates. The page opens the template studio for student cards.
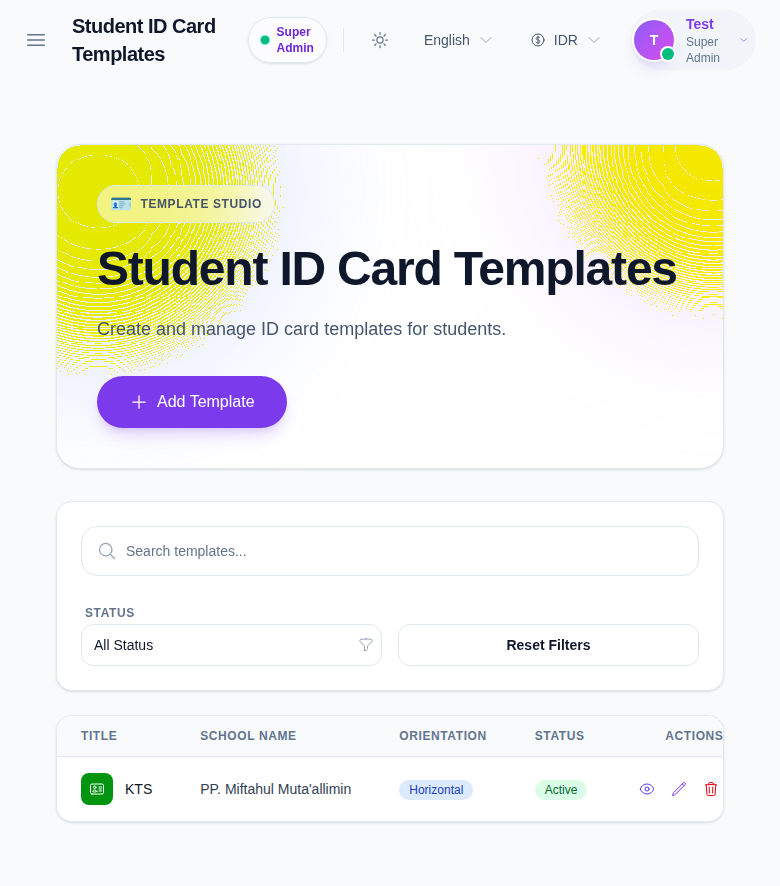
Step 2: Review the current template list
Inspect the table before making changes. In the current local environment, the list includes a seeded active template with the title KTS, the school name PP. Miftahul Muta’allimin, and Horizontal orientation.
The table includes:
- title
- school name
- orientation
- status
- row actions
Use this review to confirm whether a usable template already exists before creating another one.
Step 3: Open the template drawer
Click Add Template to open the create drawer.
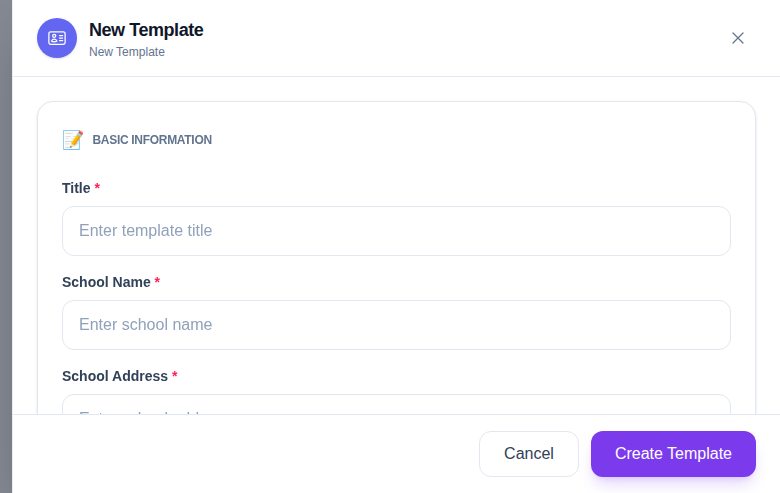
The drawer includes these sections:
- Basic Information
- Images
- Field Toggles
The basic information block collects:
- Title
- School Name
- School Address
- Header Color
- Orientation
- Active Status
The image block lets you upload:
- Background
- Logo
- Signature
The field toggle block controls whether each value appears on the card:
- Admission No
- Student Name
- Class / Section
- Father’s Name
- Mother’s Name
- Address
- Phone
- Date of Birth
- Blood Group
- Barcode / QR Code
- Roll No
- House Name
Step 4: Configure the card layout
Fill in the school identity fields first, then decide how crowded the card should be.
Use Horizontal when the school prefers a wide layout. Use Vertical when the design should read like a badge-style card. If the template should be used immediately in generation, keep Active Status enabled.
Choose the field toggles based on the operational policy of the school:
- keep only the core identity fields visible if the card must stay minimal
- enable more fields when the card is also used for internal verification
- turn on barcode or QR code only if your school actually scans cards at entry points or events
Step 5: Save, preview, and adjust if needed
After the fields look correct, save the template and use Preview from the table.
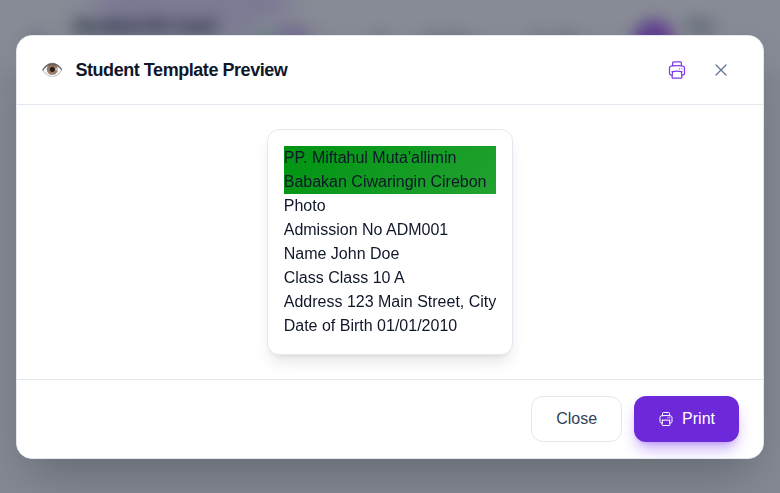
Check the preview for:
- logo placement
- header color contrast
- field order
- spacing around the card edges
- readability of the student information block
If something looks wrong, reopen the drawer with Edit, adjust the template, and preview it again.
Step 6: Maintain the template over time
Use Edit when the school updates branding or changes which fields must appear on the card. Use Delete only when the template is obsolete and no longer used in generation.
Verify the result
Use this checklist after creating or updating a template:
- the template title is easy to recognize
- the school name and address match the official school identity
- the selected fields match the school policy
- the preview looks correct on the page
- the template is active only when it is ready to be used in generation
Expected result: the student template list contains a clear, reusable template that can later be selected in the student ID generation workflow.
Troubleshooting
| Issue | Likely cause | What to do |
|---|---|---|
| Preview does not reflect the changes you expected | The template was not saved or you are previewing an older version | Save again, then reopen Preview from the updated row |
| Template looks too crowded | Too many field toggles are enabled | Turn off less important fields and preview again |
| Branding image looks blurry | The uploaded file is low quality | Reupload a higher-resolution background, logo, or signature |
| Template should not be used yet | Active Status was turned on too early | Edit the template and disable Active Status until it is ready |
| A duplicate template appears in the list | Another template with a similar purpose already exists | Standardize the title and keep only one active template per design purpose |