This guide explains how to use Search Fees Payment inside Tuition Fees Reports as a receipt-reporting workspace instead of a simple receipt lookup screen.
Before you start
- Use this branch when the question is about posted fee receipts, not unpaid balances.
- The receipt report defaults to a recent date window, so widen the range if you expect older receipts.
- Academic filters in this branch use session, class, and section to narrow the receipt ledger.
- Grouped summaries appear only when you choose a Group By option.
Navigation path
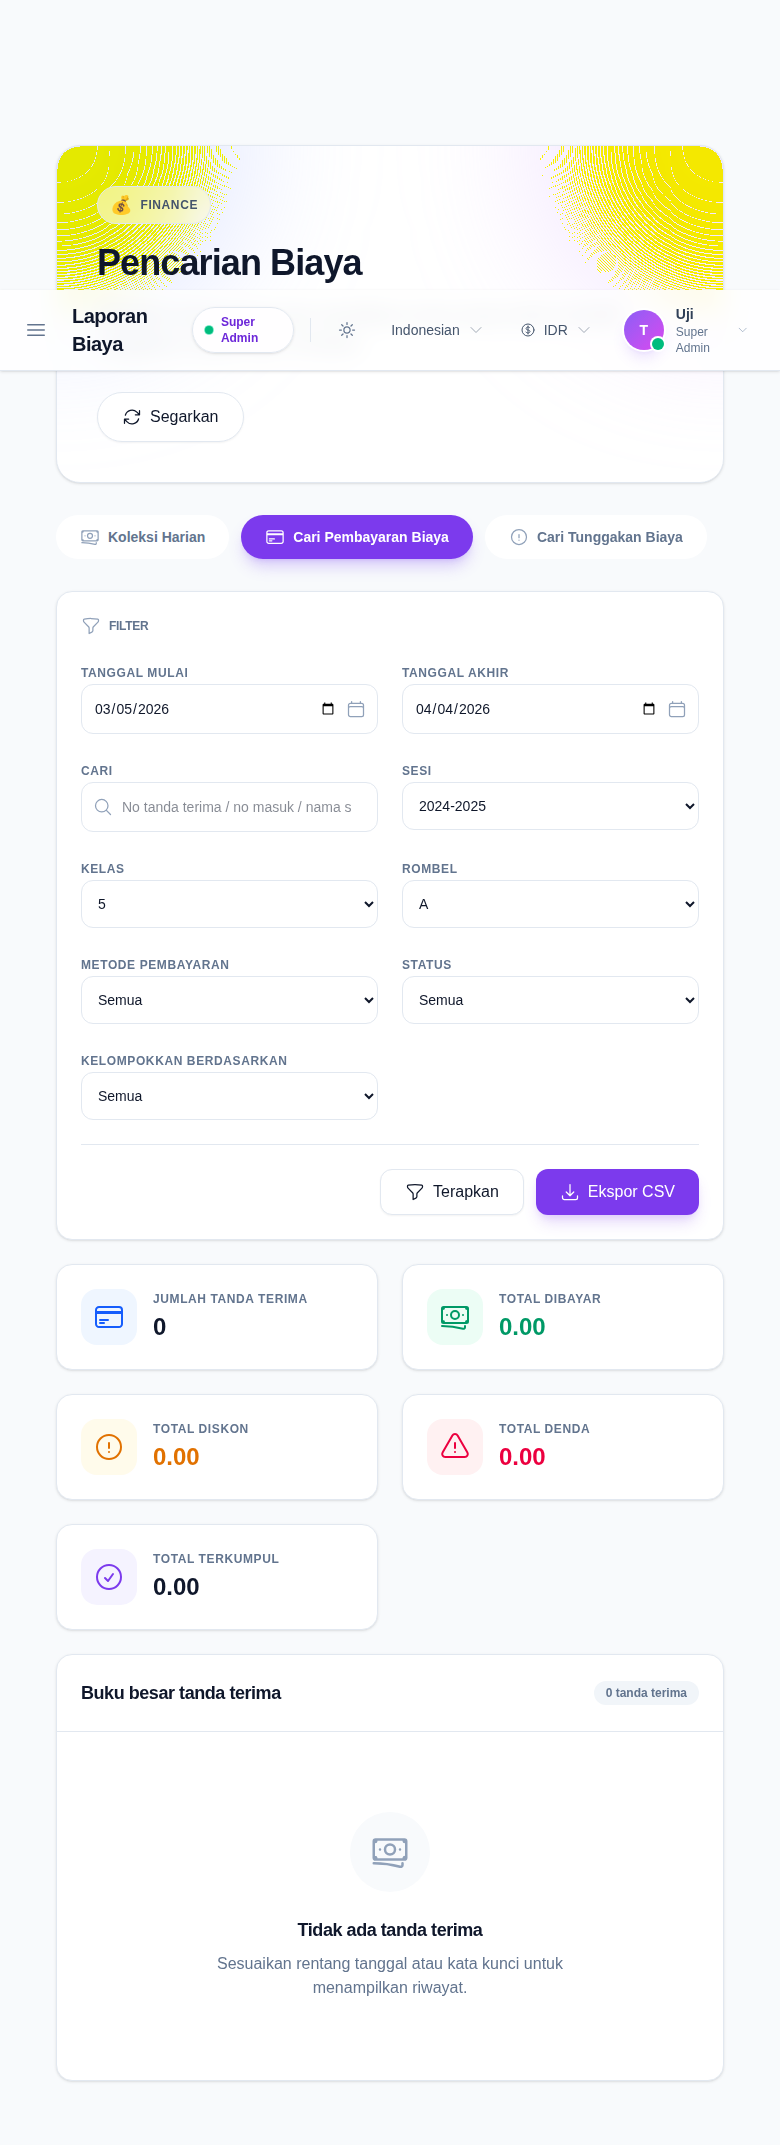
Reports -> Tuition Fees Reports -> Search Fees Payment
Step 1: Open Tuition Fees Reports and switch to Search Fees Payment
Open Tuition Fees Reports from the Reports menu, then select Search Fees Payment.
This branch sits inside the same shared shell as:
- Daily Collection
- Search Due Fees
Unlike Daily Collection, this branch is receipt-first. It focuses on the ledger of posted fee receipts and the filters that help you narrow them down.
Step 2: Apply the receipt filters for the reporting slice you need
The current branch supports these filters:
- Start Date
- End Date
- Search
- Session
- Class
- Section
- Payment Mode
- Status
- Group By
Use Search for a receipt number, admission number, or student name. Use Group By only when you want grouped totals by:
- class
- collection
- mode
Click Apply after changing the filters.
Step 3: Read the summary cards and optional grouped summary
When receipt data matches the filters, the workspace can show summary cards for:
- Receipt Count
- Total Paid
- Total Discount
- Total Fine
- Total Collected
If you set Group By, the branch also shows a grouped collection summary above the ledger. That grouped block rolls up totals by the grouping you selected and helps you compare collection patterns before reading receipt rows one by one.
Step 4: Review the receipt ledger
The ledger area below the summaries shows:
- receipt number
- student
- admission number
- class
- fee type
- payment date
- amount
- discount
- fine
- net amount
- payment mode
- status
- received by
Use the table when you need one filtered receipt history rather than a per-day summary.
If the result is large, the branch paginates the receipt list and keeps the current page in the route.
Step 5: Export the report only after the filters are final
Use Export CSV after the current filters match the report you actually want to keep.
Because the export follows the current filter state, changing any of these changes the file:
- date range
- academic filters
- payment mode
- status
- group-by selection
Verify the result
Use this checklist after your review:
- confirm the branch is Search Fees Payment
- confirm the date range and academic filters match the intended receipt slice
- confirm the grouped summary, if enabled, matches the grouping you selected
- confirm the ledger rows reflect the same filter state shown above
- confirm the CSV export is triggered only after the report state is final
Expected result: you can narrow fee receipts to one reporting slice, inspect the matching receipt ledger, optionally compare grouped collection totals, and export the current result as CSV.
Troubleshooting
| Issue | Likely cause | What to do |
|---|---|---|
| The receipt ledger is empty | No receipts match the current filters | Broaden the date range or clear one or more filters |
| Grouped summary is missing | No Group By option is selected or no rows match | Choose a grouping value, then apply the filters again |
| The result count is smaller than expected | The academic or payment-mode filters are too narrow | Recheck session, class, section, payment mode, and status |
| The export file is not useful | The report was exported before the filters were final | Reapply the correct filters, then export again |
| The wrong receipts appear | A previous search or page state is still active | Reset the filters and rerun the query from page 1 |