This guide shows how to use the Visitor Book workspace inside Front Office.
Short summary
Visitor records keep reception activity visible. The Visitor Book workspace captures who visited, why they came, who they met, and whether the visit was tied to a staff member or a student.
Before you start
- Confirm visitor purpose values already exist.
- Confirm the staff or student meeting target is known before opening the drawer.
- Prepare ID proof details or the optional attachment if your school uses them.
Navigation path
Front Office -> Visitor Book
Step 1: Open the Visitor Book workspace
Go to Front Office and select Visitor Book.
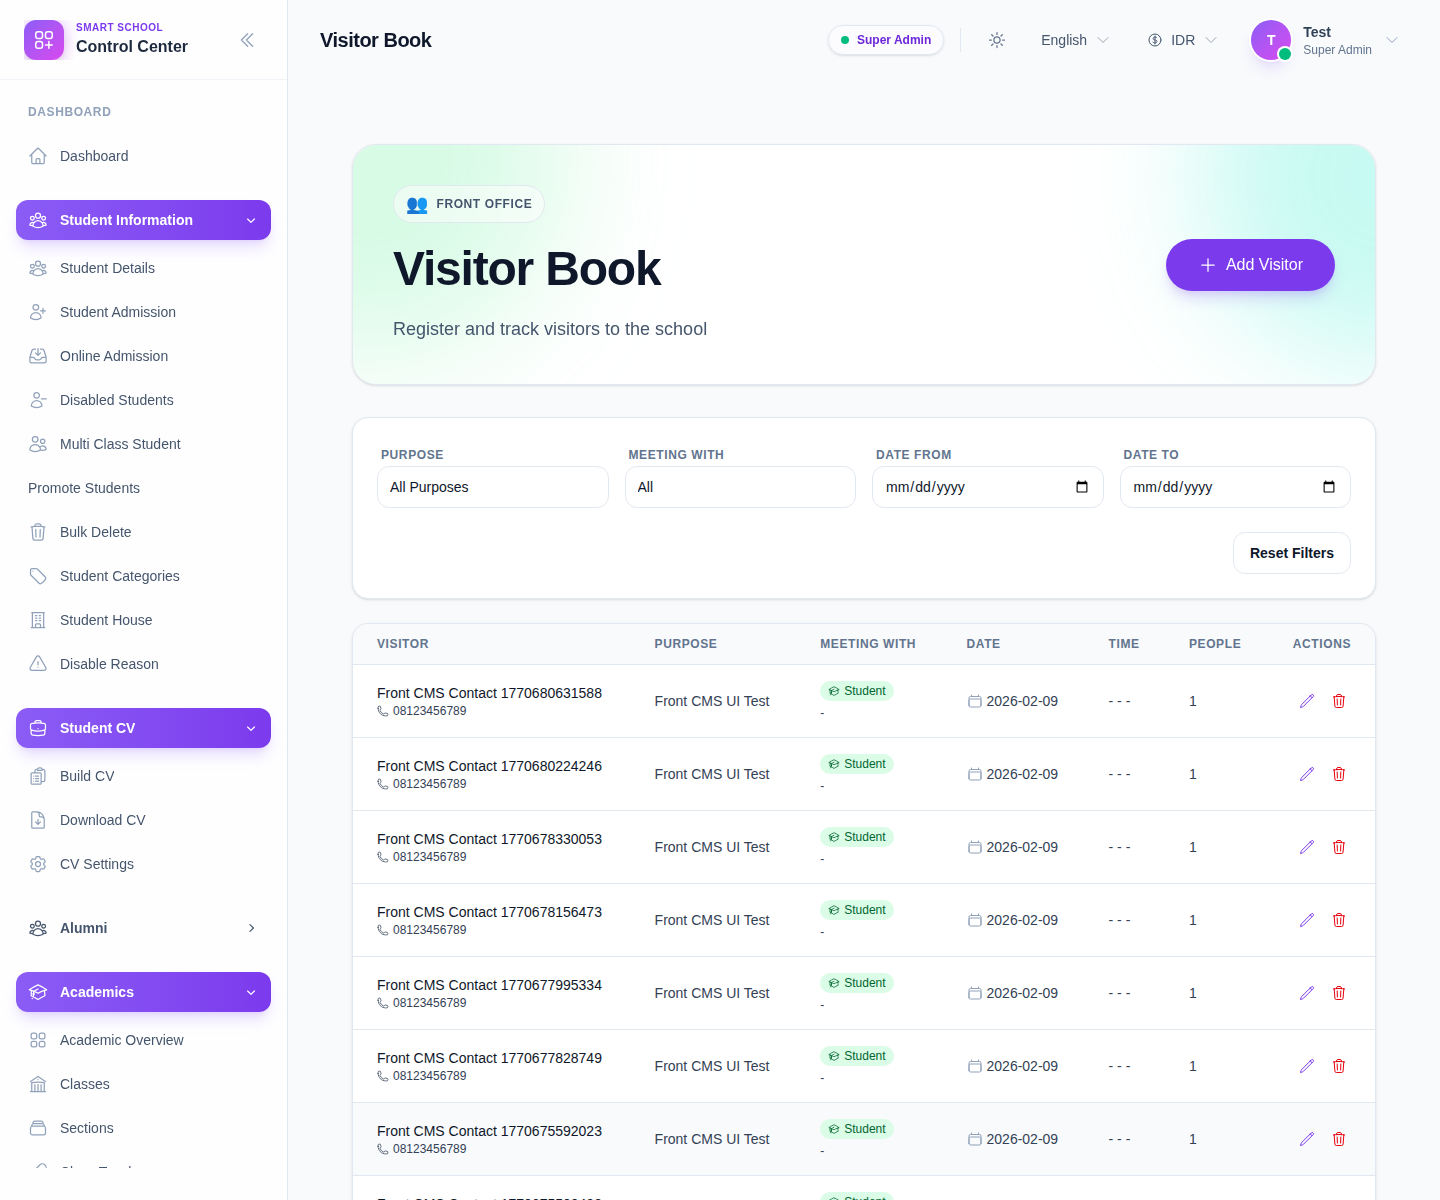
Use this page to:
- review current visitor entries
- filter by purpose, meeting target, and date range
- open a visitor record for review or edit
Step 2: Create or update a visitor entry
Click Add Visitor to open the drawer.
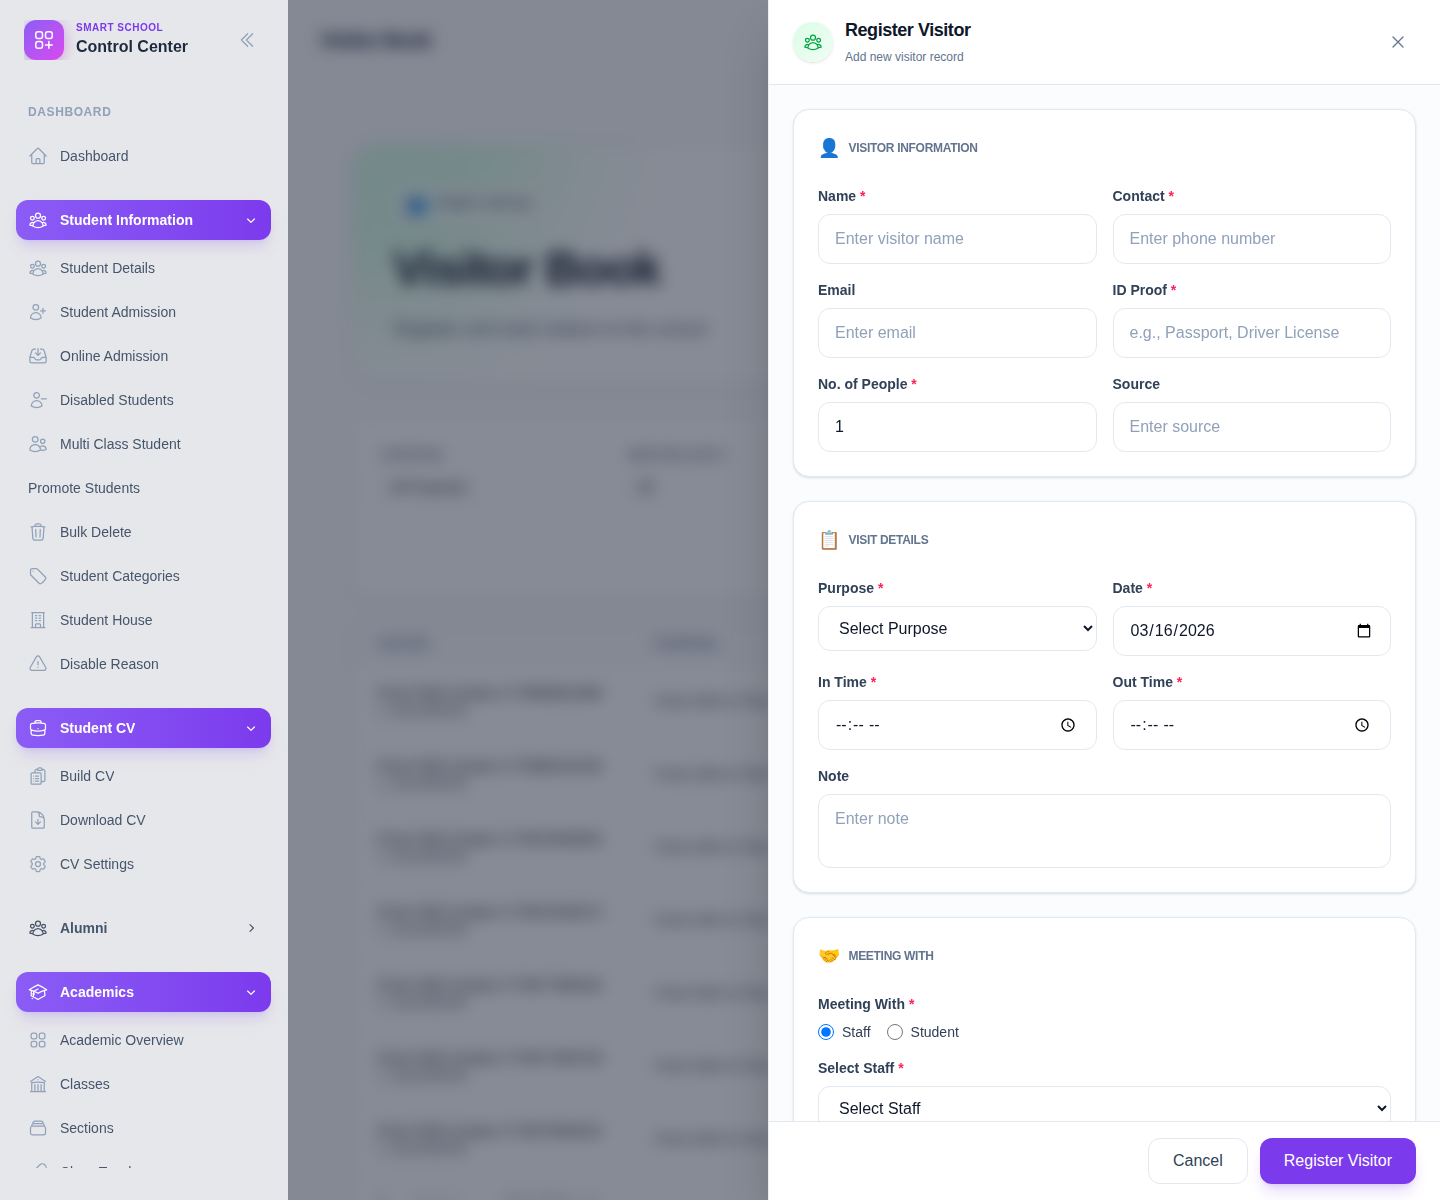
Complete the main fields:
- Name
- Contact
- ID Proof
- No. of People
- Source
- Purpose
- Date
- In Time
- Out Time
- Note
- Meeting With
- Select Staff or the student search flow
- optional Photo/ID Proof Image
If the visitor is meeting a student, select the student path and choose the class and section before the student list appears.
Step 3: Review the saved visitor record
After saving:
- Return to the list view.
- Filter by purpose or date if needed.
- Confirm the meeting target and visit timing are correct.
- Edit or remove the row if the visit was logged incorrectly.
Important notes
Important: Visitor Book is a reception log, not a public sign-in form. Staff should still verify the record before using it for follow-up or reporting.
Verification checklist
- The visitor uses the correct purpose and source.
- The meeting target is set to staff or student correctly.
- The saved row appears in the Visitor Book table.
Expected result: visitor entries are stored in Front Office and ready for review.
Troubleshooting
| Issue | Likely cause | What to do |
|---|---|---|
| Save fails | A required field is empty | Fill the missing contact, purpose, or date field |
| Student meeting list is empty | Class and section were not selected | Select the class and section first, then reload the student list |
| Purpose options are missing | Visitor purpose lookup data is incomplete | Add the missing value from Front Office setup |
| The attachment is missing | No image or ID proof was uploaded | Reopen the drawer and attach the required file |