This guide explains how to use Payment Gateways to manage the online payment providers available for school fee collection.
Short summary
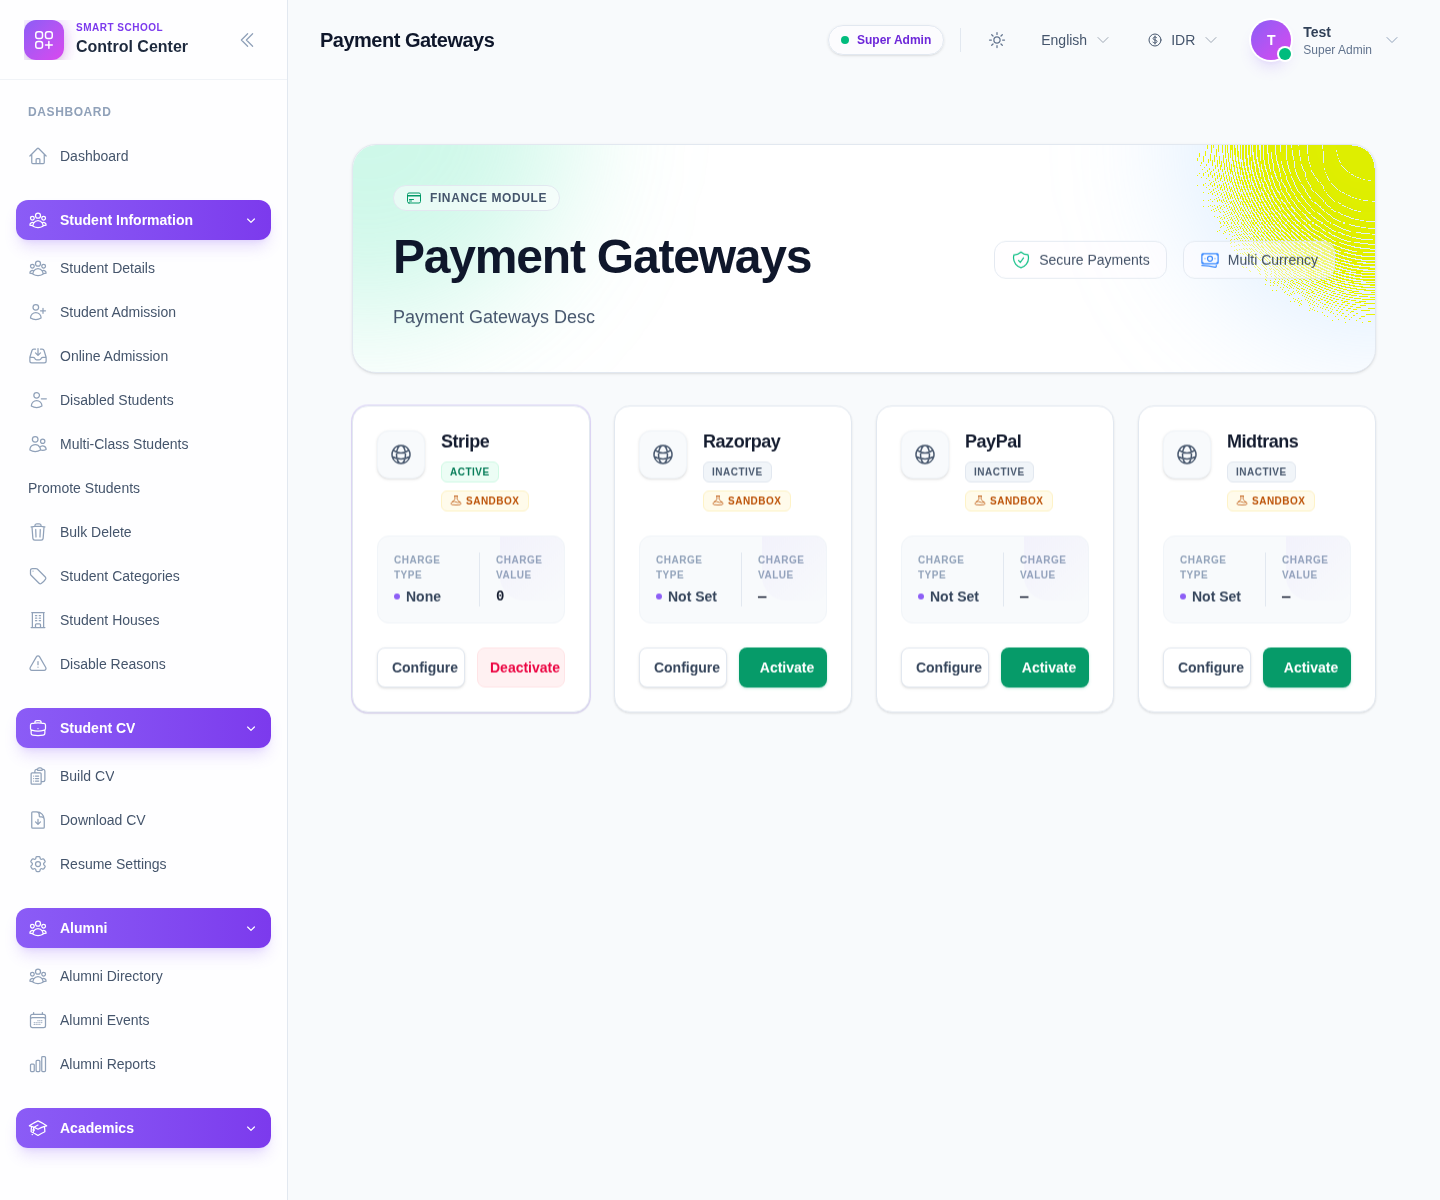
Use Payment Gateways when the school needs to enable, disable, or configure an online payment provider. The current page renders a gateway-card catalog and a configuration drawer rather than a traditional table.
Before you start
- Confirm which gateway the school actually intends to use in production.
- Prepare the provider credentials before opening the configuration drawer.
- Coordinate changes carefully if live families are already paying online.
Navigation path
Online Payments -> Payment Gateways
Step 1: Open Payment Gateways
In the sidebar, open Online Payments, then choose Payment Gateways.
The hero area also surfaces the current positioning of the page:
- Secure Payments
- Multi Currency
Step 2: Review the available gateways
The local UI currently shows gateway cards for:
- Stripe
- Razorpay
- PayPal
- Midtrans
Your environment may vary, but the page pattern stays the same: each provider appears as its own card with operational actions attached.
Step 3: Open the configuration drawer
Click Configure on the gateway you want to review.
Use the drawer to:
- inspect the current configuration
- enter or update provider settings
- save the configuration without changing unrelated gateway cards
Keep changes narrow and deliberate, especially when the school already has one active gateway in service.
Step 4: Activate or deactivate the gateway
The current UI exposes either Activate or Deactivate on each card depending on the provider state.
When you use either action:
- the UI triggers a confirmation dialog
- the action applies to the selected gateway only
- the gateway state should refresh after the change
Use activation only after configuration is complete enough for the target provider.
Step 5: Verify the active gateway state
After saving or changing status:
- confirm the correct card still looks selected for current use
- verify the action button changed appropriately between Activate and Deactivate
- open the transactions page later to monitor whether live online payments begin appearing as expected
Operational note: changing gateway state affects real collection channels. Avoid activating multiple providers casually unless that is an intentional part of your payment operations model.
Verify the result
- the intended provider card is configured
- the active or inactive state matches the school decision
- the confirmation step completed without error
- the gateway is ready for transaction monitoring
Troubleshooting
| Issue | Likely cause | What to do |
|---|---|---|
| Configure opens but nothing useful is saved | Required provider credentials are missing | Gather the provider settings first, then reopen the drawer |
| A gateway stays inactive | It was not activated after configuration | Use Activate and confirm the status change |
| The wrong provider was changed | The action was run from the wrong card | Recheck the provider name on the card before confirming |
| Finance teams are unsure which channel is live | Multiple providers were changed without review | Reopen the page and confirm the intended active-state pattern card by card |