This guide explains how to use Item Store to manage the storage-location records used by inventory items and stock entries.
Short summary
Use Item Store when the school needs to add or maintain a storage location such as a store room, supply office, or other tracked inventory location. The current tab combines an add form, a store table, and an edit modal.
Before you start
- Decide the store name first.
- Use the Code field if the school tracks storage locations by short identifier.
- Add a description when the store needs location context for operators.
Navigation path
Inventory -> Item Store
Step 1: Open Item Store
In the sidebar, open Inventory and choose Item Store.
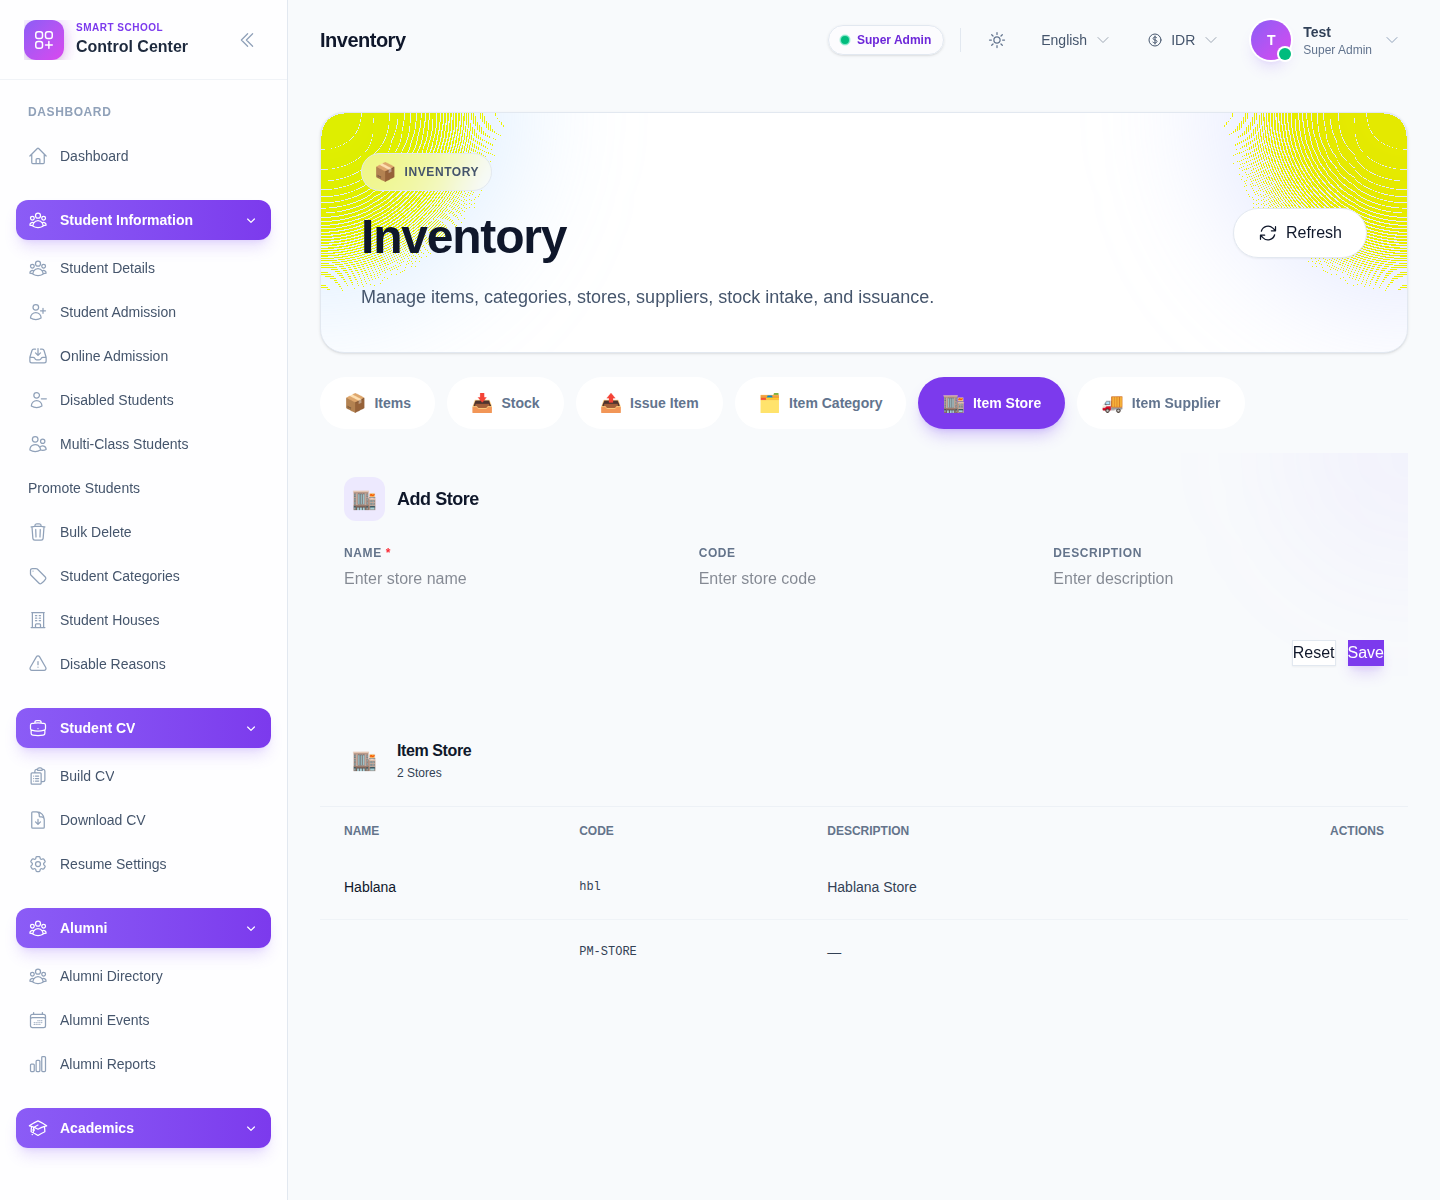
The current form includes:
- Name
- Code
- Description
Step 2: Create the store record
Complete the form:
- enter Name
- add Code if your process uses one
- add Description if helpful
- click Save
Use Reset to clear the current input.
Step 3: Review the store table
The current table shows:
- Name
- Code
- Description
- Actions
Use the table to confirm the store exists before it is referenced in items or stock entries.
Step 4: Edit or remove the store carefully
The current row actions include:
- Edit
- Delete
Edit opens a modal for updating the same fields. Delete should be used carefully because stores are shared reference records used in multiple inventory tabs.
Step 5: Confirm usage in inventory workflows
After saving the store:
- return to Add Item or Stock
- verify the store appears in the selectors
- use store-based filters later to confirm the record behaves as intended
Verify the result
- the store appears in the table with the right name and code
- the store is available in item and stock selectors
- inventory filters can use the store correctly
Troubleshooting
| Issue | Likely cause | What to do |
|---|---|---|
| The store is missing from selectors | It was not saved or the inventory page needs refresh | Save again and reload the workspace |
| Store labels are confusing | Names or codes are too similar | Clarify them before operations depend on them |
| Staff save stock to the wrong store | The reference list is unclear | Improve store names and descriptions |
| Deleting a store feels risky | Items and stock rows may already rely on it | Review dependent records before removing the store |