This guide explains how to use the Staff Attendance page in Migdafa Smart School.
Before you start
- Use a date that the page accepts as today or earlier.
- Narrow by department or designation only when it helps.
- Decide whether you will use row-by-row updates or bulk present marking.
- Expect the current local environment to show a date-validation warning on first load until you set a valid past date and reload.
Important: in the current local environment, the page can initially show a validation warning for the date field. A valid earlier date still loads the staff roster correctly, so treat the warning as an environment quirk rather than the final operational state.
Navigation path
Attendance -> Staff Attendance
Step 1: Open Staff Attendance
Go to Attendance and choose Staff Attendance.
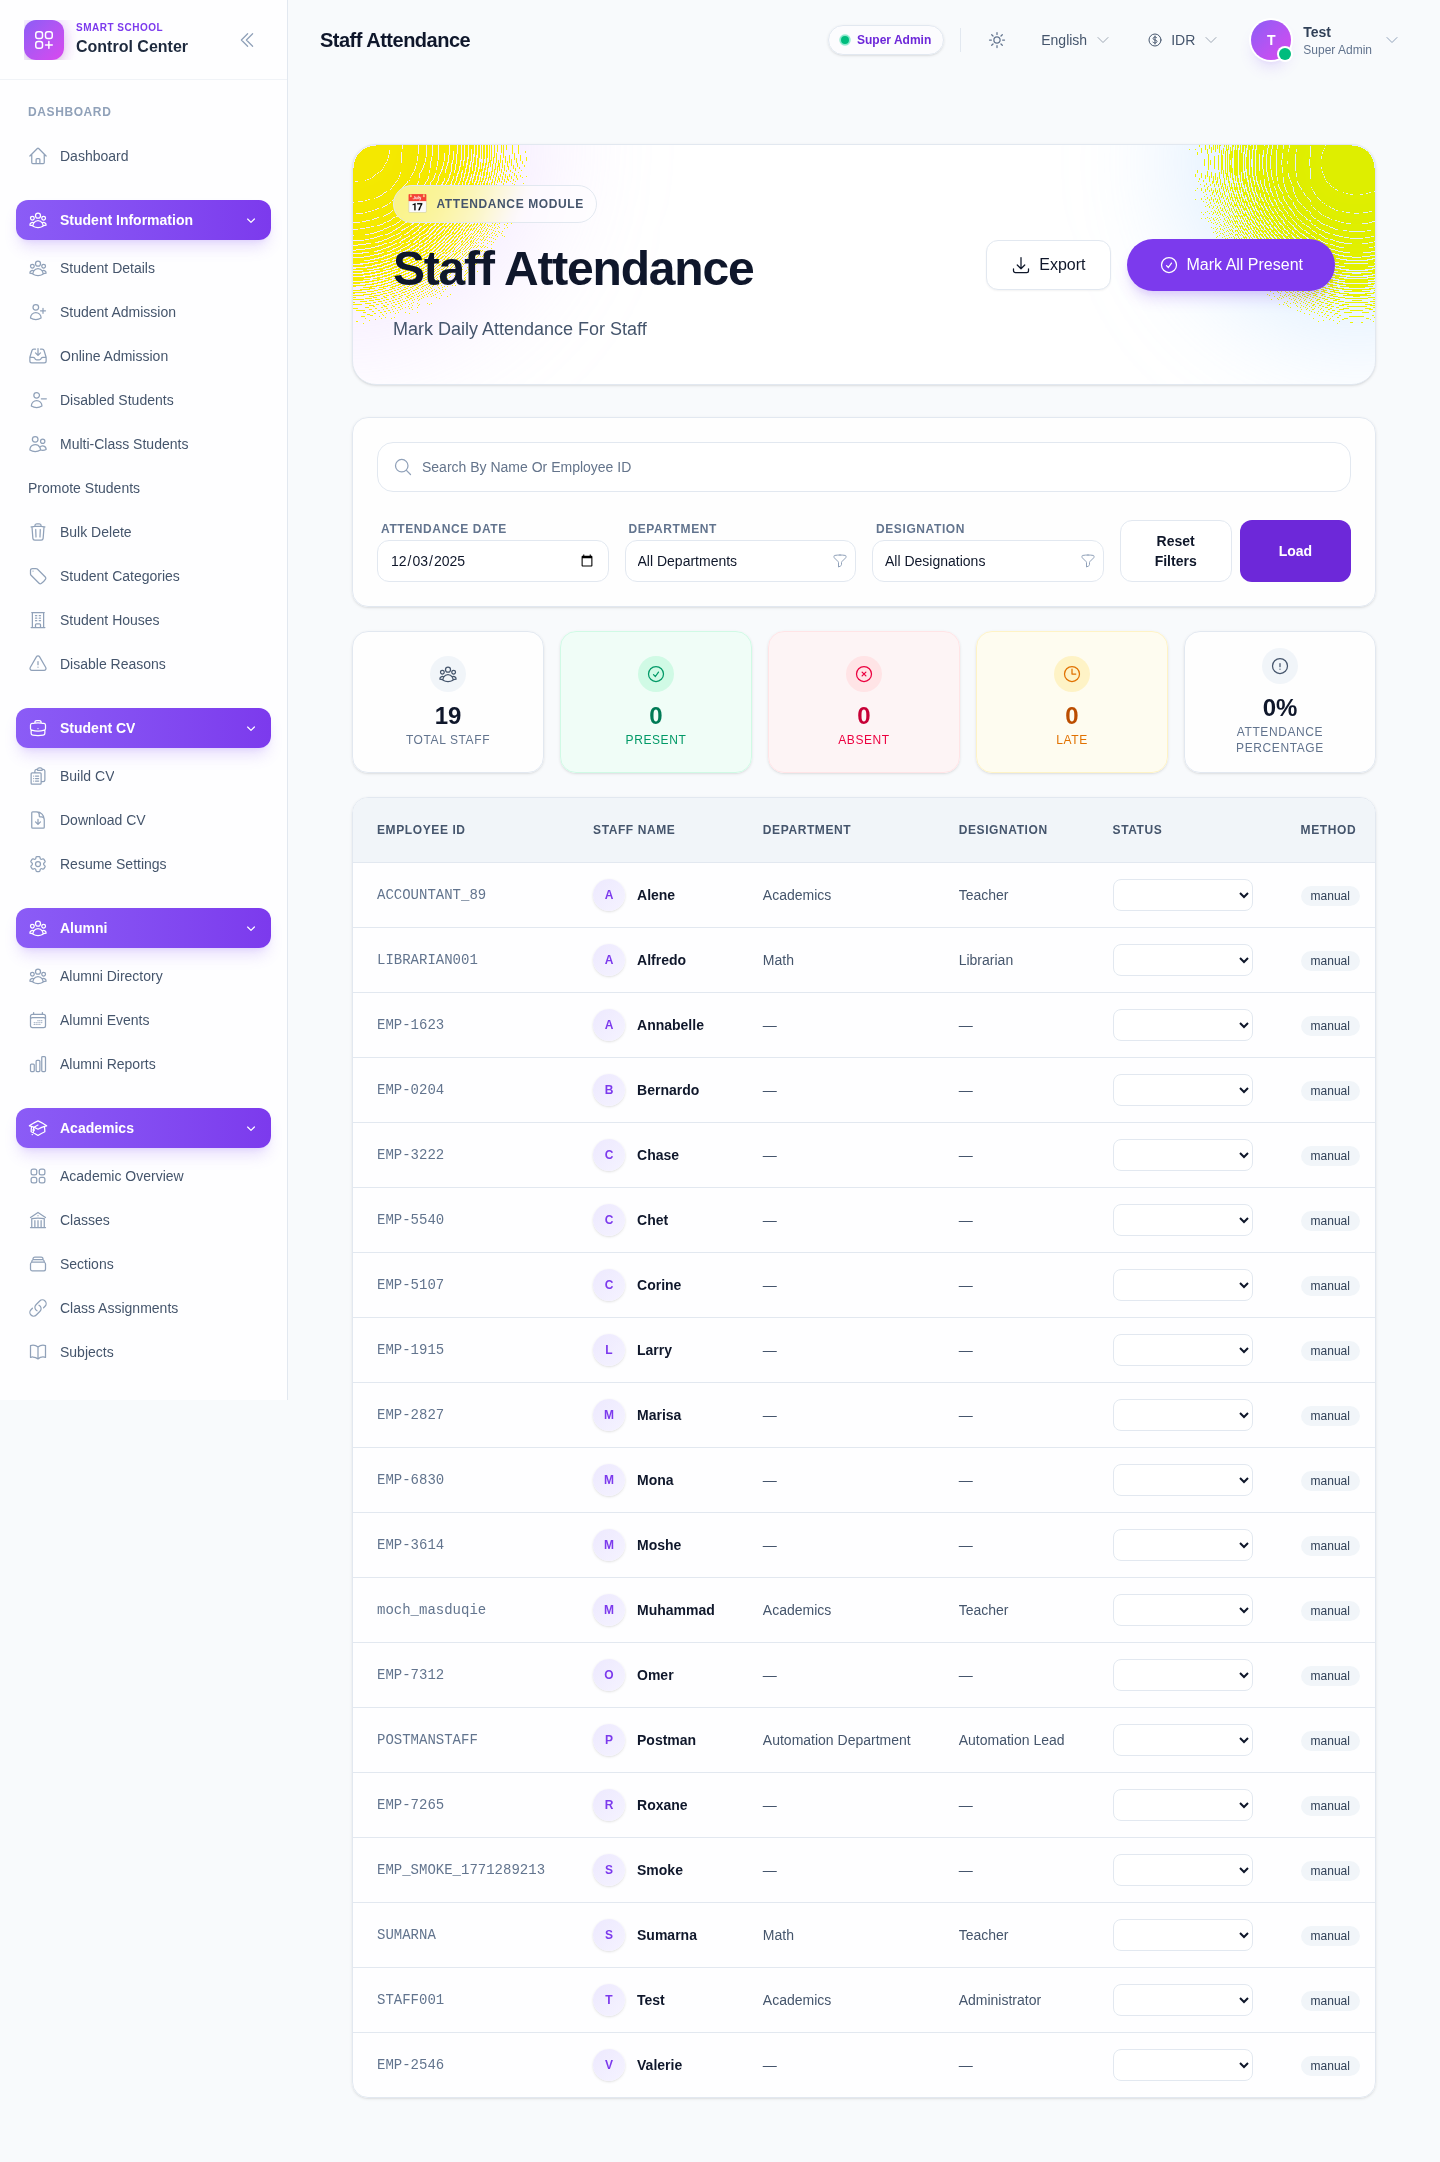
The current page provides:
- a search field for name or employee ID
- Attendance Date
- Department
- Designation
- actions such as Load, Clear Filters, Mark All Present, and Export
Step 2: Set a valid attendance date
Choose the attendance date first.
In the local environment, the page currently behaves best when you use a valid earlier date and then click Load. This avoids the initial warning state and returns the actual staff list.
Step 3: Narrow the staff roster if needed
Use Department and Designation when you want to restrict the roster to a specific team or role. You can also search by staff name or employee ID after the page is loaded.
Step 4: Load the roster
Click Load after the filter context is ready.
When the roster loads, the current UI shows:
- summary cards such as total staff, present, and absent
- a table with employee ID, staff name, department, designation, status, method, punch in, punch out, and actions
- View History on each row
Step 5: Mark attendance row by row or in bulk
Each row currently exposes a Select Status control with attendance states such as:
- Present
- Absent
- Late
- Half Day
- Holiday
- On Leave
Use row-level selection when attendance outcomes differ across staff. Use Mark All Present when the whole visible roster shares the same outcome and only a few exceptions need follow-up.
Step 6: Review history or export when needed
Use View History to inspect an individual staff member’s recent attendance pattern. Use Export after the roster is in the right state and you need a record outside the page.
Verify the result
Use this checklist after marking staff attendance:
- the date is correct
- the right staff group is loaded
- row statuses reflect the intended outcome
- history and export actions are used only after the roster is confirmed
Expected result: the staff roster for the selected date is loaded and staff attendance can be managed through row-level status controls, history review, and export.
Troubleshooting
| Issue | Likely cause | What to do |
|---|---|---|
| The page shows a date validation warning | The default date state in the local environment is not accepted | Enter a valid earlier date and click Load |
| No staff are returned | Filters are too narrow or the date context is wrong | Clear filters and reload with a simpler date-only context |
| The wrong department is loaded | A stale department or designation filter is still active | Use Clear Filters and reload |
| Bulk present is not appropriate | Staff outcomes differ on that date | Use row-level statuses instead of the bulk action |