This guide explains how to use Legacy Content inside Download Center to post older downloadable materials to the audience that still needs them.
Before you start
- Decide whether the post is for students, staff, or both.
- Prepare the file and the title before you open the form.
- Confirm whether the post should be public for all students or restricted to a class and section.
Important: legacy content is still a live distribution surface. Check the audience and class-section targeting carefully before you publish the file.
Navigation path
Download Center -> Legacy Content
Step 1: Open the Legacy Content page
Go to Download Center and open Legacy Content.
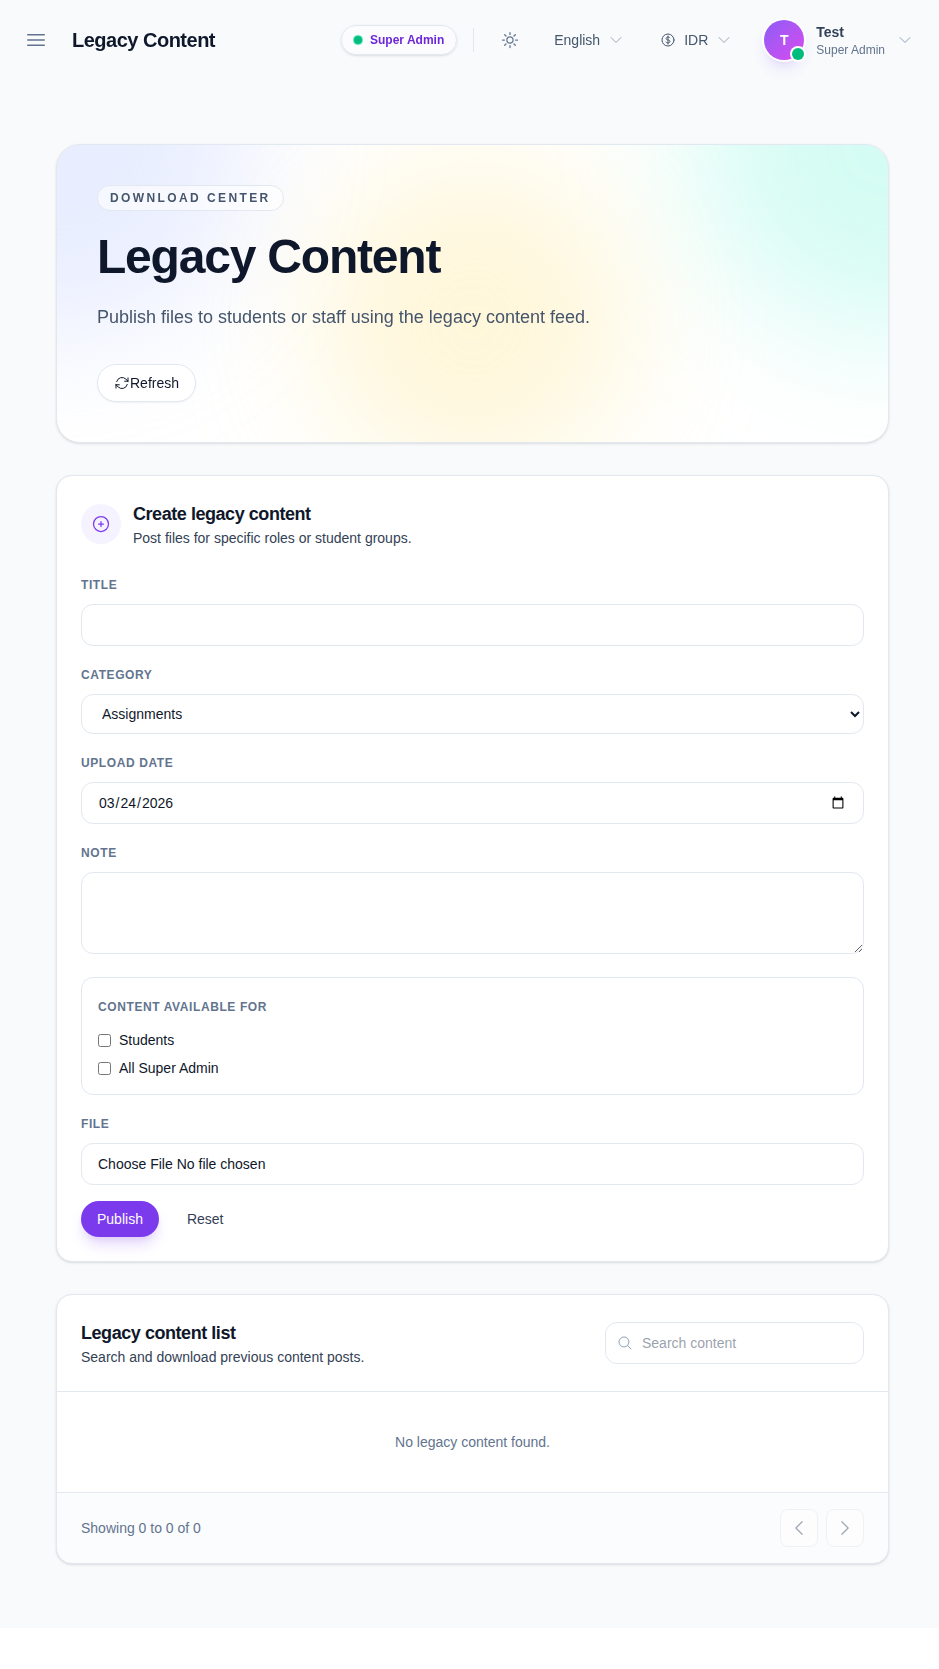
The page includes:
- a create form for new legacy posts
- a searchable list of previous posts
- a download action for each record
Step 2: Fill in the post details
Enter the title, choose the category, set the upload date, and add a note if needed.
The category field currently supports values such as:
- assignments
- study material
- syllabus
- other downloads
Choose the category that best matches the file you are publishing.
Step 3: Choose the audience
Use the Content available for options to decide who should see the post.
The current UI lets you target:
- students
- the current role audience shown in the workspace
If students are included and the post is not public, the class and section fields become required.
Step 4: Decide whether the post is public or targeted
If the post is for students:
- enable Public for all students when the file should be visible to everyone
- leave it disabled when the file should only apply to one class and section
When the post is targeted, choose the class and section before publishing.
Step 5: Attach the file and publish
Choose the file you want to publish, then click Publish.
The post appears in the legacy content list after it is created.
Step 6: Review or download previous posts
Use the list on the right to:
- search previous posts
- review the title and note
- check the audience and class-section targeting
- download the attached file
This makes it easy to revisit older shared materials without rebuilding them.
Verify the result
Use this checklist after publishing legacy content:
- the title and category are correct
- the chosen audience matches the intended recipients
- class and section are filled in when the post is targeted
- the uploaded file appears in the legacy list
Expected result: the legacy post is published to the intended audience and can be downloaded from the list when needed.
Troubleshooting
| Issue | Likely cause | What to do |
|---|---|---|
| Publish is unavailable | No file or title was provided | Fill the required fields first |
| Class and section are required | The post targets students but is not public | Choose both fields before publishing |
| The post is not visible in the list | The form was not submitted successfully | Review the fields and publish again |
| Download link is missing | The record has not finished processing | Refresh the page and try the row again |