This guide explains how to use Route Pickup Mapping to connect pickup points to routes with fee, timing, distance, and stop-order details.
Short summary
The Route Pickup Mapping page shows route cards with assigned pickup points and opens a mapping drawer for adding or editing each route-stop relationship.
Before you start
- Confirm the route already exists.
- Confirm the pickup point already exists and is active.
- Decide the stop order before adding multiple points to one route.
Navigation path
Transport -> Route Pickup Mapping
Step 1: Open Route Pickup Mapping
In the sidebar, open Transport and choose Route Pickup Mapping.
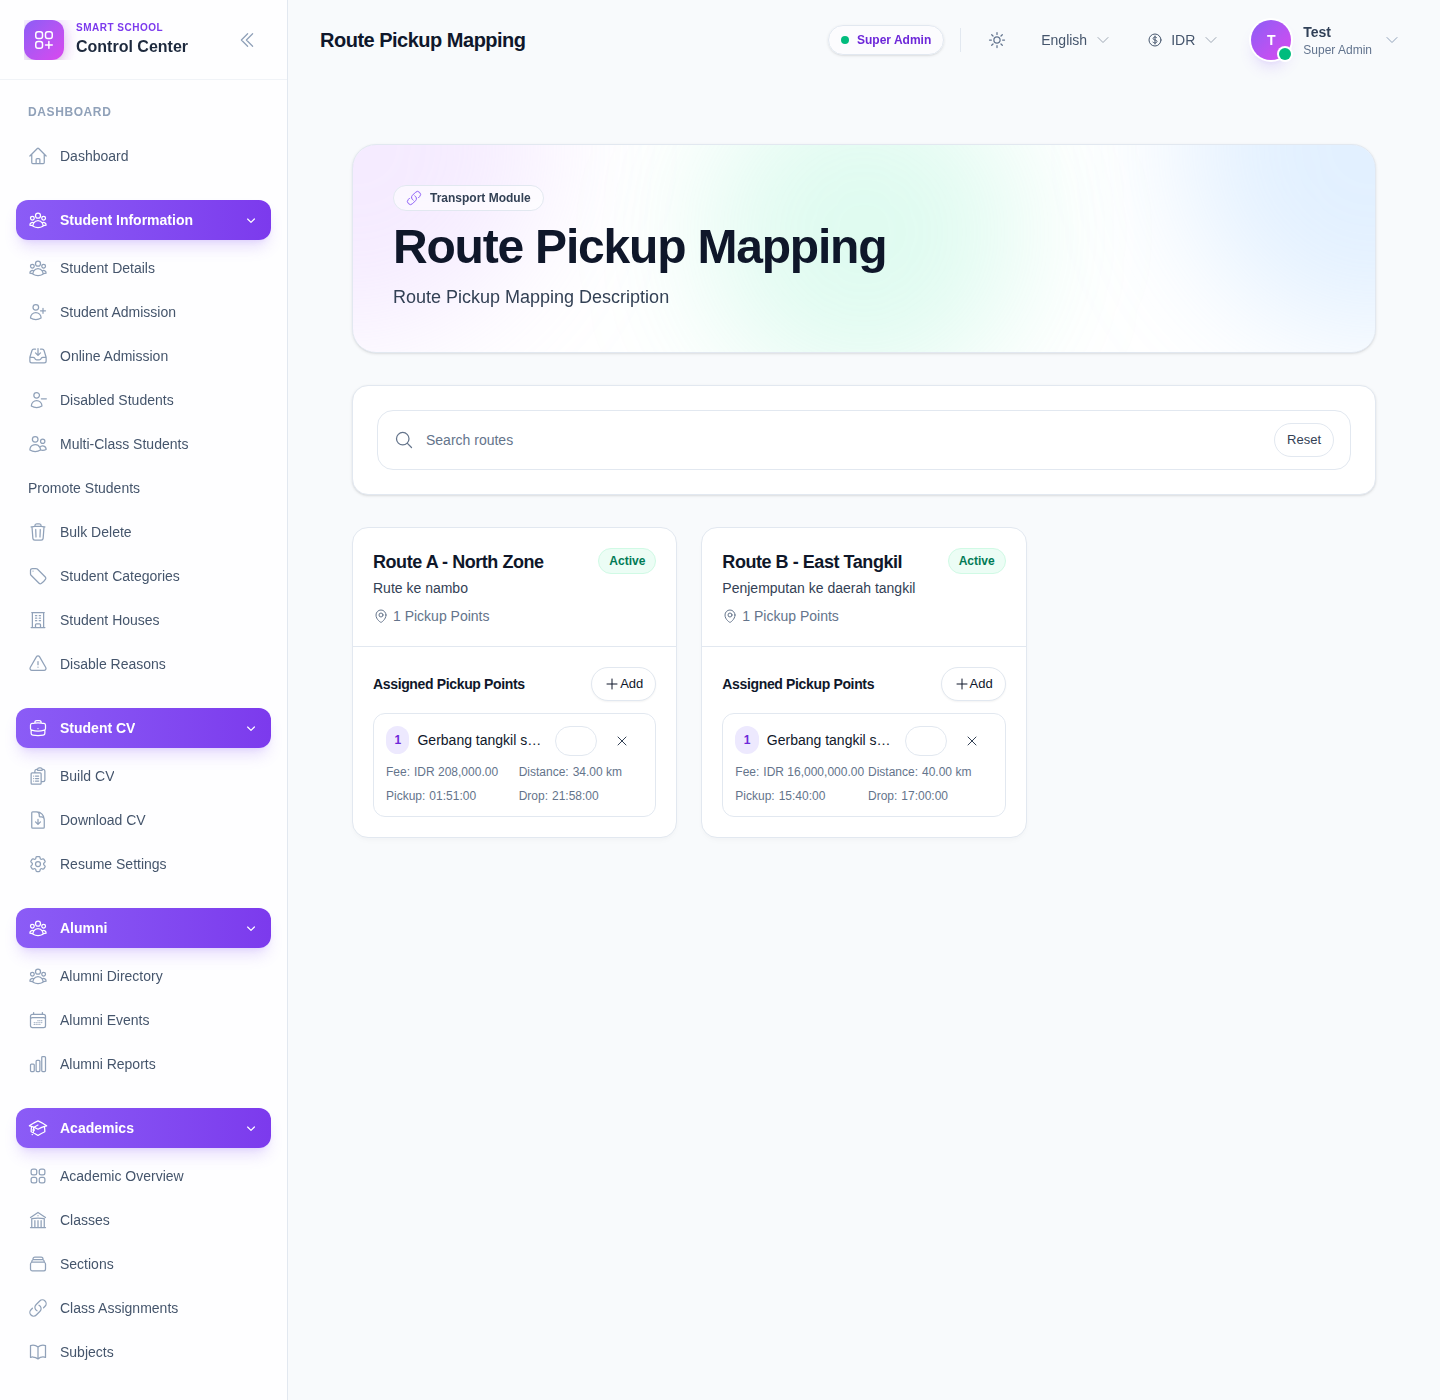
Step 2: Find the route you want to maintain
Use the route search box to narrow the route cards.
Each route card shows:
- route title
- route note
- active status
- number of assigned pickup points
- current mapped pickup points with fee, distance, pickup, and drop details
Step 3: Open the mapping drawer
Click Add on the route card to create a new route-stop link, or use the edit action on an existing mapped point.
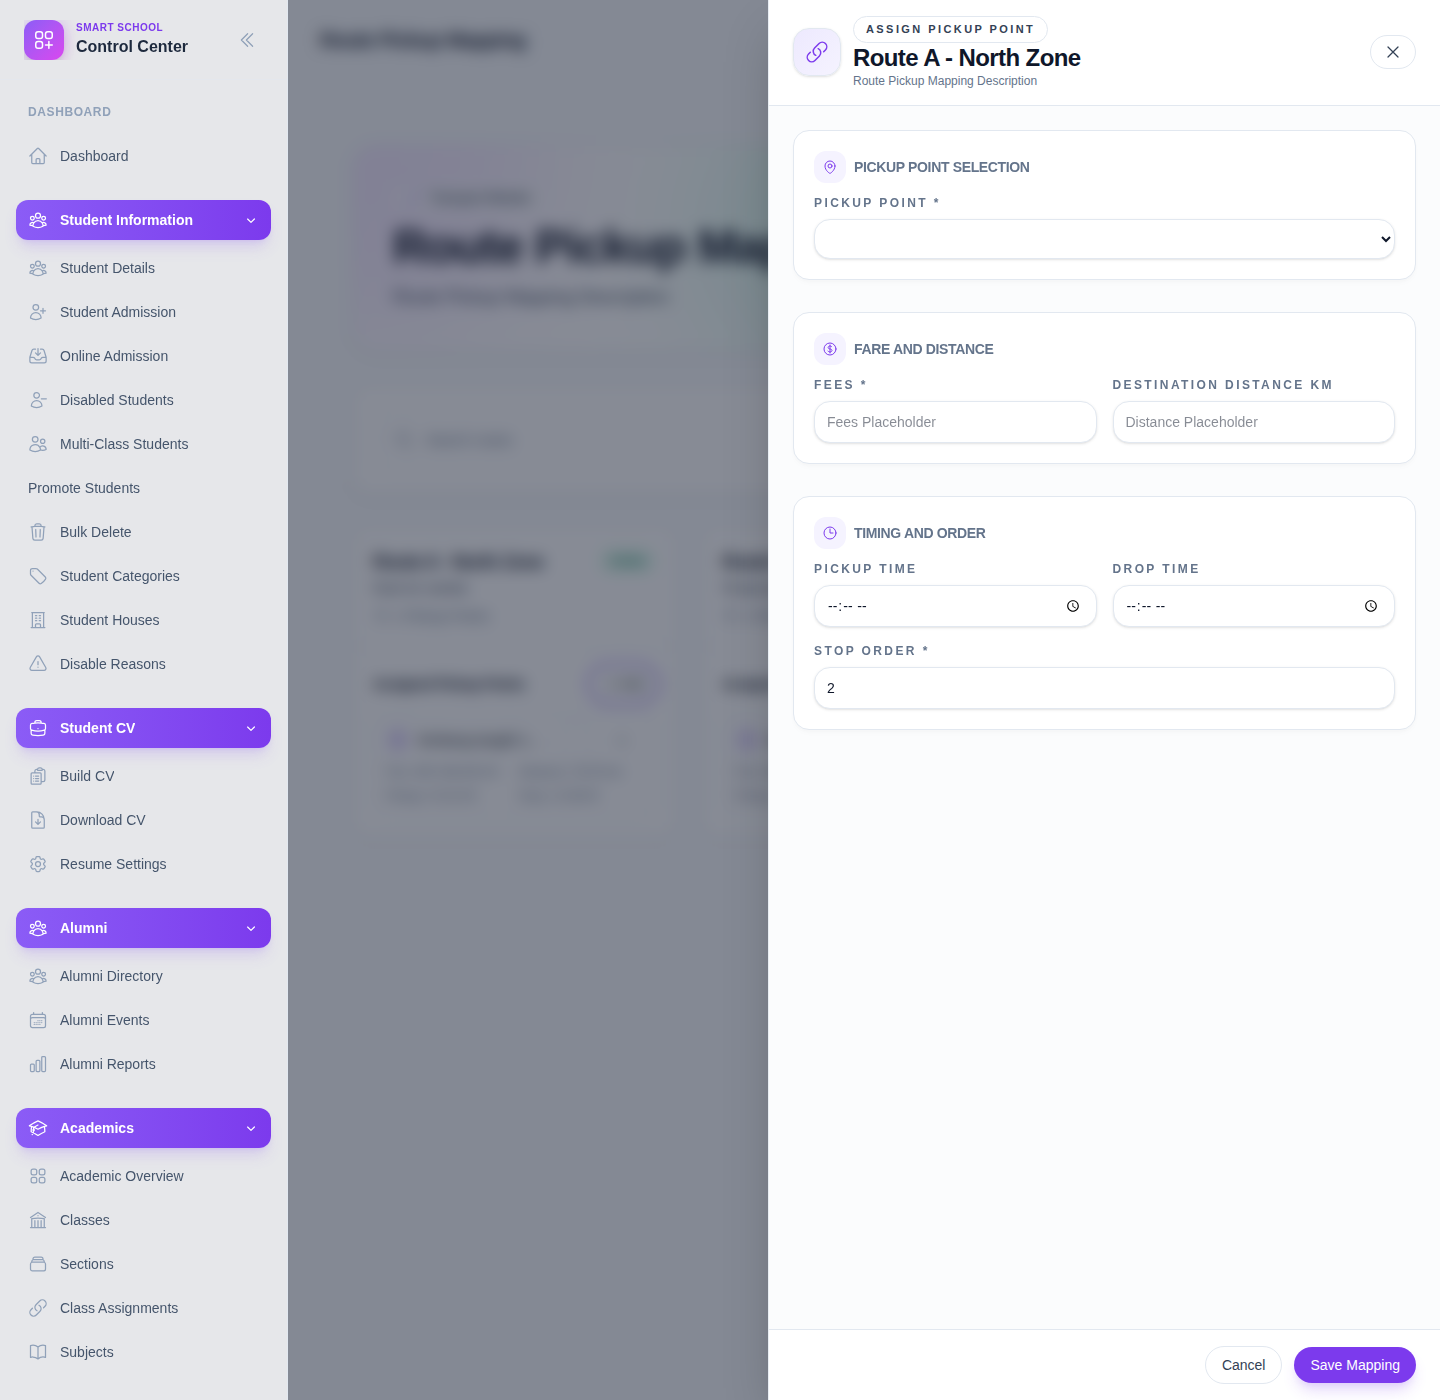
Step 4: Fill the route-stop details
The drawer currently includes:
- Pickup Point
- Fees
- Destination Distance Km
- Pickup Time
- Drop Time
- Stop Order
For new mappings, the page automatically suggests the next stop order after the existing route stops.
Step 5: Save or remove the mapping
Save the drawer when the route-stop details are complete.
If a pickup point should no longer belong to the route, use the remove action from the mapped pickup-point card and confirm the removal.
Step 6: Recheck downstream transport setup
After saving, continue to Student Transport if needed and verify the route now exposes the expected pickup-point option.
This is the step that turns generic stops into route-aware transport choices.
Important note
Important: the current local Smart School page renders the mapping workflow correctly, but it also emits unresolved-component warnings in the browser console. The visible controls are still stable enough to document the operator workflow accurately.
Verify the result
- the pickup point appears under the correct route
- fee and distance values are correct
- pickup and drop times make operational sense
- stop order reflects the intended route sequence
Troubleshooting
| Issue | Likely cause | What to do |
|---|---|---|
| Pickup Point dropdown is empty | No active pickup points are available or all are already assigned | Create or activate pickup points first, then reopen the drawer |
| Stop order is confusing | Existing mappings were not reviewed first | Review the route card, then set the next logical order value |
| Student transport does not show the expected stop | The route-pickup mapping was not saved or the wrong route was updated | Reopen the correct route and confirm the mapping card exists |
| Fee looks inconsistent | The route-stop fee was entered incorrectly | Edit the mapping and correct the fee before assigning students |