This guide explains how to use User Directory inside Administration to manage the mixed roster of portal users and staff users.
Before you start
- Confirm whether the user belongs to the portal account pool, the staff pool, or both.
- Decide whether you need to change role access, activation status, or basic account details.
- Gather the user name, email address, and role name before you open the create form.
Important: this page merges staff and portal accounts into one view. Make sure you edit the correct row before saving any user change.
Navigation path
Administration -> User Directory
Step 1: Open the User Directory page
Go to Administration and open User Directory.
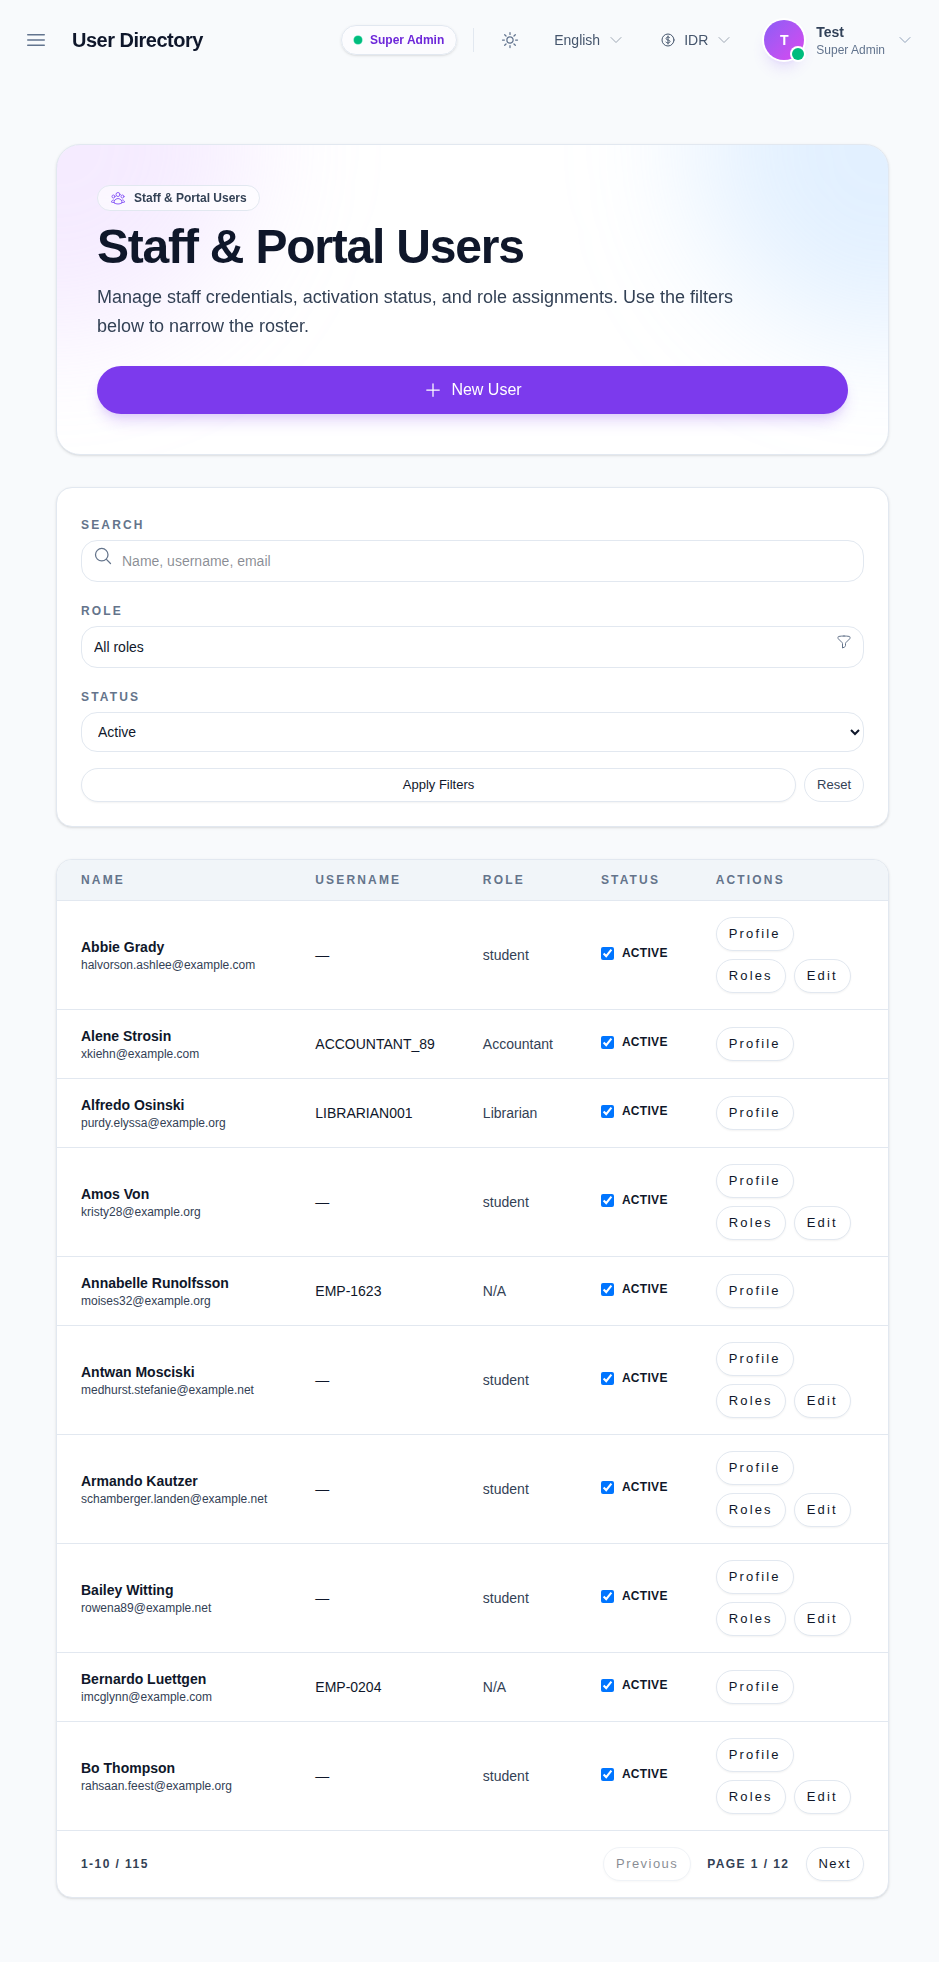
The page shows:
- a New User action
- search, role, and status filters
- a combined user table
- row actions for each user
Step 2: Search or filter the directory
Use the filters at the top of the page to narrow the roster.
You can filter by:
- name, username, or email
- role
- status
The page merges staff and portal accounts, so the role filter is the fastest way to find a specific account type in a large school.
Step 3: Create a new user
Click New User when you need to add an account.
Use the create form to enter the basic account details and role assignment. Keep the role choice consistent with the access the user actually needs.
Step 4: Review the row actions
Every user row includes actions such as:
- Profile
- Roles
- Edit
Use Profile when you want to review account details. Use Roles when you need to adjust role membership. Use Edit when you need to change the user’s account data or activation state.
Step 5: Review activation status before saving changes
The status column shows whether the account is active.
When you need to reactivate or deactivate a user:
- open the row action you need
- confirm the correct account type
- save the change
- refresh the page if the updated status does not appear immediately
Verify the result
Use this checklist after updating the directory:
- the user is still visible in the correct account pool
- the search filter returns the expected row
- the role label matches the user’s current access level
- the status column reflects the intended activation state
Expected result: the directory shows the correct staff or portal user row, with the right role and activation status.
Troubleshooting
| Issue | Likely cause | What to do |
|---|---|---|
| A user does not appear | The search or role filter is too narrow | Clear the filters and search again |
| Staff rows are missing | The account cannot read staff data | Confirm the staff-directory permission set |
| Role changes do not show | The row was not saved or the list needs a refresh | Save again and refresh the directory |
| Wrong user appears to be edited | Staff and portal accounts are merged in one list | Recheck the username, email, and source before saving |