This guide explains how to mark daily student attendance from the Student Day Wise Attendance page in Migdafa Smart School.
Before you start
- Confirm the academic session you want to mark attendance for.
- Make sure the target class and section already have active students in that session.
- Decide whether you will mark individually, use bulk actions, or both.
- Prepare any late, half-day, leave, or remark information that teachers expect to capture.
Important: the roster is filter-driven. If the session, class, section, and date do not match an active student group, the page will load but the roster will remain empty.
Navigation path
Attendance -> Student Day Wise Attendance
Step 1: Open Student Day Wise Attendance
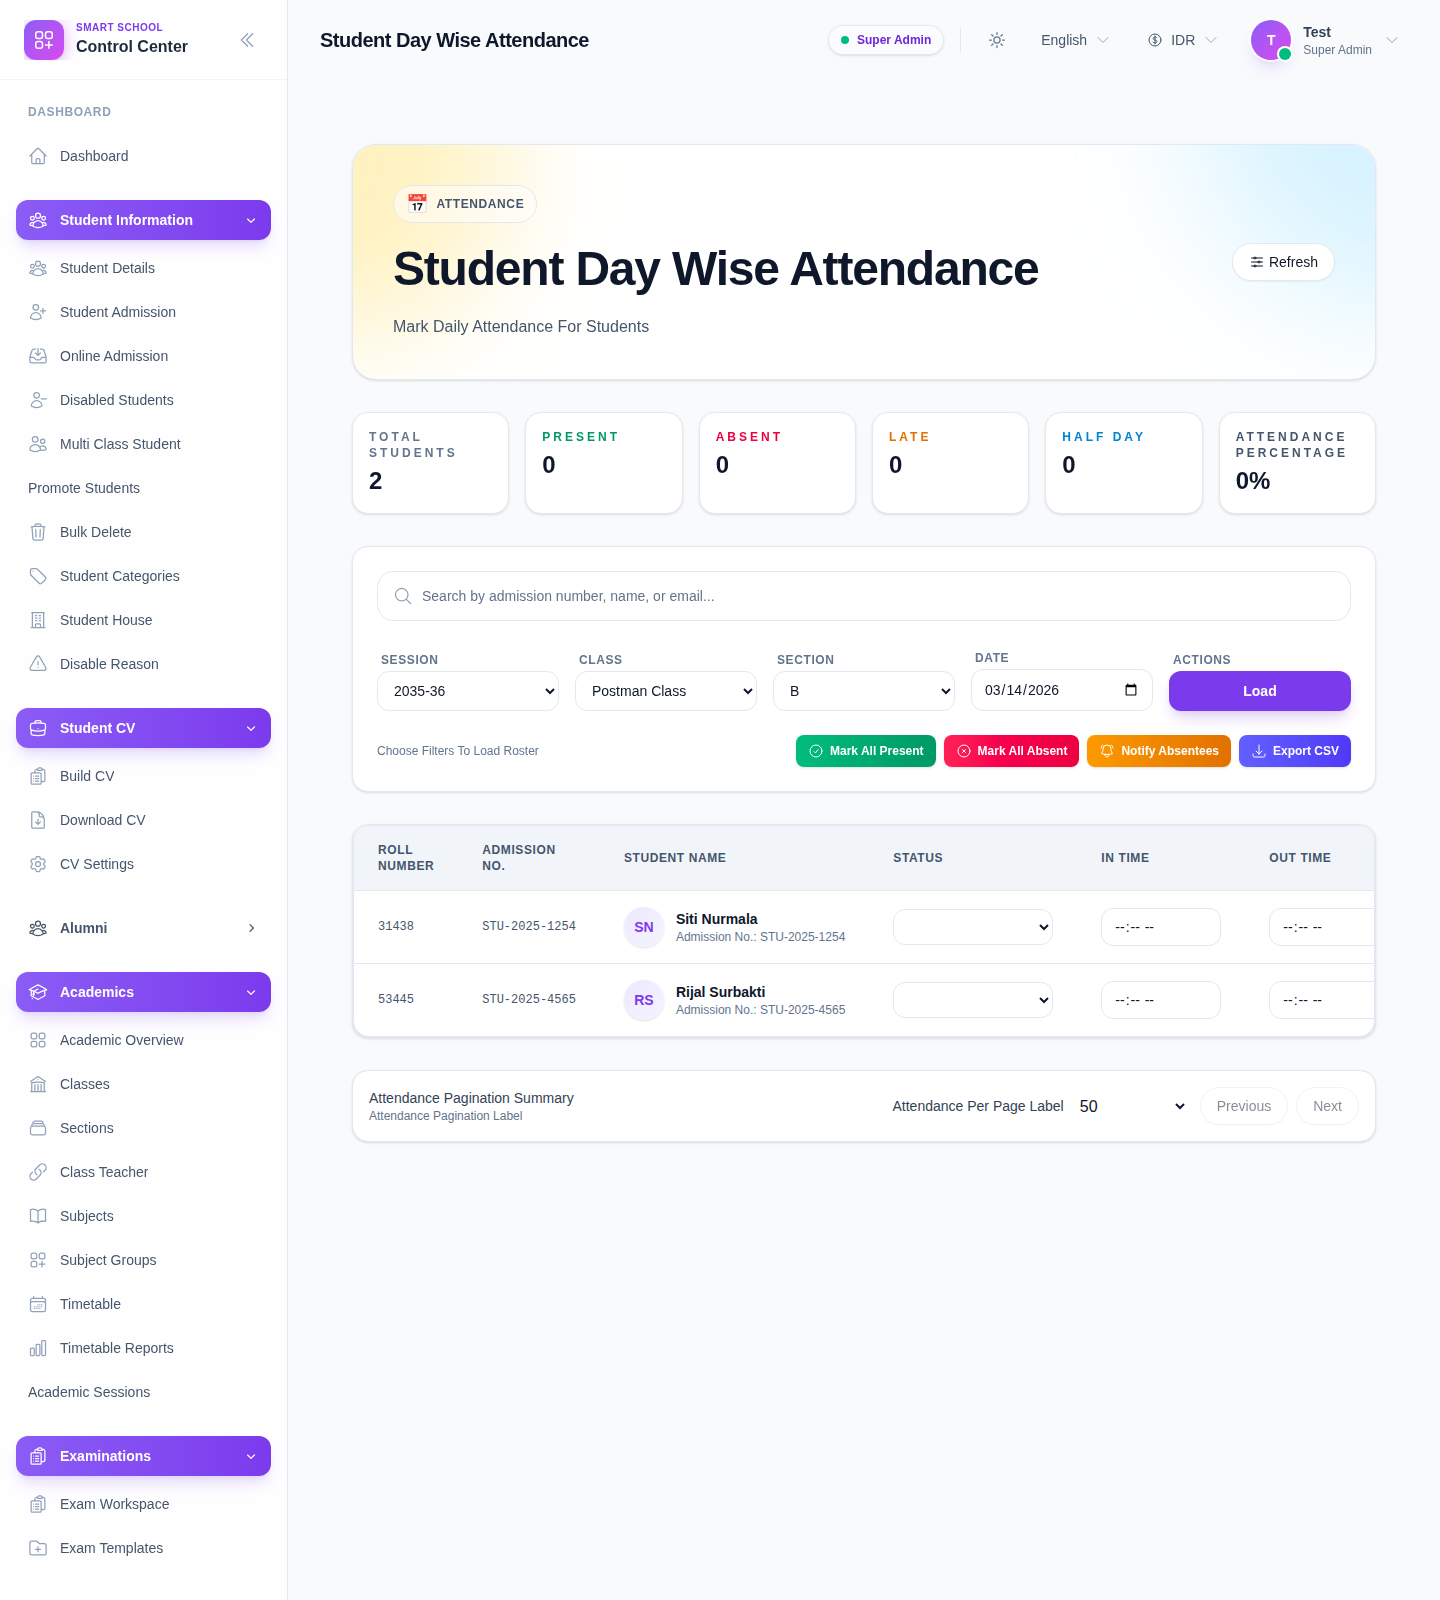
Go to Attendance in the sidebar and choose Student Day Wise Attendance. This page combines filtering, statistics, row-level attendance controls, notifications, history, and export actions.
Step 2: Set the roster filters
Use the filter bar to define the working context:
- Session
- Class
- Section
- Date
The page is designed to load the roster only when the required context is complete. The filter bar also includes a search field for narrowing the roster by admission number, name, or email after the student list is loaded.
Step 3: Load the roster
Click Load after the filters are correct.
When the roster is available, the page shows:
- summary cards for total students, present, absent, late, half day, and attendance percentage
- bulk action buttons
- the student roster table
- pagination controls
If the selected filters do not match active students, the page shows a no-students state instead of the roster table.
Step 4: Understand the roster columns
Each student row includes:
- roll number
- admission number
- student identity
- Status
- In Time
- Out Time
- Remark
- View History
The Status control is the main attendance input. Available attendance states in the current UI include:
- Present
- Late
- Absent
- Half Day
- Holiday
- On Leave
Step 5: Mark attendance row by row
Use the Status dropdown on each row to mark the student.
What to expect from the row controls:
- attendance is intended to save from the row-level action
- In Time and Out Time fields are available for applicable statuses
- time inputs are disabled for states such as absent and holiday/half-day-type records where timing should not be captured
- Remark can be used for extra operational context
This row-level method is best when attendance outcomes are mixed across the class.
Step 6: Use bulk actions when the whole class matches
The page also exposes bulk buttons:
- Mark All Present
- Mark All Absent
- Notify Absentees
- Export CSV
Use bulk actions when most or all students share the same attendance outcome for the day. This is faster than updating every row manually.
Step 7: Review summary cards and percentages
After the roster loads, the summary cards help you monitor the attendance distribution for the selected date:
- total students in the roster
- current present count
- current absent count
- late count
- half-day count
- attendance percentage
This is useful for quickly checking whether the day has been fully marked or still needs review.
Step 8: Open attendance history when needed
Use View History on a student row when you need a quick attendance review for that student.
This is useful for:
- checking repeated absences
- verifying whether a leave or half-day pattern is consistent
- confirming the student’s recent attendance before contacting guardians
Step 9: Export or notify after review
After the roster is marked:
- use Export CSV when attendance records need to be shared or archived
- use Notify Absentees when absent guardians or contacts should receive follow-up communication
These actions keep the attendance page connected to reporting and operational communication instead of making it a dead-end data-entry screen.
Verify the result
Use this checklist after attendance entry:
- confirm the correct session, class, section, and date are still selected
- review a few rows to ensure the intended status was applied
- confirm the summary cards reflect the class outcome
- add remarks where the school needs later follow-up
- export or notify only after the roster looks correct
Expected result: the selected class roster is loaded for the chosen date and attendance can be managed from one place using row-level status updates, bulk actions, history checks, and export or notification tools.
Troubleshooting
| Issue | Likely cause | What to do |
|---|---|---|
| Roster stays empty | The selected session, class, section, or date does not match active students | Recheck the filter combination and reload |
| Section options do not match the class | The class filter was changed and the section list refreshed | Re-select the correct section after changing class |
| In Time and Out Time remain disabled | The selected attendance status does not accept time input | Use a status such as Present or Late when time fields are required |
| Bulk actions are disabled or not useful | The roster has not been loaded yet, or follow-up should be handled row by row | Load the roster first, then choose the correct action path |
| Row-level update returns a class-section mismatch error | The current environment may have a filter-state mismatch between the loaded roster and the submitted row | Refresh the page, reload the roster, and confirm the active filters before retrying |