This guide explains how to use the Master tab in Fees Setup to create the actual billable fee mappings used later in fee assignment and collection.
Short summary
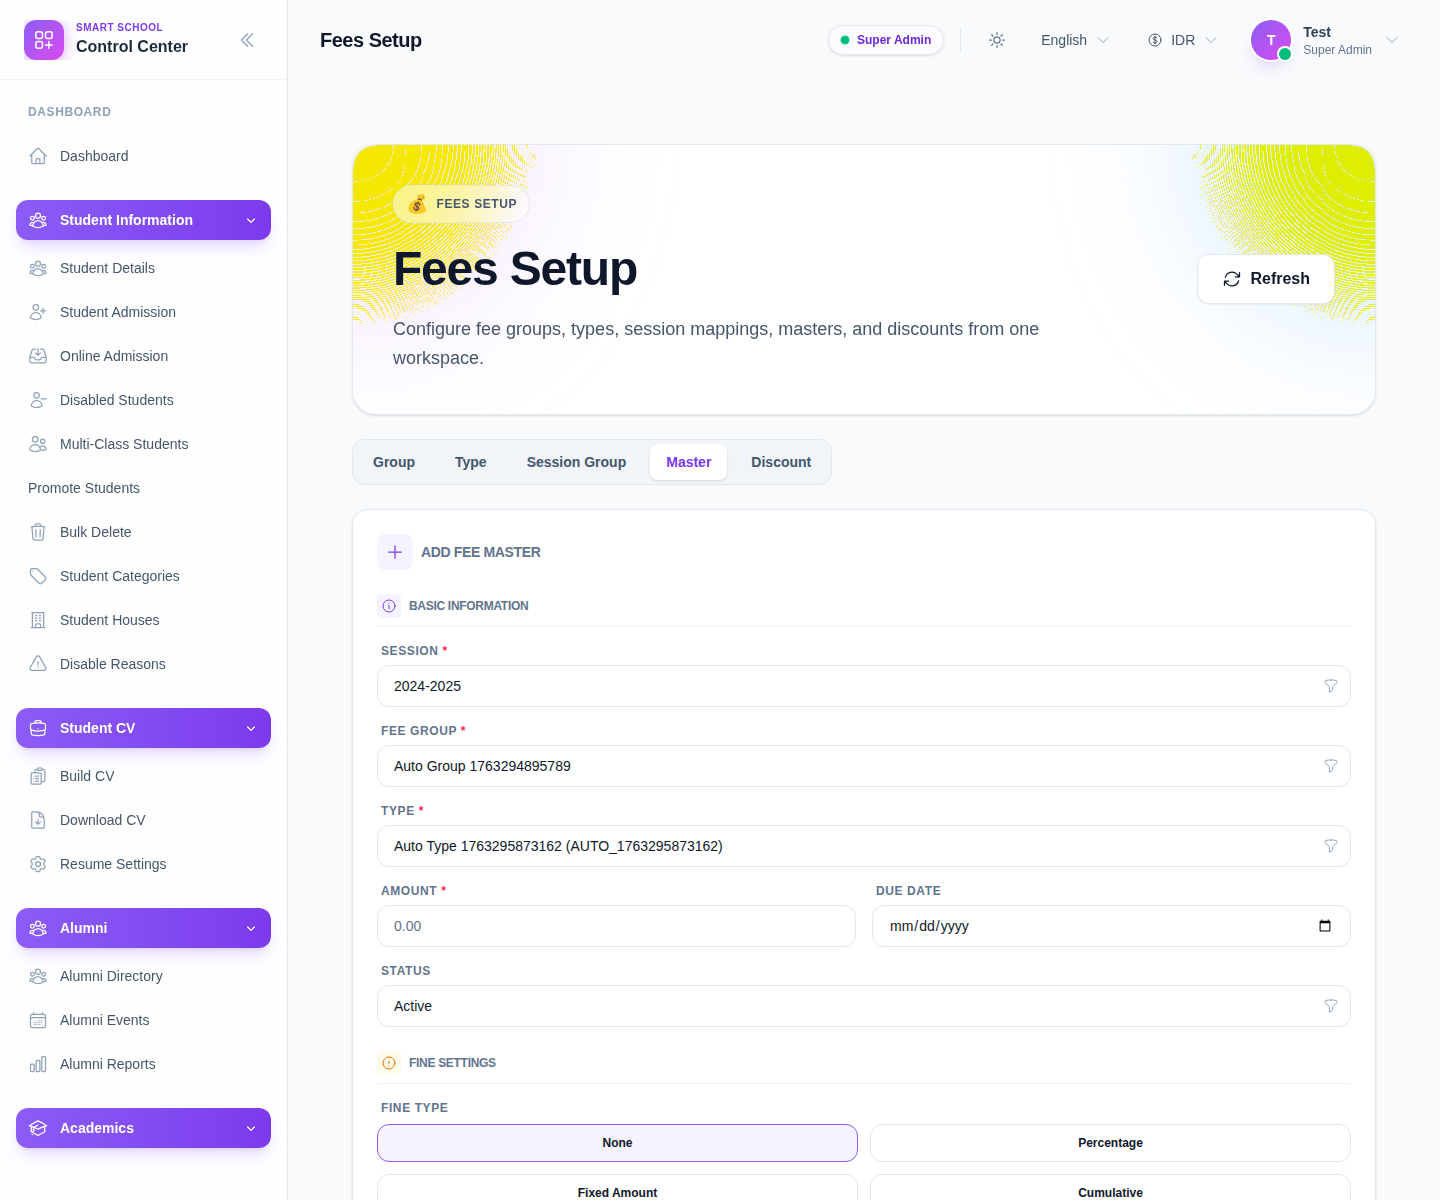
Use Fee Masters after the supporting groups, types, and session mappings already exist. This is where the current UI combines the charge identity, amount, due date, and fine settings into one reusable finance record.
Before you start
- Confirm the target session, fee group, and fee type already exist.
- Decide the exact Amount and Due Date before saving.
- Decide whether the fee needs no fine, a percentage fine, a fixed amount, or a cumulative pattern.
- Keep the mapping clean before assigning it to students in the later Assign Fees workflow.
Navigation path
Fees Setup -> Master
Step 1: Open the Master tab
In the sidebar, open Fees Setup, then choose Master.
The current form exposes:
- Session
- Fee Group
- Type
- Amount
- Due Date
- Status
- Fine Type
Step 2: Fill the core charge fields
Start with the structural fields:
- choose Session
- choose Fee Group
- choose Type
- enter Amount
- set Due Date
- choose Status
These fields define what the charge is, which session it belongs to, and when it becomes due.
Step 3: Configure fine behavior if needed
The current UI exposes these fine-type choices:
- None
- Percentage
- Fixed Amount
- Cumulative
Use None when the charge does not need a late-payment penalty.
Use another fine type only after confirming the business rule with finance operations. The visible form and underlying setup logic support fine-detail fields, so a wrong fine choice here can affect later collection behavior.
Step 4: Save the fee master and review the table
Click Save once the mapping is complete.
The table currently shows:
- Fee Group
- Type
- Amount
- Fine Type
- Due Date
- Fine Details
- Actions
This table is your main review point before you proceed to student assignment.
Step 5: Filter and maintain the fee-master list
The workspace supports filtering by search context and by finance structure. Use the available selectors to narrow the list by session, group, or type when the table becomes dense.
This is especially important in the local environment because the dataset contains many test mappings and prior setup rows.
Step 6: Use the master in downstream fee workflows
After the row is stable:
- keep it active if it should be assignable now
- edit it if amount, due date, or fine behavior is wrong
- use it later from Assign Fees when attaching charges to student records
Operational note: do not treat the fee master as a disposable draft. Once a master is reused in later assignment and collection workflows, changing the financial meaning of the row can create avoidable confusion.
Verify the result
- the row appears with the correct fee group and type
- the amount matches the intended charge
- the due date is correct
- the fine type matches the intended late-payment rule
- the master is ready for assignment workflows
Troubleshooting
| Issue | Likely cause | What to do |
|---|---|---|
| Required selectors are missing data | Groups, types, or sessions are not prepared yet | Create the supporting setup records first |
| Fine details do not match the intended policy | The wrong fine type was chosen | Edit the master before it is used operationally |
| The list is difficult to review | Too many mappings are present in the environment | Filter by session, fee group, and type |
| Later assignment uses the wrong charge | The wrong master was saved or left active | Correct the master and review assignments before continuing |