This guide explains how to configure the Online Admission form, verify the public applicant experience, and review incoming requests from the internal admission workspace.
Short summary
Online Admission is managed from a mix of internal and public surfaces. Administrators configure the form from Settings → Online Admission, applicants use the public /online-admission page, and staff monitor incoming requests from Student Information → Online Admission.
Before you start
- Decide whether online admission should be disabled, manual-payment only, or gateway-enabled.
- Prepare the admission fee, public instructions, and agreement text.
- Confirm which student, guardian, and document fields must be required.
- Decide whether you need starter-template or custom fields.
Navigation paths
Settings -> Online AdmissionStudent Information -> Online Admission- public route:
/online-admission
Step 1: Open the Online Admission settings panel
Go to Settings and open the Online Admission tab.

Use the top panel to manage:
- the main Online admission toggle
- Payment behaviour
- Admission fee
- Admission Instruction
- Terms & Agreement
- Application Form File
Save changes after updating these settings.
Step 2: Review required system fields
In the Online Admission System Fields section, decide which fields are required on the public form.
Common examples include:
- applicant name fields
- mobile and email
- guardian identity fields
- address fields
- upload documents
Each row shows the payload key and whether the field is currently Required or Optional.
Step 3: Add starter-template or custom fields
Scroll to the custom-field section when the standard form is not enough.
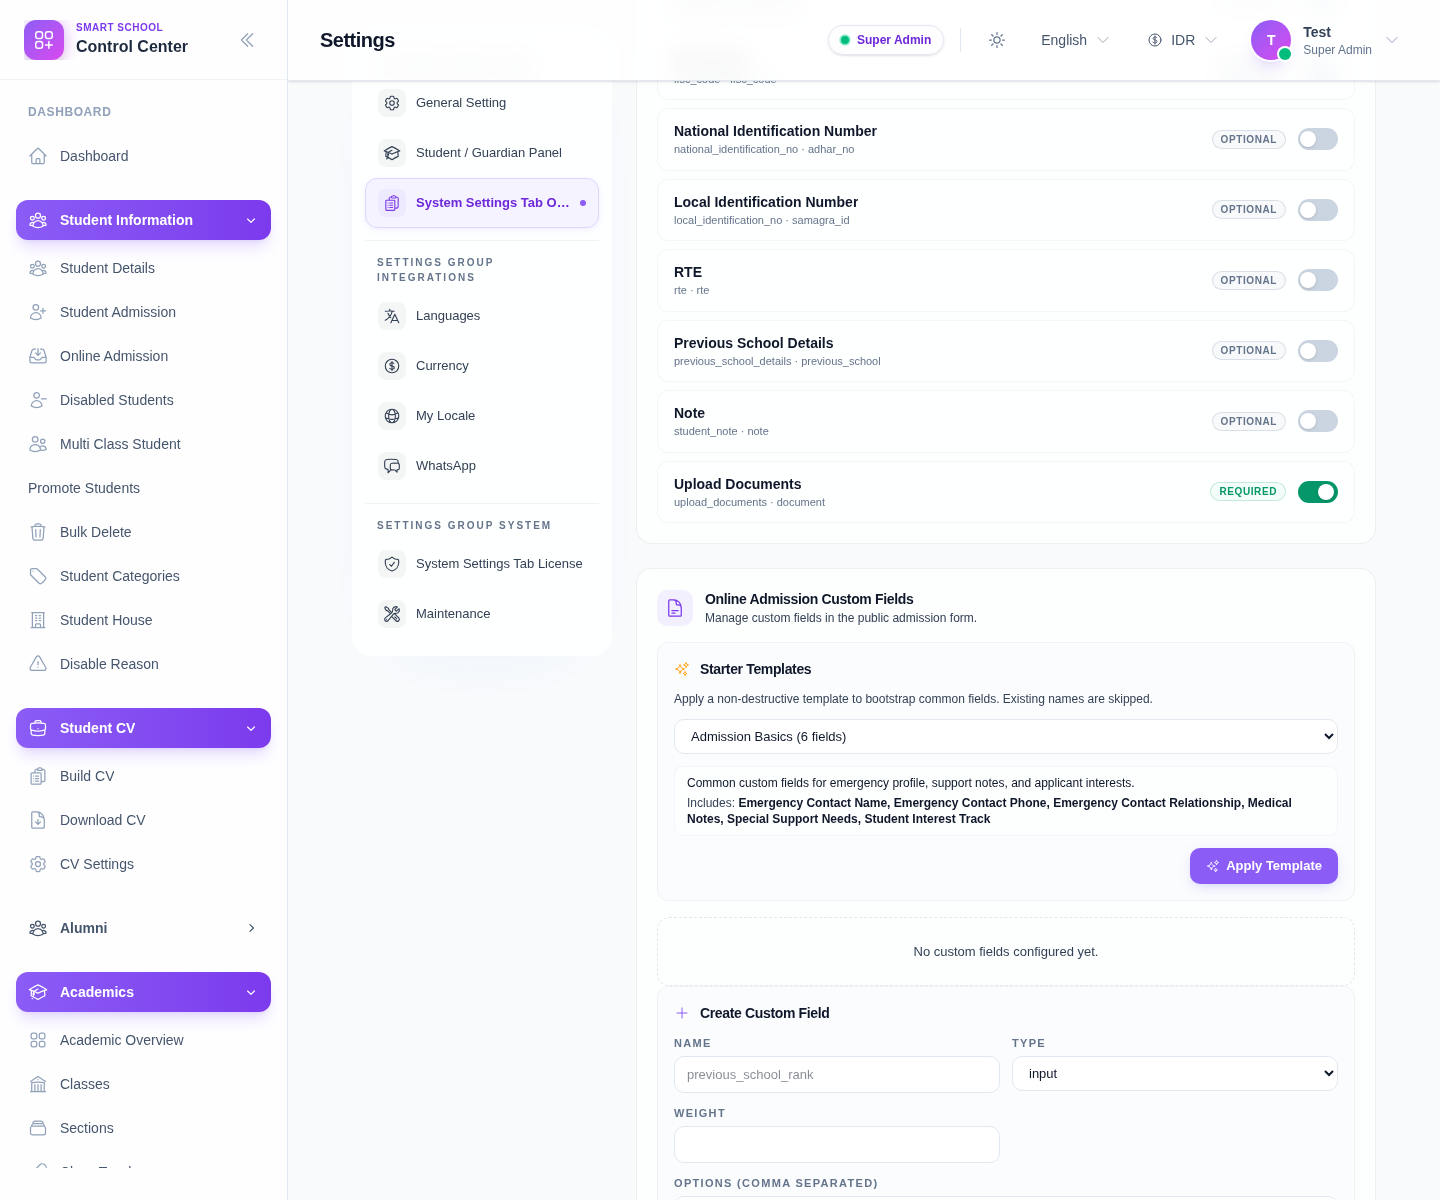
Use this area to:
- apply a Starter Template
- create a custom field with Name, Type, Weight, and optional Options
- mark the field as Required
- keep the field Active
This is the best place to add school-specific applicant questions without editing core code.
Step 4: Verify the public admission form
Open the public /online-admission page after saving the settings.
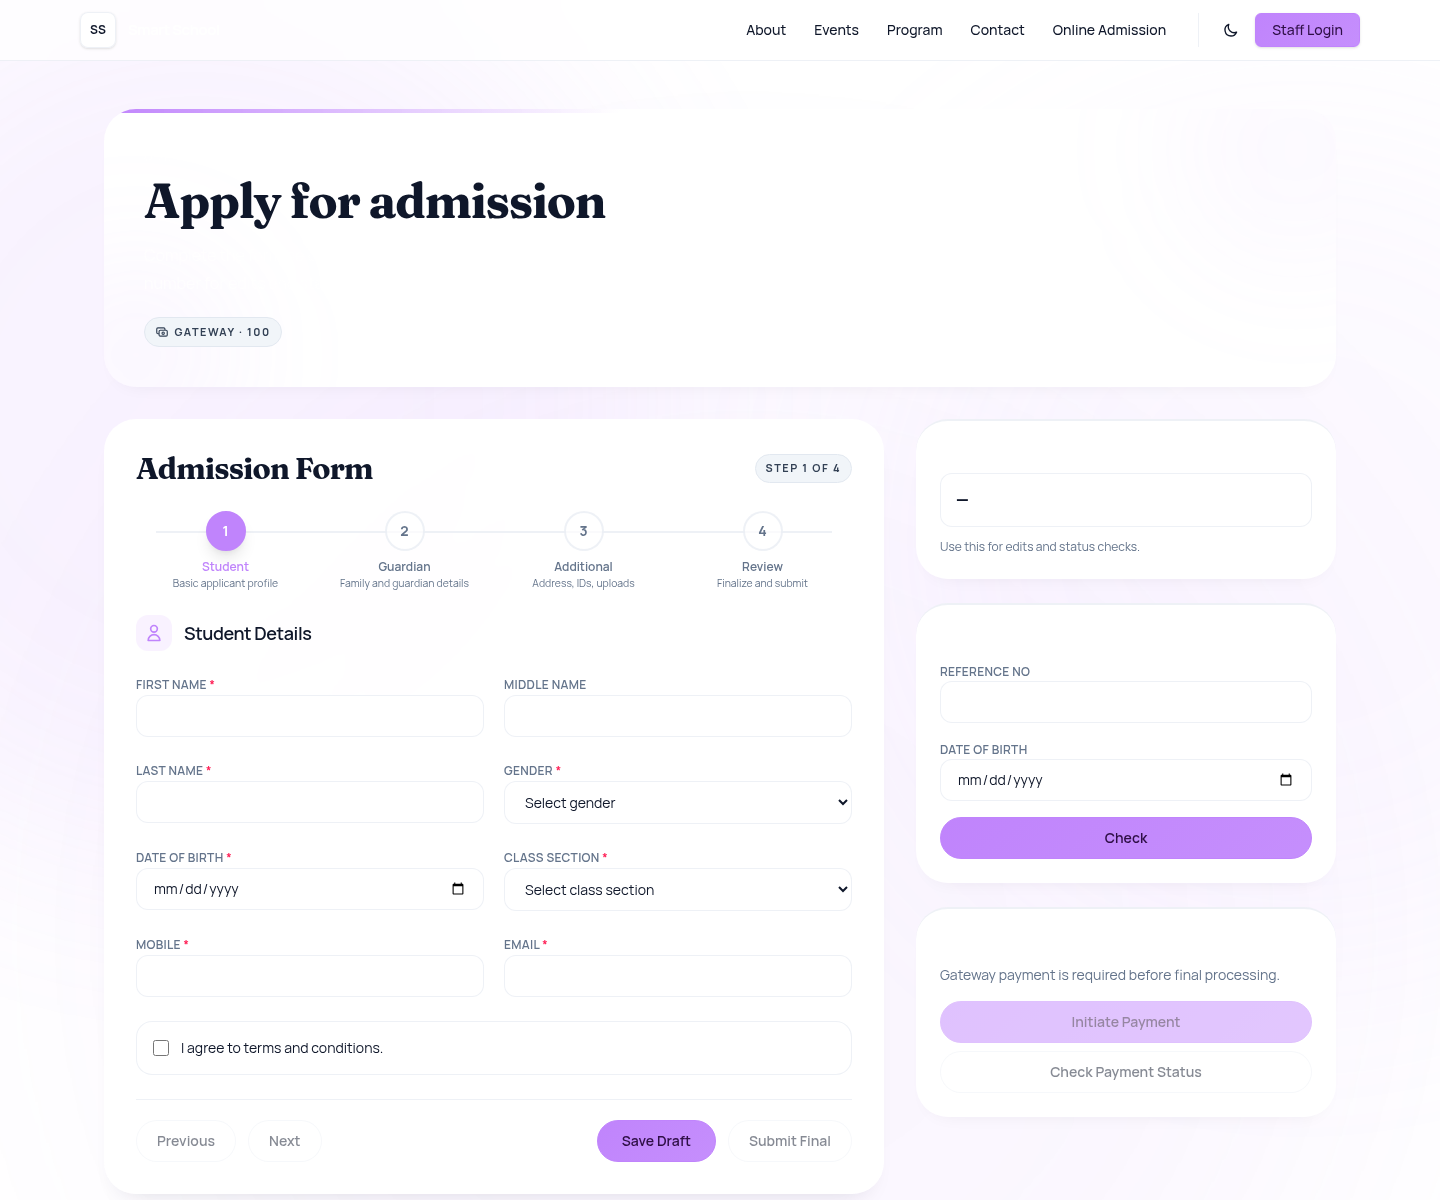
Check that the public page shows:
- the expected payment mode and fee chip
- the four-step form structure
- the required applicant fields
- the agreement checkbox
- the status-check card
- the payment card when gateway mode is enabled
Step 5: Monitor requests from the internal workspace
After applicants start using the form, open Student Information → Online Admission.
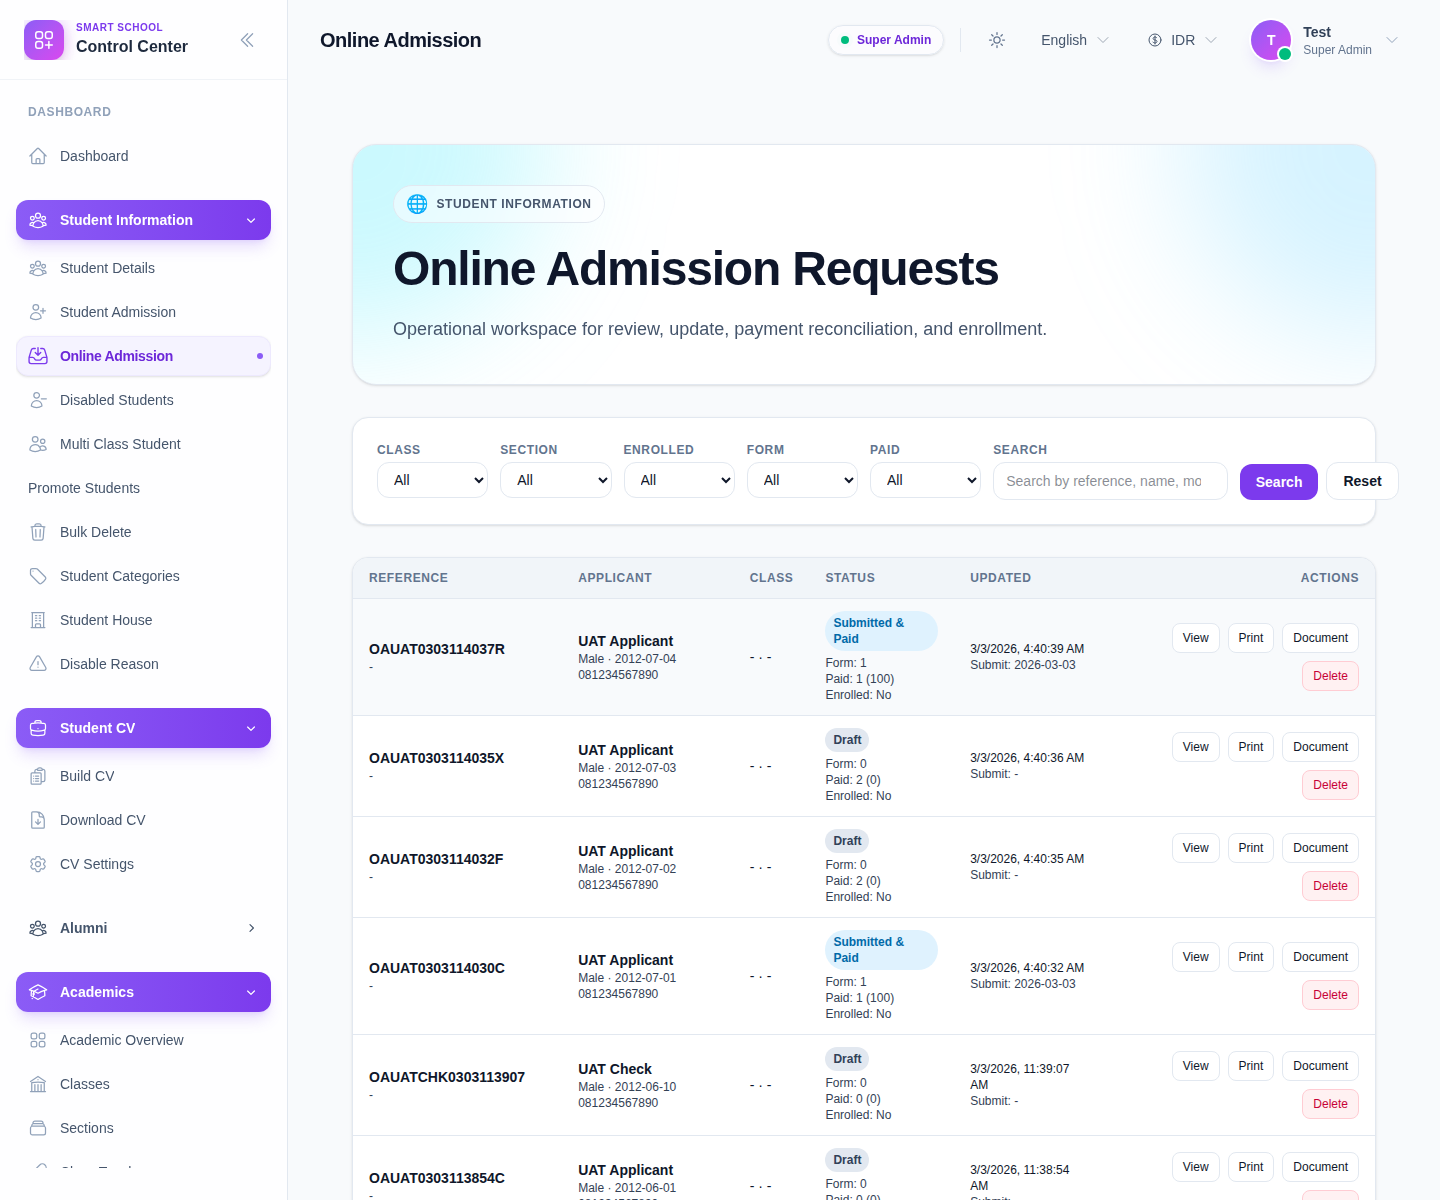
Use this workspace to:
- filter by class, section, enrolled state, form state, and payment state
- search by reference number or applicant name
- open View for a request
- print the request
- download supporting documents
- reconcile payment or continue the enrollment workflow
Important notes
Important: managing the online admission form means configuring an in-product school workflow, not editing the public SaaS landing page. Always verify changes from the school's FrontCMS public route after saving the settings.
Audit note: the local environment currently shows some translation-key or fallback copy on the Online Admission settings tab label, but the configuration panel, public form, and request workspace are still usable.
Verification checklist
- The Online Admission toggle and payment behavior match the school’s intended process.
- Required system fields match the real data policy.
- Any custom fields or starter-template fields are active before launch.
- The public
/online-admissionpage reflects the latest settings. - Internal staff can see and filter the resulting requests in the admin workspace.
Expected result: applicants see the correct online admission form publicly, and staff can manage the resulting requests from the internal workspace.
Troubleshooting
| Issue | Likely cause | What to do |
|---|---|---|
| Public form does not reflect recent changes | Settings were not saved or the public page is stale | Save changes again and reload the public page |
| Required fields are wrong | System-field toggles were left in the wrong state | Recheck the required and optional switches before launch |
| School-specific questions are missing | No starter template or custom field was added | Add the required fields in the custom-field section and save |
| Tab labels or helper copy look unusual | Some settings labels still fall back to translation keys locally | Validate the actual controls and public output rather than the label polish alone |