This guide explains how to use Payment Transactions to review online payment activity after gateway-based fee collection is enabled.
Short summary
Use Payment Transactions as the review console for online-payment history. The page focuses on filters and a transaction table, not on editing gateway settings or collecting fees manually.
Before you start
- Know whether you want to review all gateways or only one provider.
- Decide whether the date range should be narrow or broad.
- Be ready for legitimate empty-state results if no transactions match the current filters.
Navigation path
Online Payments -> Payment Transactions
Step 1: Open Payment Transactions
In the sidebar, open Online Payments, then choose Payment Transactions.
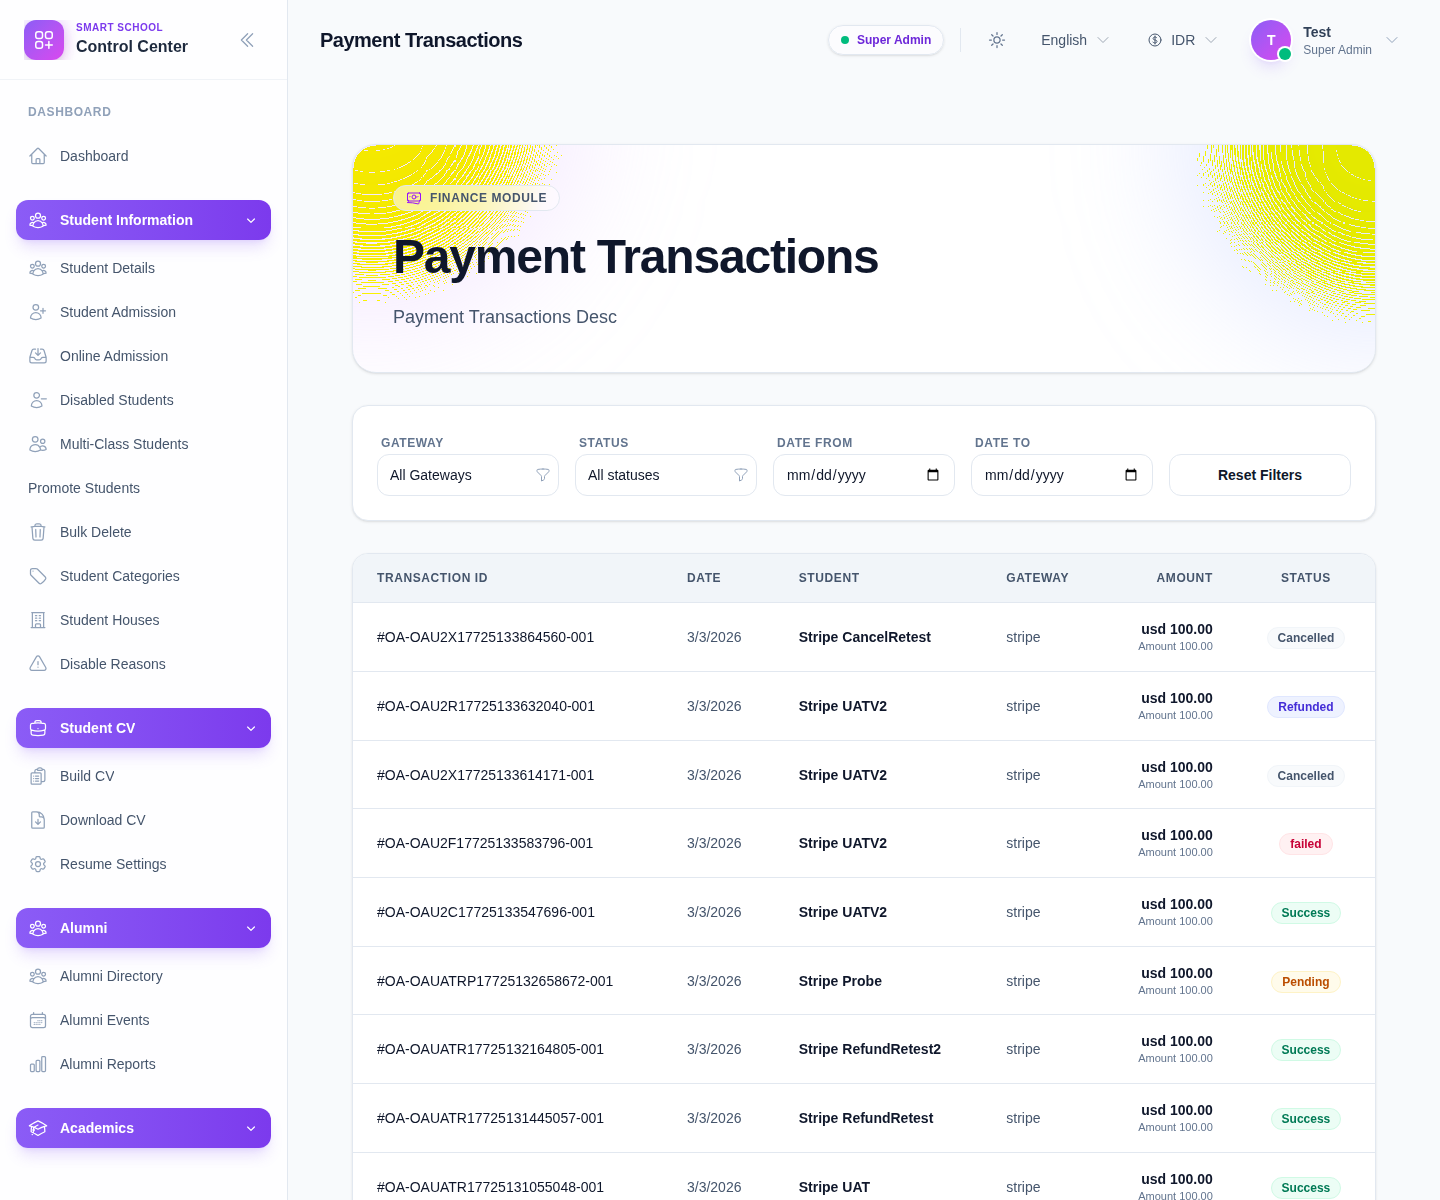
The current filter bar includes:
- Gateway
- Status
- Date From
- Date To
- Reset Filters
Step 2: Narrow the transaction list
Choose the filter combination that matches the review goal.
The visible status options are:
- completed
- pending
- processing
- failed
- cancelled
- refunded
Use smaller date windows when investigating one gateway incident or one settlement period.
Step 3: Review the transaction table
The table currently exposes:
- Transaction ID
- Date
- Student
- Gateway
- Amount
- Status
Use this table to answer common finance questions such as:
- which gateway processed the payment
- which student record is attached to the payment
- whether the transaction completed or failed
- how much was charged and what the final total looks like
Step 4: Reset when the current filter path becomes too narrow
Click Reset Filters when:
- you no longer trust the current filter combination
- the page returns no rows and you need to widen the search
- you want to start a fresh transaction review
The current UI also provides a Clear Filters action in the empty state when no rows match.
Step 5: Handle empty states and pagination correctly
If no rows match, the page shows No transactions found. That does not automatically mean the system is broken.
Possible explanations include:
- the chosen gateway has no matching rows in that period
- the status filter is too restrictive
- the date range is too narrow
When rows do exist, review the pagination summary and move between pages as needed.
Verify the result
- the filters reflect the intended gateway, status, and date range
- the table shows the right subset of transactions
- the row status helps explain whether a payment succeeded or needs follow-up
- the finance team can move from transaction review to deeper fee-payment review when needed
Troubleshooting
| Issue | Likely cause | What to do |
|---|---|---|
| No rows appear | The filter combination is too narrow | Reset the filters and widen the search |
| Gateway review feels incomplete | Only one provider is selected | Clear the gateway filter or choose another provider |
| Status results are confusing | Different payment states are mixed together | Filter by one status at a time, then compare |
| Staff expect this page to edit gateways | This is a review page, not a configuration page | Return to Payment Gateways for provider changes |