This guide explains how to generate student ID cards from the Generate Student ID Cards workspace.
Before you start
- Create at least one active student ID-card template first.
- Confirm the class and section you want to process.
- Make sure the student records are complete enough for printing.
- Check that the users running generation are allowed to work with official student identity data.
Important: the generation workspace depends on student data already existing in the system. If no students match the selected class or section, the list stays empty and the Generate button remains unavailable.
Navigation path
Certificates -> Generate Student ID Cards
Step 1: Open the generation workspace
Go to Certificates in the sidebar and choose Generate Student ID Cards.
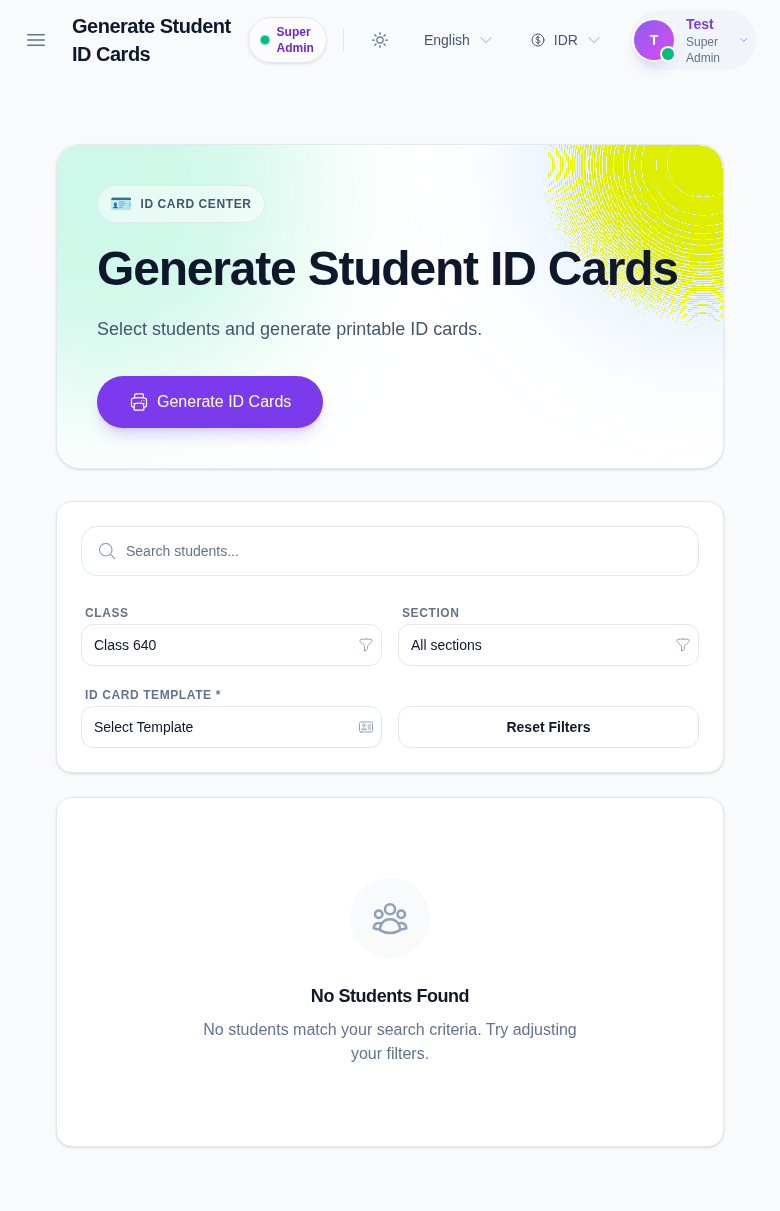
In the current local environment, no student records are returned for the available classes, so the empty state is visible right away.
Step 2: Choose the class and section
Pick the target Class first, then choose the matching Section.
What to expect:
- the Section list depends on the chosen Class
- changing the Class can reset the Section selection
- the student list updates after the filters are applied
This step matters because cards are usually generated in batches for a specific class-section combination.
Step 3: Select the student ID-card template
Use the ID Card Template dropdown to choose the active template you created earlier.
If the template list is empty:
- verify that a student template exists
- confirm that the template is active
- return to the template workspace and create one if needed
The template controls the layout, branding, and field visibility of the output cards.
Step 4: Search and select students
Use the search field to find students by name or admission details, then select the students you want to include.
The list area should let you review the students before generation. In the current local dataset, no rows appear, so the page shows No Students Found until matching records exist.
Step 5: Generate the cards
After class, section, template, and student selection are ready, click Generate ID Cards.
The workspace then moves into the printable generation flow so you can review the output before final printing.
Verify the result
Use this checklist after generation:
- the correct class and section were selected
- the template matches the intended card design
- the selected students are the ones you intended to print
- the output is ready for review or printing
Expected result: the selected students are prepared as printable ID cards using the active template and the chosen class-section filter.
Troubleshooting
| Issue | Likely cause | What to do |
|---|---|---|
| No students appear in the list | The selected class or section has no matching student records | Change the filters or confirm the students already exist |
| Generate button stays disabled | Students have not been selected yet | Choose one or more students before trying again |
| Template list is empty | No active student template exists | Create and activate a template in the template workspace |
| Wrong students are shown | Search or class-section filters are too broad | Narrow the filters before generating cards |
| Output does not match the card design | The wrong template was selected | Go back, choose the correct template, and generate again |