This guide explains how to use the Items tab in Inventory to maintain the item master records used by stock and issue workflows.
Short summary
Use Items when the school needs to add a new inventory record or refine the master data behind existing stock. The current tab combines an add-item form, a filter panel, a paginated table, and a detail drawer.
Before you start
- Confirm the required Category, Store, and Supplier records already exist.
- Decide whether the item should track quantity.
- Prepare the item code, SKU, barcode, cost, and reorder level if your school uses those controls.
Navigation path
Inventory -> Add Item
Step 1: Open the Items tab
In the sidebar, open Inventory and choose Add Item.
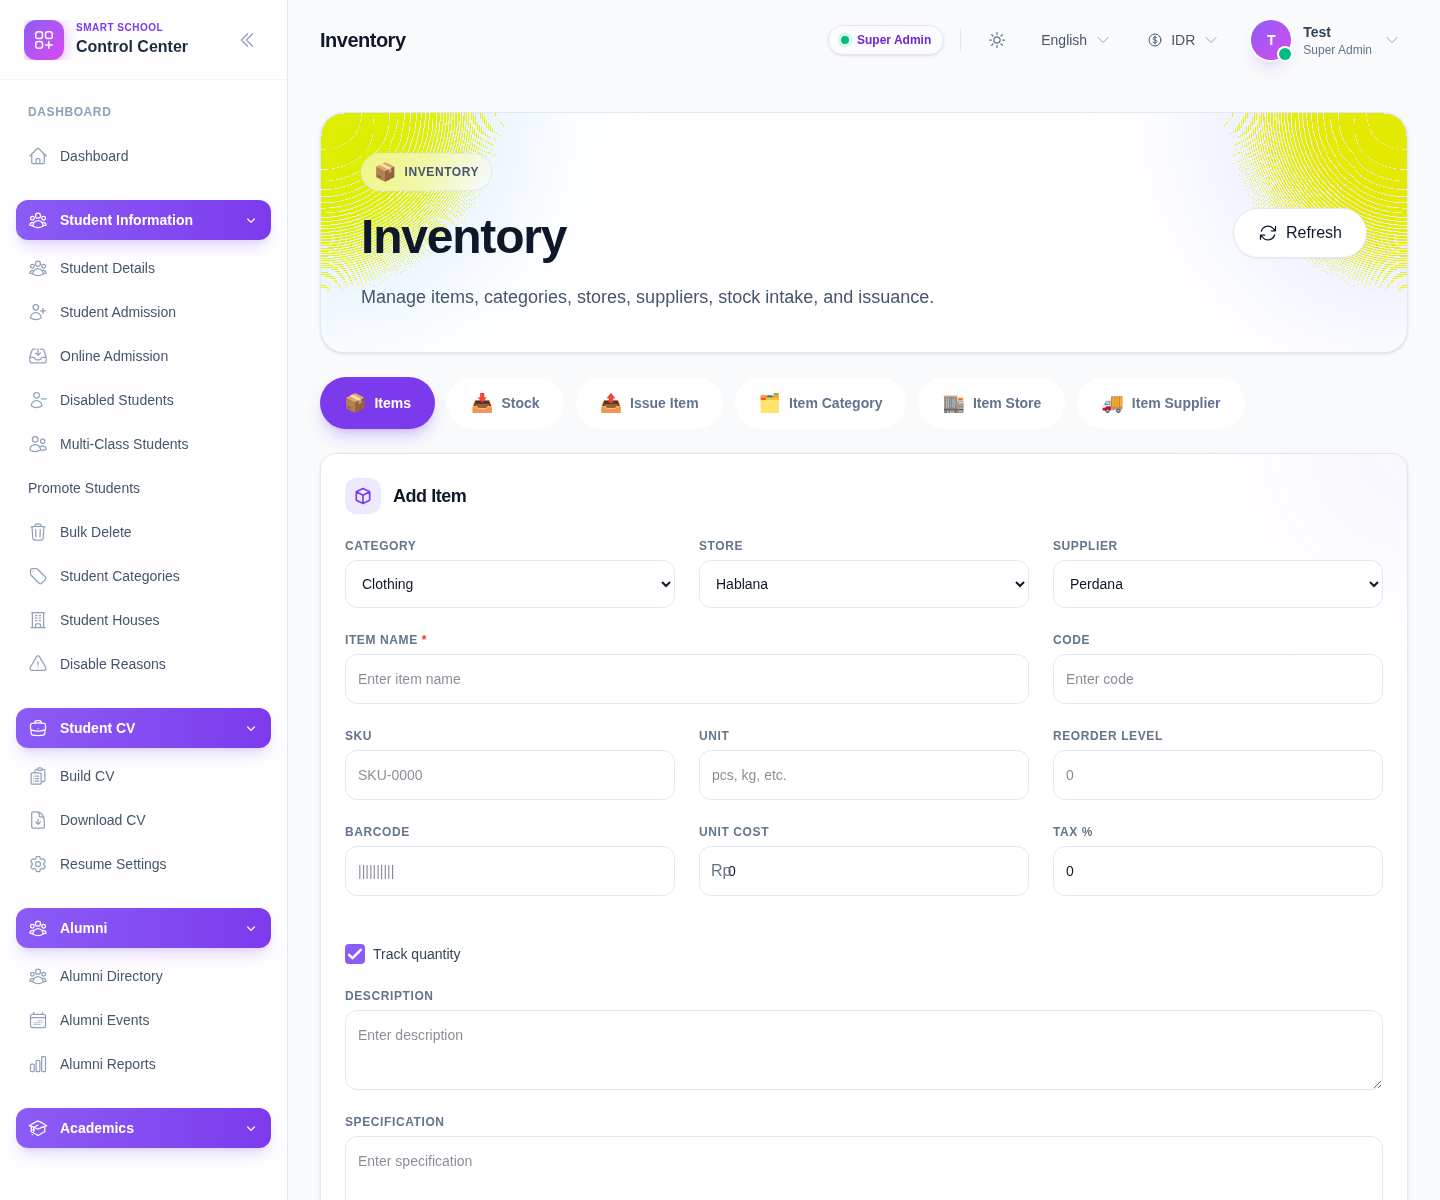
The current item form includes:
- Category
- Store
- Supplier
- Item Name
- Code
- SKU
- Unit
- Reorder Level
- Barcode
- Unit Cost
- Tax %
- Track Quantity
- Description
- Specification
Step 2: Create the item master record
Fill the form in a deliberate order:
- choose Category, Store, and Supplier
- enter the Item Name
- add identifying fields such as Code, SKU, and Barcode
- complete stock-planning fields such as Unit, Reorder Level, Unit Cost, and Tax
- decide whether Track Quantity should stay enabled
- add Description and Specification where useful
Use Save to create the item and Reset when the form should be cleared.
Step 3: Filter the item list
Below the form, the current filter panel lets you narrow the list by:
- Search
- Category
- Store
- Supplier
Use Apply to refresh the results and Reset to return to the full list.
This matters because the local environment contains many fixture and test rows, so the table can become noisy quickly.
Step 4: Review the items table
The current table shows:
- Item
- Category
- Store
- Supplier
- Unit Cost
- Tax
- Reorder Level
- Actions
Use the table to confirm the new row was saved correctly and to check whether an item already exists before creating a near-duplicate.
Step 5: Edit or inspect the item
The current row actions include:
- Edit
- View Details
Use Edit when the item master data needs correction. The current UI scrolls the operator back to the form and repopulates it for editing.
Use View Details when you need a read-only review surface with related stock and issue context.
Step 6: Use pagination when the list is long
The item table includes:
- Previous
- Next
Check pagination before assuming a missing row failed to save.
Verify the result
- the item appears in the table with the intended category, store, and supplier
- cost, tax, and reorder data look correct
- the item is available for later stock and issue workflows
- the item detail view reflects the saved master record
Troubleshooting
| Issue | Likely cause | What to do |
|---|---|---|
| Save does not create a useful row | A required field such as item name or reference data is missing | Recheck category, store, supplier, and name |
| The table shows too many similar rows | Local fixtures and active items are mixed together | Use search plus category or supplier filters |
| Staff create duplicates | They do not search before adding | Review the filtered table before saving a new item |
| Reorder or cost values look wrong later | The master data was entered loosely | Edit the item before stock activity depends on it |