This guide explains how to use the Communications workspace to compose school notifications and move through the audience, content, and review steps before delivery.
Short summary
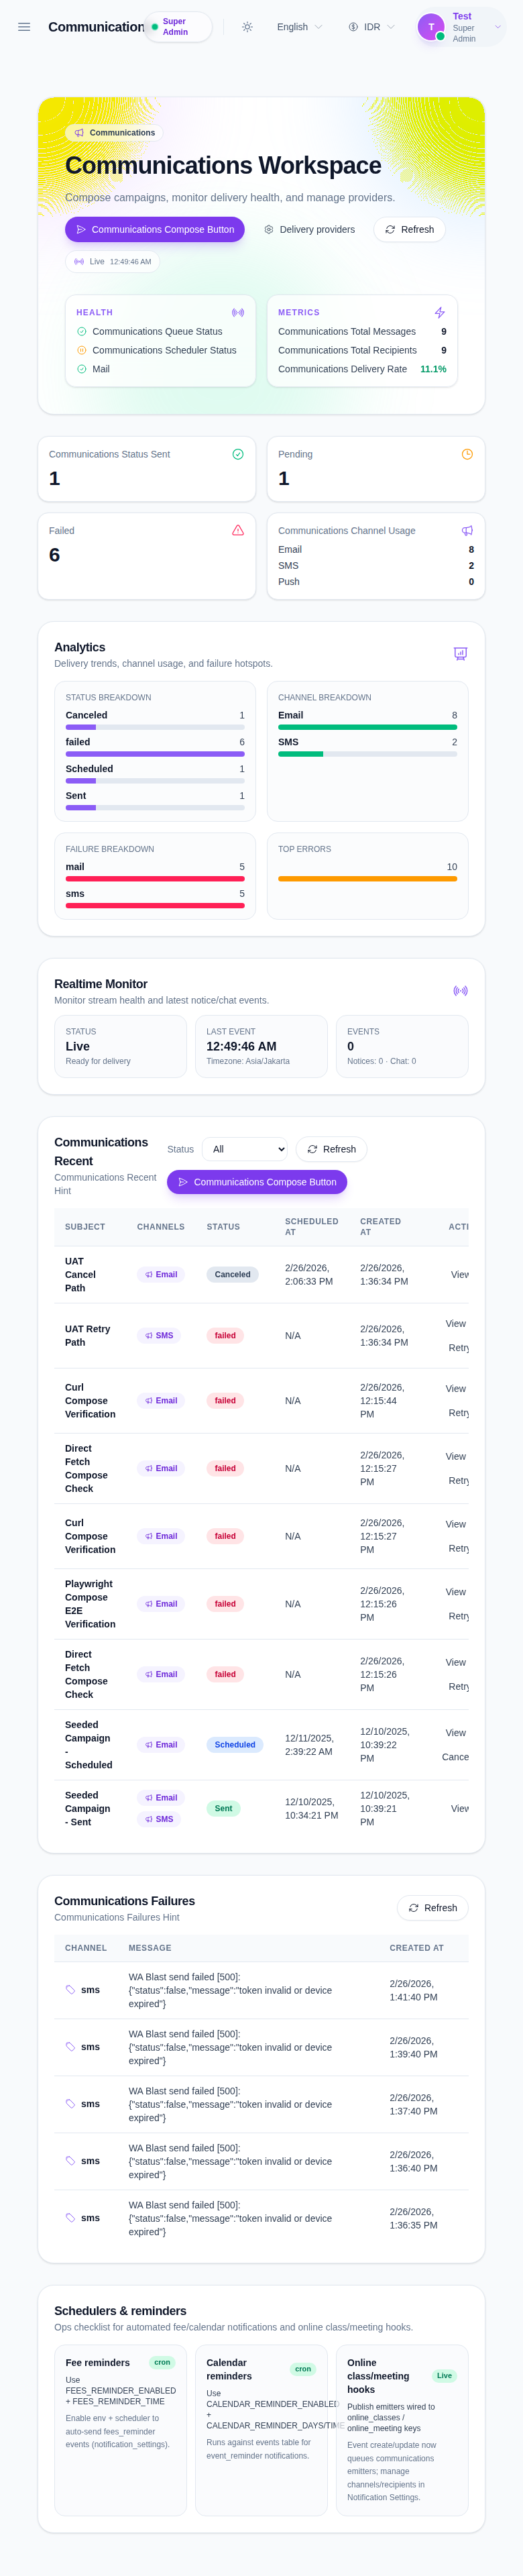
The Communications workspace combines delivery health, recent campaign history, failure monitoring, and a three-step compose drawer. You first choose recipients, then write the message and select channels, and finally review the summary before sending notifications.
Before you start
- Decide whether you are sending to individuals, groups, classes, or custom recipients.
- Prepare the message subject and body.
- Confirm email, SMS, or push delivery providers are configured if you plan to use those channels.
Navigation path
Communications
Step 1: Open Communications workspace
Go to Communications in the sidebar.
Step 2: Start a new notification
Click Communications Compose Button from the header or from the recent-campaigns panel.
The compose drawer uses three steps:
- Audience
- Content
- Review
Step 3: Define the audience
On the Audience step, choose the recipient mode:
- Individual
- Group
- Class
- Custom
Then use the available recipient fields such as:
- Role
- Class
- Section
- Mobile Number
- Push Token
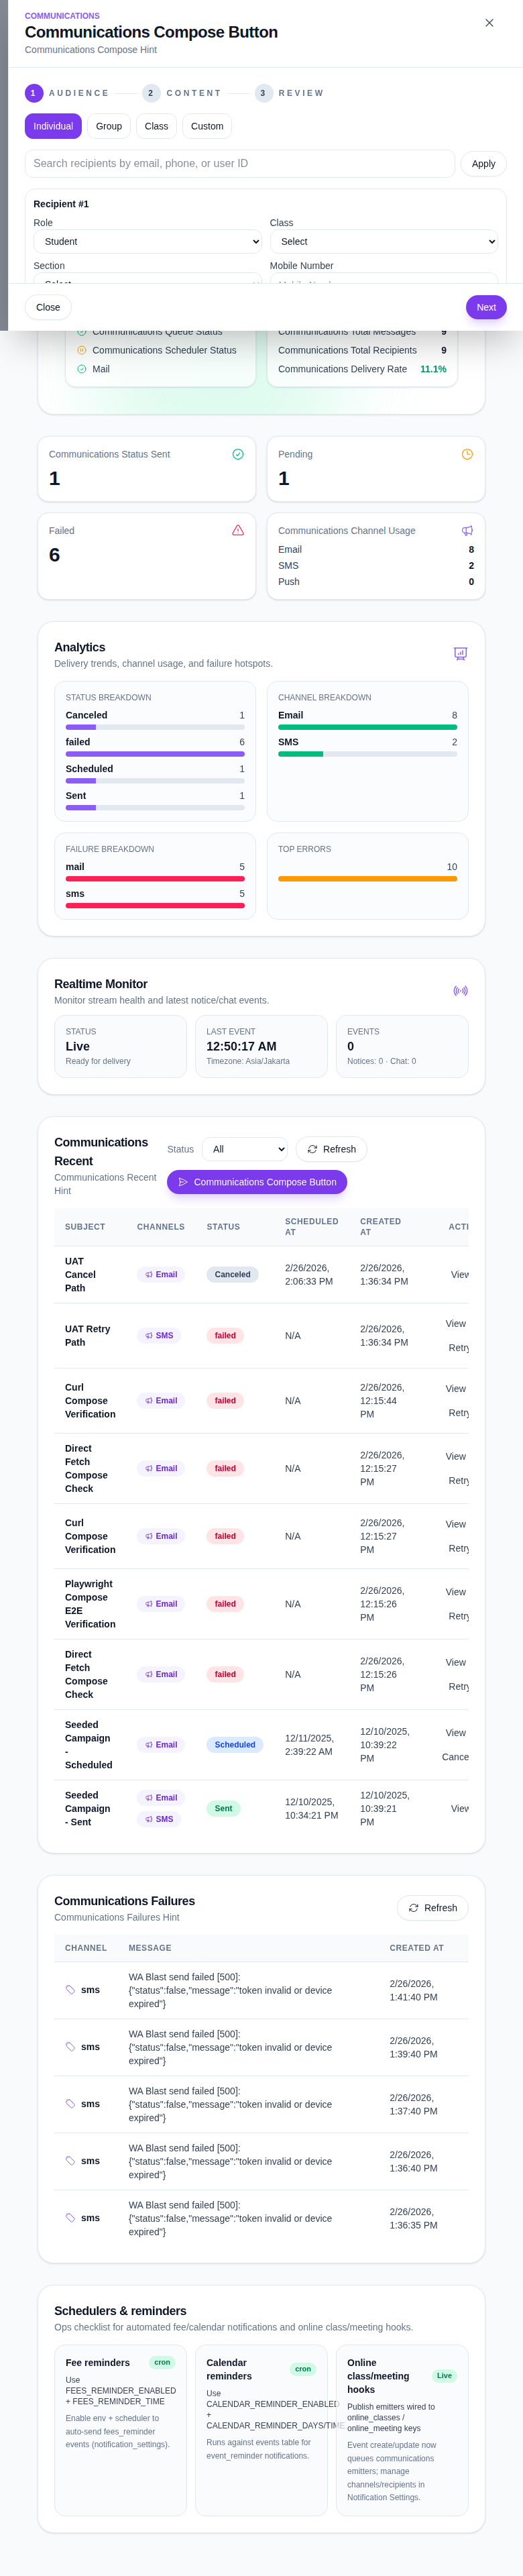
Click Next when the audience setup is ready.
Step 4: Write the notification content
On the Content step, complete:
- Subject
- Message
- optional Email Template
- optional SMS Template
- delivery Channels
- Scheduled At if you want to send later
- optional Attachments
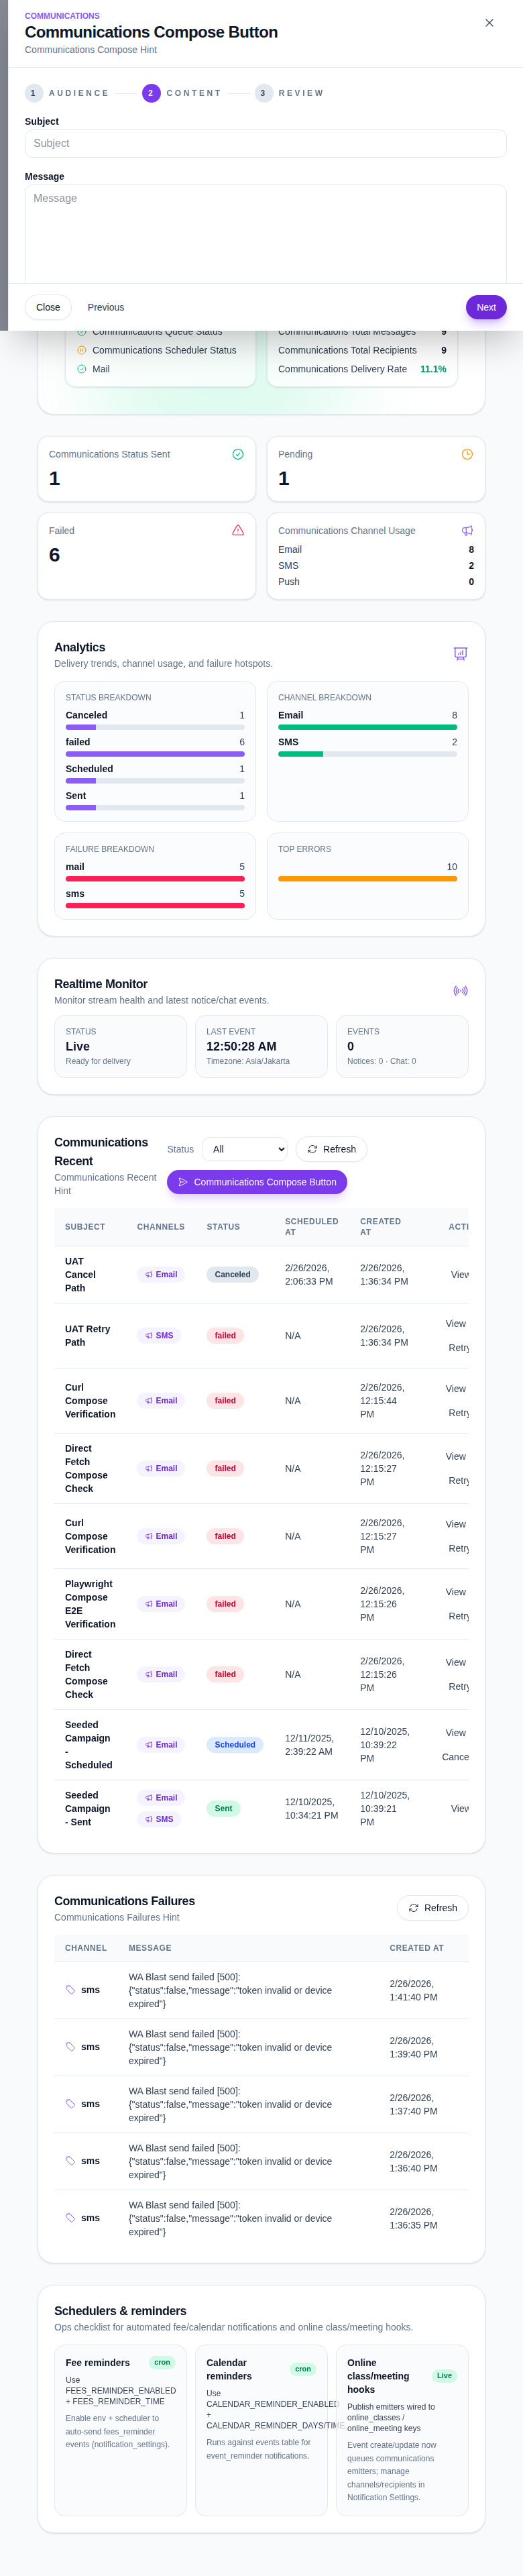
The quick schedule shortcuts include Send now, In 30 minutes, and Tomorrow 09:00.
Step 5: Review before sending
Click Next to open the review step.
The summary shows:
- subject
- applied templates
- selected channels
- scheduled time
- recipient count
- attachment count
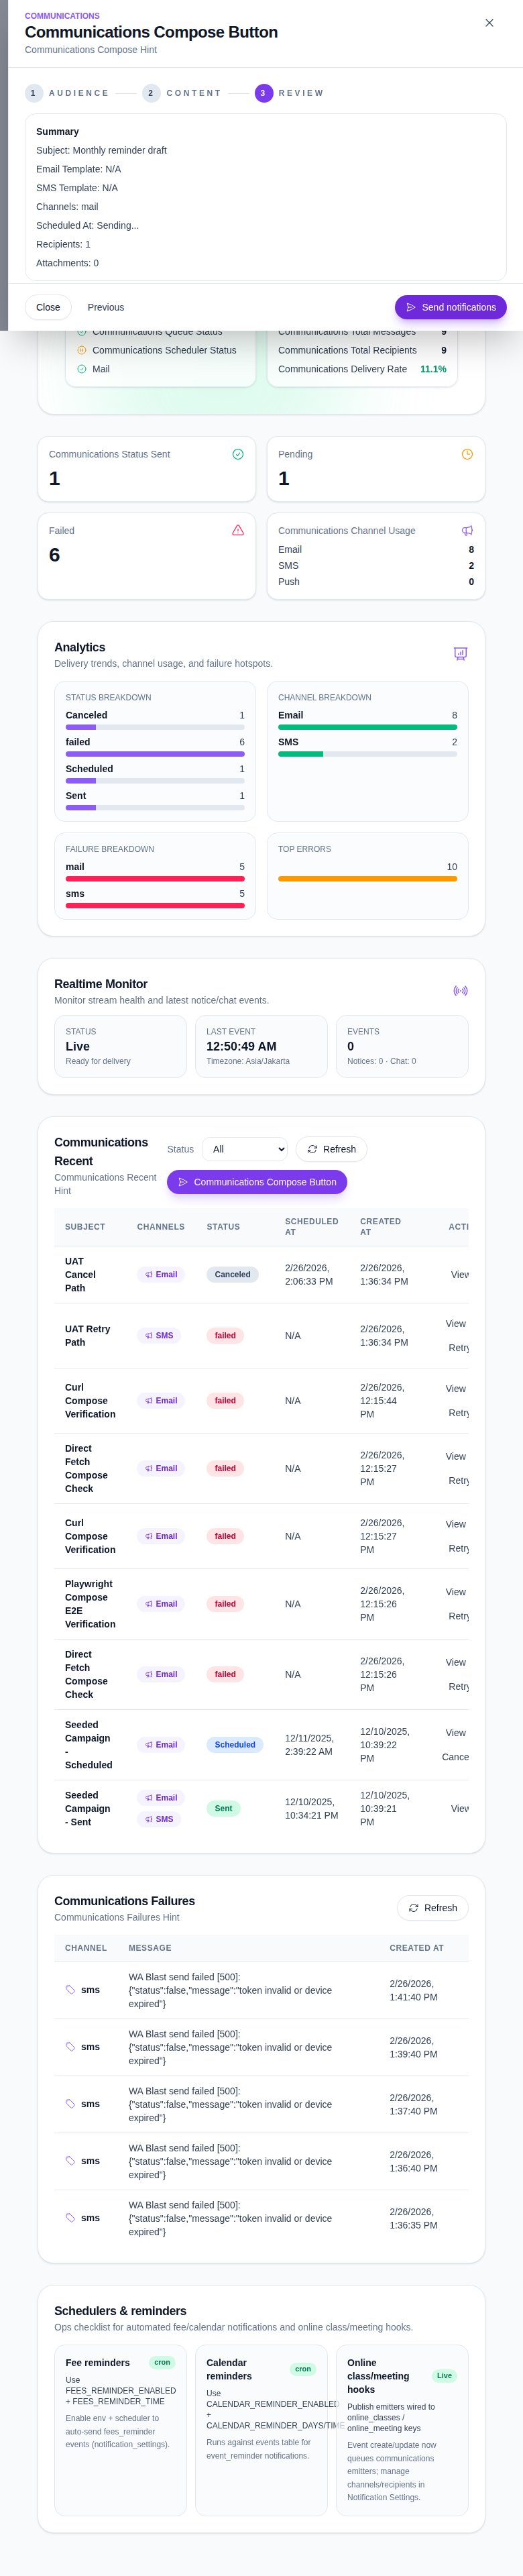
If everything is correct, click Send notifications. Use Previous if you need to change the content or audience first.
Step 6: Monitor delivery after sending
After delivery is queued or sent, return to the workspace and review:
- Communications Recent
- Communications Failures
- delivery health cards
- analytics and status breakdown
These panels help confirm whether your notification was sent, scheduled, canceled, or failed.
Important notes
Important: successful composition does not guarantee successful provider delivery. The workspace can still show email or SMS failures if the configured provider token, device, or mail transport is not healthy.
Verification checklist
- The correct audience mode is selected.
- Subject and message are filled with the intended content.
- The right channels are enabled before review.
- The summary shows the expected recipients and schedule.
- Recent campaigns and failure panels are checked after sending.
Expected result: the notification is prepared for immediate send or scheduled delivery and can be tracked from the Communications workspace.
Troubleshooting
| Issue | Likely cause | What to do |
|---|---|---|
| Recipients are not resolving | Audience filters or recipient mode do not match the intended target group | Recheck role, class, section, or switch recipient mode |
| SMS or email fails after send | Provider token, device, or mail transport is unhealthy | Review delivery providers and the failures panel before retrying |
| Wrong schedule is applied | Scheduled At or shortcut timing was selected accidentally | Go back to the content step and reset the schedule |
| Campaign status stays pending | Queue or scheduler health is degraded | Check the delivery health panel and refresh the workspace |