This guide explains how to maintain class records from the Classes page in Migdafa Smart School.
Before you start
- Decide the official class naming format.
- Confirm whether the new class should be active immediately.
- Review existing classes first to avoid duplicates.
- Coordinate with admissions and timetable owners before changing active class records.
Important: classes are foundational academic data. Changes here can affect admissions, promotion planning, class-section linking, and timetable work.
Navigation path
Academics -> Classes
Step 1: Open Class Management
Go to Academics and choose Classes. The page combines an Add New Class form with a searchable Class Management list.
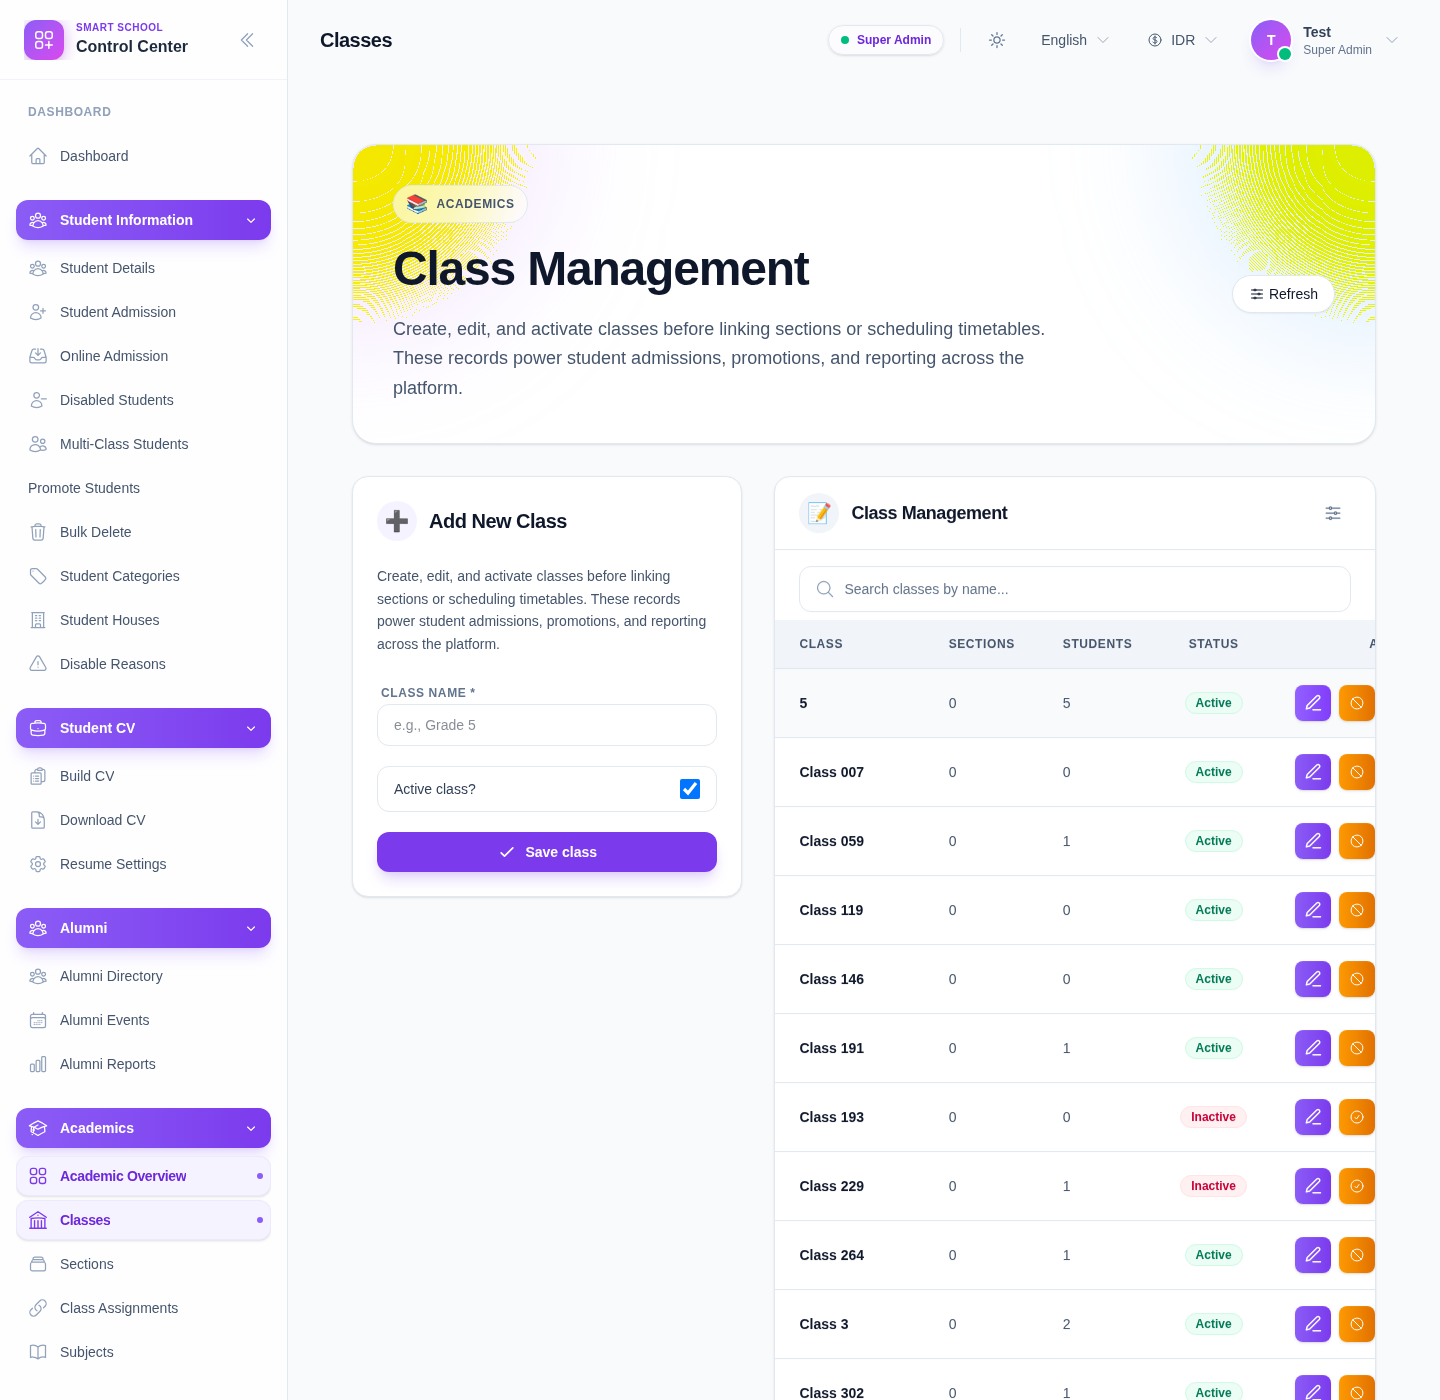
The current table includes:
- class
- sections count
- students count
- status
- actions
Step 2: Review the current class list
Before adding or editing records, search the existing class list with Search classes by name….
This helps you spot:
- duplicate class names
- inactive classes that should be reused instead of recreated
- classes that already have linked sections or enrolled students
Step 3: Create a new class
Use the Add New Class form:
- Enter Class name.
- Decide whether Active class? should stay enabled.
- Click Save class.
Use Refresh if the list does not immediately show the new record.
Step 4: Review counts and status
After saving, check the row in Class Management and review:
- whether the class name is correct
- whether the class is active or inactive
- whether section and student counts make sense over time
Counts become especially important once sections are linked and students start using the class.
Step 5: Use row actions carefully
The current list provides row-level actions:
- Edit
- Activate or Deactivate
- Delete
Use them like this:
- Edit for naming corrections
- Activate/Deactivate for operational availability changes
- Delete only when the class should not remain in the academic structure
Verify the result
Use this checklist after a class update:
- the class name follows the school’s naming convention
- the active status matches current operational needs
- no duplicate class was created
- downstream teams know whether the class is ready for sections and admissions
Expected result: the class catalog stays clean, searchable, and ready for section linking, student placement, and academic planning.
Troubleshooting
| Issue | Likely cause | What to do |
|---|---|---|
| A class seems duplicated | The existing list was not reviewed first | Search the list before creating a new class |
| The new row is not obvious after save | The list was not refreshed or filtered unexpectedly | Use Refresh and clear the search filter |
| You are unsure whether to delete a class | The class may already be linked to sections or students | Review counts and related workflows before deleting |
| Active status is wrong | The toggle or row action was used incorrectly | Recheck the status and use Activate/Deactivate intentionally |
| Naming is inconsistent | No standard format is being used | Agree on a naming convention and normalize older entries |