This guide explains how to use the Student Transport Assignment workspace to review existing transport assignments and open the assignment drawer for new route allocation.
Short summary
The student transport screen combines summary chips, assignment search, an assignment table, a multi-student route assignment drawer, and a detail drawer that shows route, pickup point, schedule, and stop order.
Before you start
- Confirm the student already exists in the active session.
- Confirm the target route and pickup point are already configured.
- Check that a transport fee master is available if your setup requires fee-linked assignments.
Navigation path
Transport -> Student Transport
Step 1: Open Student Transport Assignment
Go to Transport in the sidebar and open Student Transport.
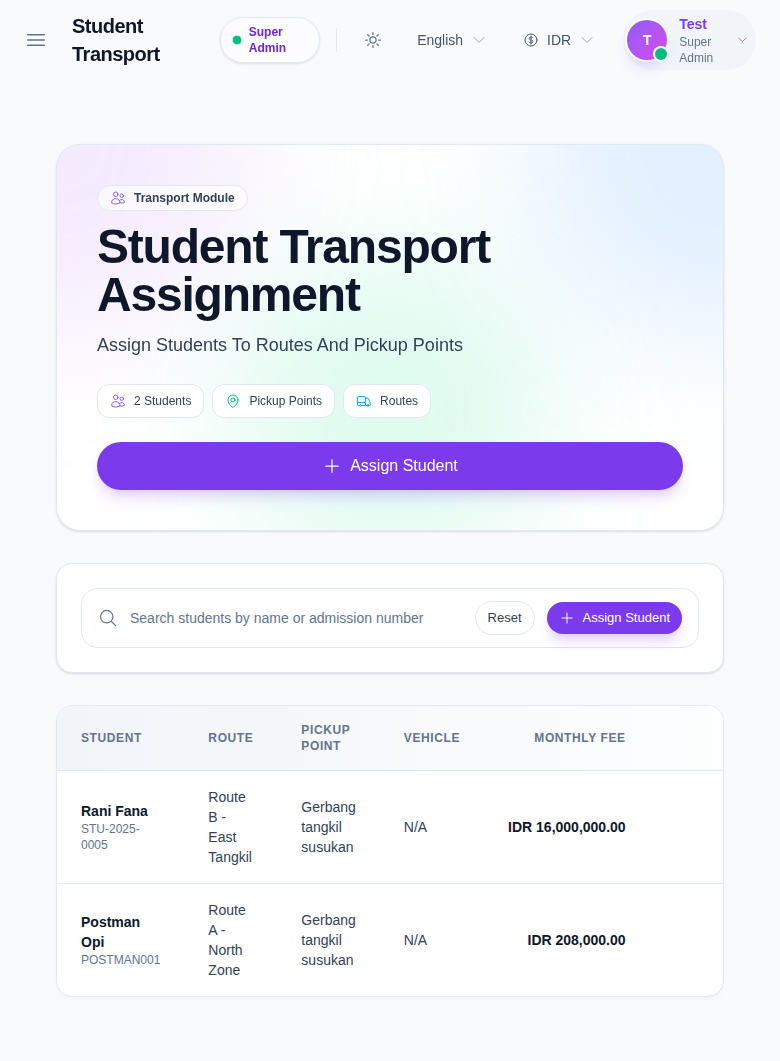
Step 2: Review current assignment data
Before creating a new assignment, inspect:
- total students in assignment chips
- pickup-point count
- route count
- the assignment table with student, route, pickup point, vehicle, and monthly fee columns
Use Search students by name or admission number to narrow the existing list.
Step 3: Open the assignment drawer
Click Assign Student.
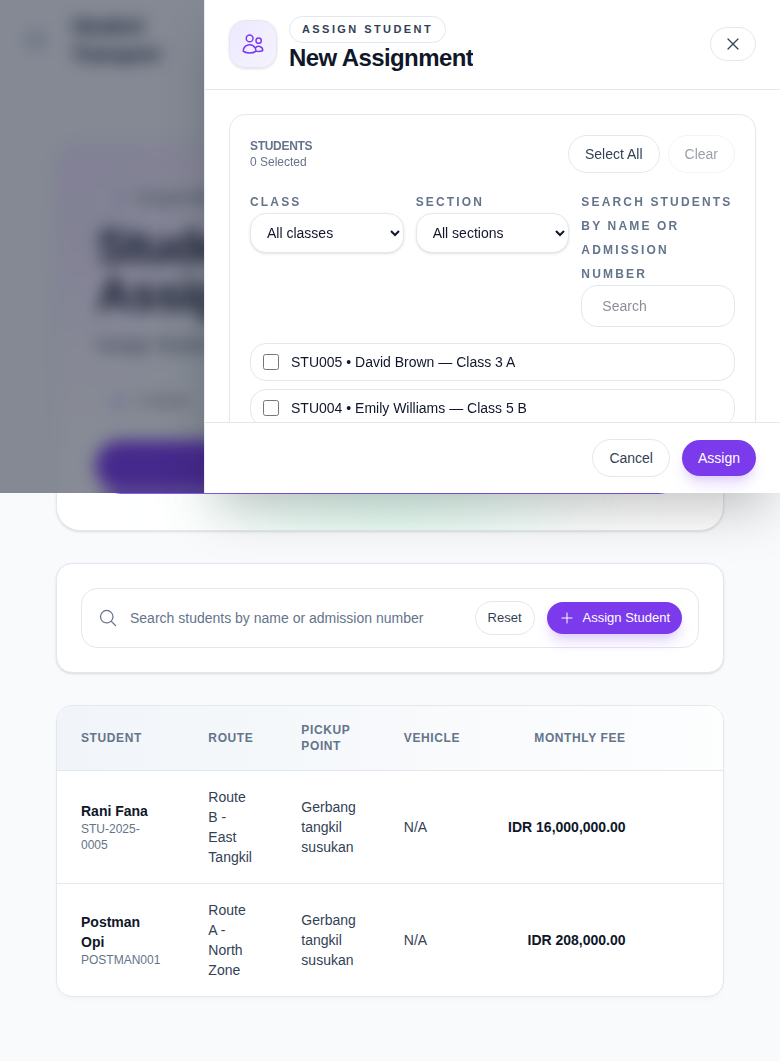
Step 4: Configure a new assignment
In the drawer, complete the available sections:
- student selection list
- Class
- Section
- Search
- Route
- Pickup Point
- Pickup Point Fee
- Transport Fee Master
You can select multiple students before assigning them to the same route and pickup point combination.
Step 5: Review assignment details
From the assignment table, click View on a student row to inspect the assignment detail drawer.
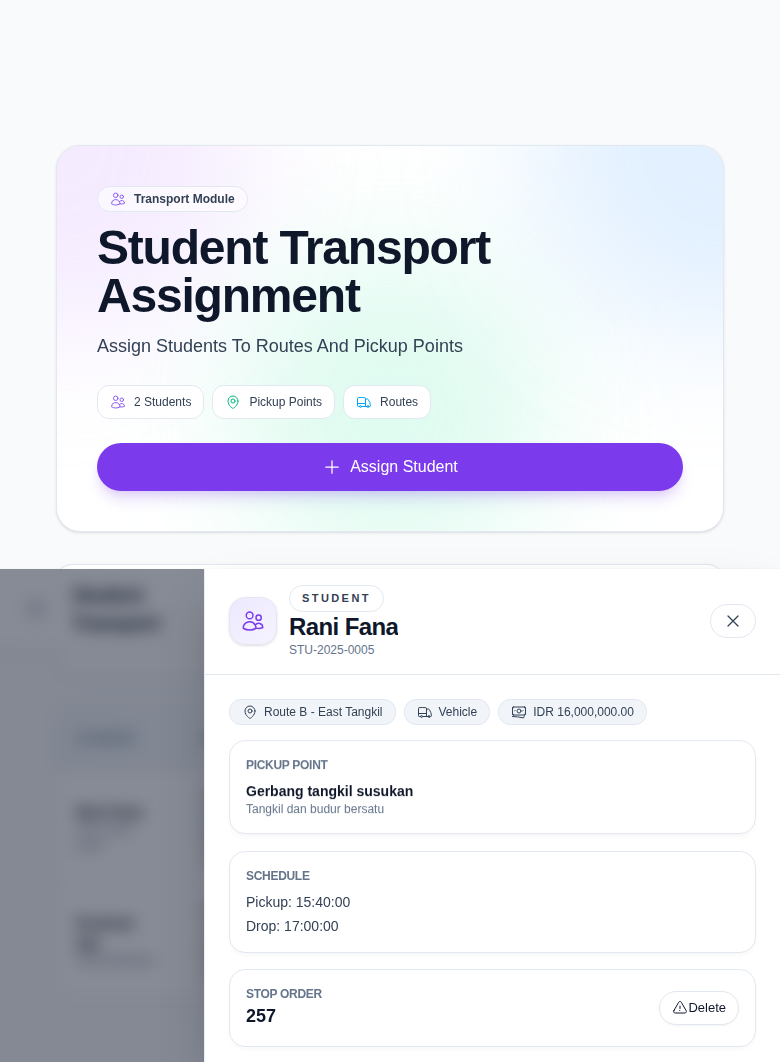
The detail drawer shows:
- student identity
- route name
- pickup point
- vehicle label
- monthly fee
- pickup and drop schedule
- stop order
- delete action
Step 6: Verify the assignment record
After assigning or reviewing:
- Return to the main table.
- Confirm the student appears with the correct route and pickup point.
- Confirm the monthly fee matches the selected transport context.
- Use the detail drawer again if you need to validate schedule or stop order.
Important notes
Important: the assignment drawer depends on route, pickup point, and fee-master setup. If one of those source datasets is missing, the assignment form can appear incomplete and should be resolved before operators save new records.
Verification checklist
- The correct student or students are selected.
- Route and pickup point match the intended transport plan.
- Fee information is reviewed before assigning.
- The saved row shows the correct route, pickup point, and monthly fee.
Expected result: the student appears in the Student Transport Assignment table with the intended route and pickup-point allocation.
Troubleshooting
| Issue | Likely cause | What to do |
|---|---|---|
| Student is hard to find in the drawer | Class, section, or search filters are not aligned with the student record | Clear filters, then narrow again with the student admission number |
| Pickup point list looks incomplete | Route has not been selected yet or route-pickup mapping is missing | Choose the route first, then recheck pickup point options |
| Transport fee master is unavailable | Fee-master dataset is not configured for the active session | Review transport fee setup before creating the assignment |
| Assignment details do not match expectation | The wrong table row was opened or the route context changed | Reopen the correct row and verify route plus pickup point before editing or deleting |