This guide explains how to use Notification Center inside Communications to review inbound notices and manage delivery settings for each event.
Short summary
Notification Center has two jobs. The Inbox tab lets you review notices, mark them as read, and inspect published messages. The Notification Settings tab lets you search events, toggle audience and channel delivery, and open the template editor for each event.
Before you start
- Confirm you have access to the Communications module.
- Decide whether you want to review the inbox or edit delivery settings.
- Know the event name or template you want to search for before opening the settings tab.
Navigation path
Communications -> Notification Center
Step 1: Open Notification Center
Go to Communications in the sidebar and open Notification Center.
The page header shows:
- the live status indicator
- the current time
- the Inbox tab
- the Notification Settings tab
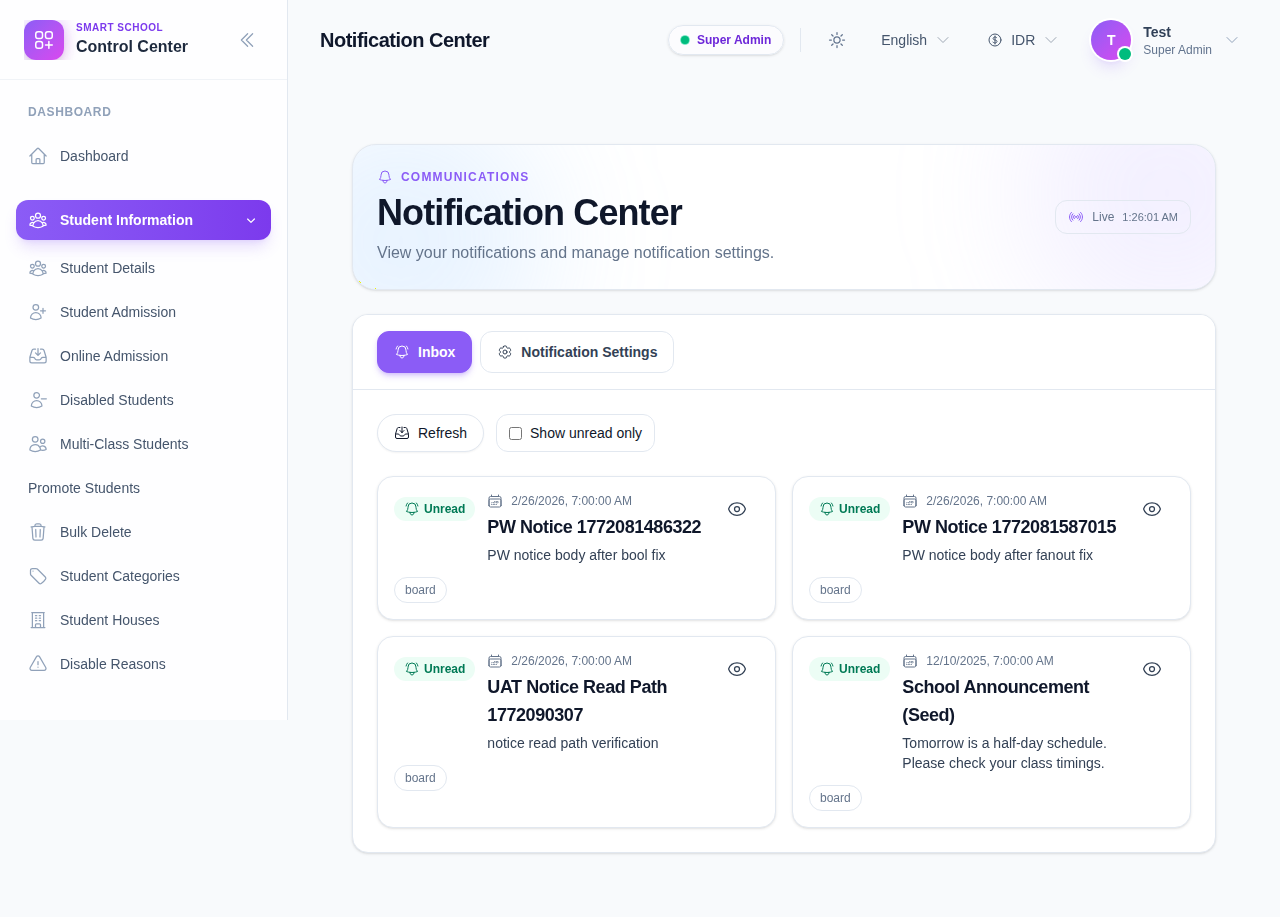
Step 2: Review notices in the Inbox tab
Use the Inbox tab to inspect notices that were published to your account.
Each notice card can show:
- read or unread status
- publish date
- title
- body preview
- channel chips such as
board - attachment indicator when a file is available
Use the eye button on a notice card to open the detail drawer and review the full message.
Step 3: Filter for unread notices only
Turn on Show unread only when you only want to inspect messages you have not reviewed yet.
This is useful when:
- you want to clear a backlog of new notices
- you are checking which items still need follow-up
- you only care about fresh operational updates
Click Refresh if you want to re-fetch the list after switching filters or after a new notice is published.
Step 4: Switch to Notification Settings
Click Notification Settings to review the event matrix.
The settings grid lets you review:
- event name and event key
- student, guardian, and staff recipient toggles
- email, SMS, and push delivery toggles
- the template action for each event row
Use the search field when you want to find a specific event quickly.
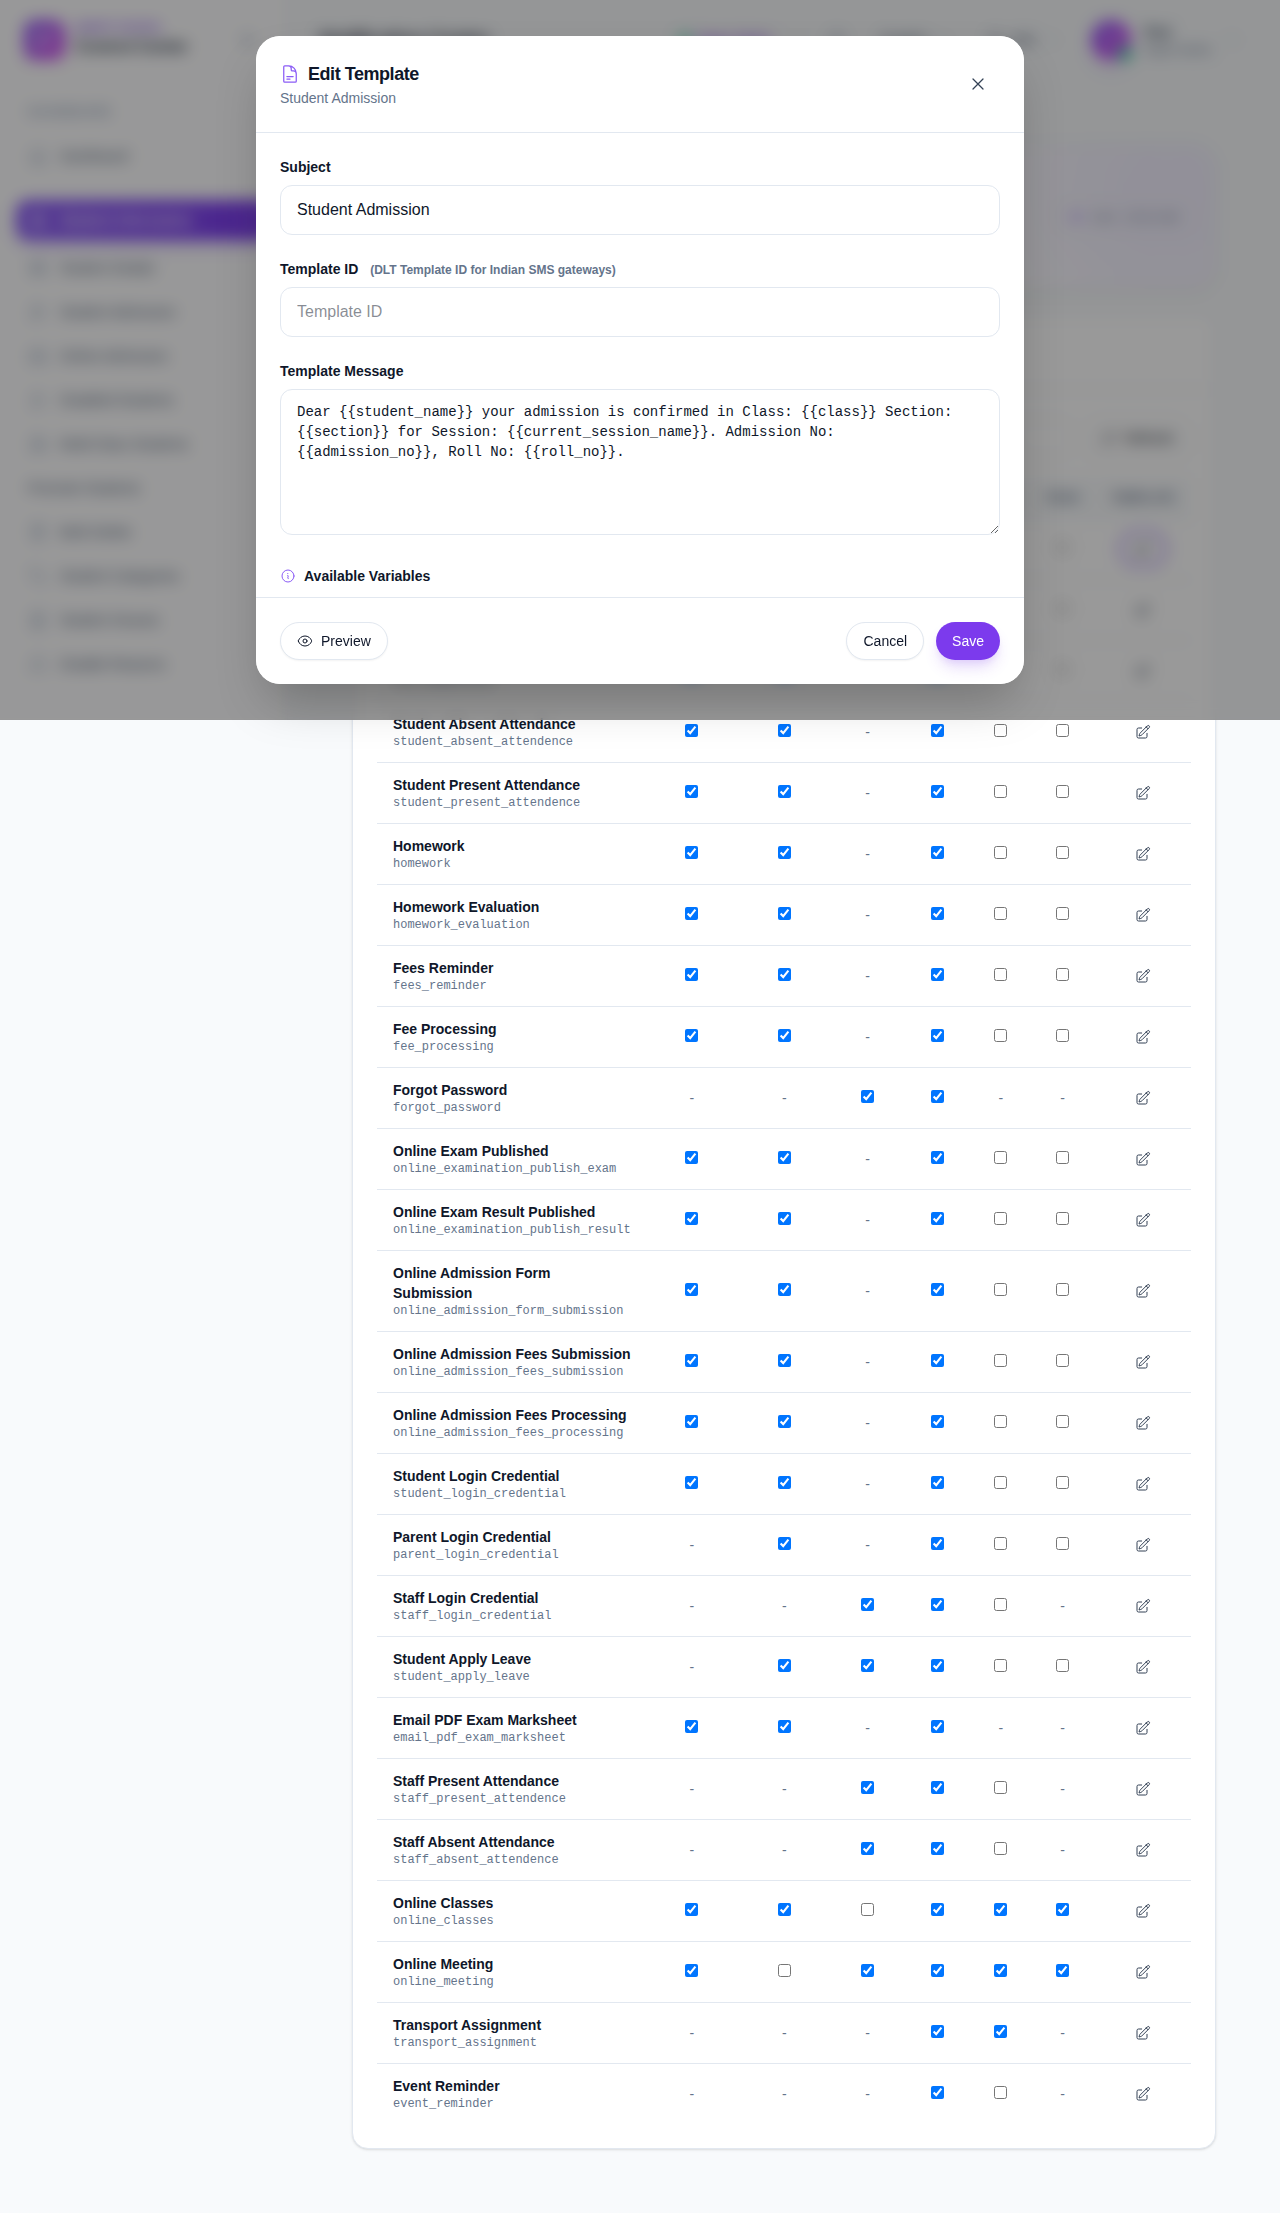
Step 5: Edit a notification template
Click Edit Template in the template column for the event you want to change.
The template editor lets you manage:
- Subject
- Template ID for SMS gateways that require a DLT identifier
- Template Message
- available variables that can be inserted into the message body
Use the variable buttons to insert placeholders such as student name, class, section, admission number, or session name.
Step 6: Validate the template before saving
Before you save:
- Confirm the subject matches the event.
- Review the template ID if your SMS provider needs one.
- Check that the template message still uses the intended variables.
- Use Preview if you want to inspect the rendered output.
- Use Send Test if you want to send a test notification to yourself.
After you save, return to the matrix and confirm the row still shows the expected channel toggles and template action.
Important notes
Important: the inbox and the notification settings matrix are related but different workflows. Reading notices does not change delivery rules, and changing delivery rules does not rewrite past notices.
Verification checklist
- The inbox tab loads with notices or an empty state.
- The unread-only filter works as expected.
- The notification settings matrix lists the event you need.
- The template editor opens with the right event row.
- Subject, template ID, and template message are reviewed before saving.
Expected result: you can review notices in the inbox and update event-level notification settings and templates from the same workspace.
Troubleshooting
| Issue | Likely cause | What to do |
|---|---|---|
| Inbox looks empty | The unread filter is hiding already-read notices | Turn off Show unread only and refresh the list |
| A notice is not marked as read | The detail drawer was not opened | Open the notice from the eye button so the read state can update |
| The event does not appear in settings | The search filter is too narrow | Clear the search box and try again |
| Template changes are not saved | Required template fields were left blank | Reopen the modal and confirm the subject and template message |