This guide explains how to work in the Subject Group Planner to create and review academic subject groups used by timetable and related academic workflows.
Short summary
The Subject Group Planner is card-based. You can search or filter groups by session, open a create drawer to define a new group, select multiple subjects, and inspect existing group details such as overview, subjects, and sections.
Before you start
- Confirm the academic Session you want to manage.
- Prepare the new group name and a short description.
- Verify the underlying subjects already exist so they can be selected in the drawer.
Navigation path
Academics -> Subject Groups
Step 1: Open Subject Group Planner
Go to Academics in the sidebar and choose Subject Groups.
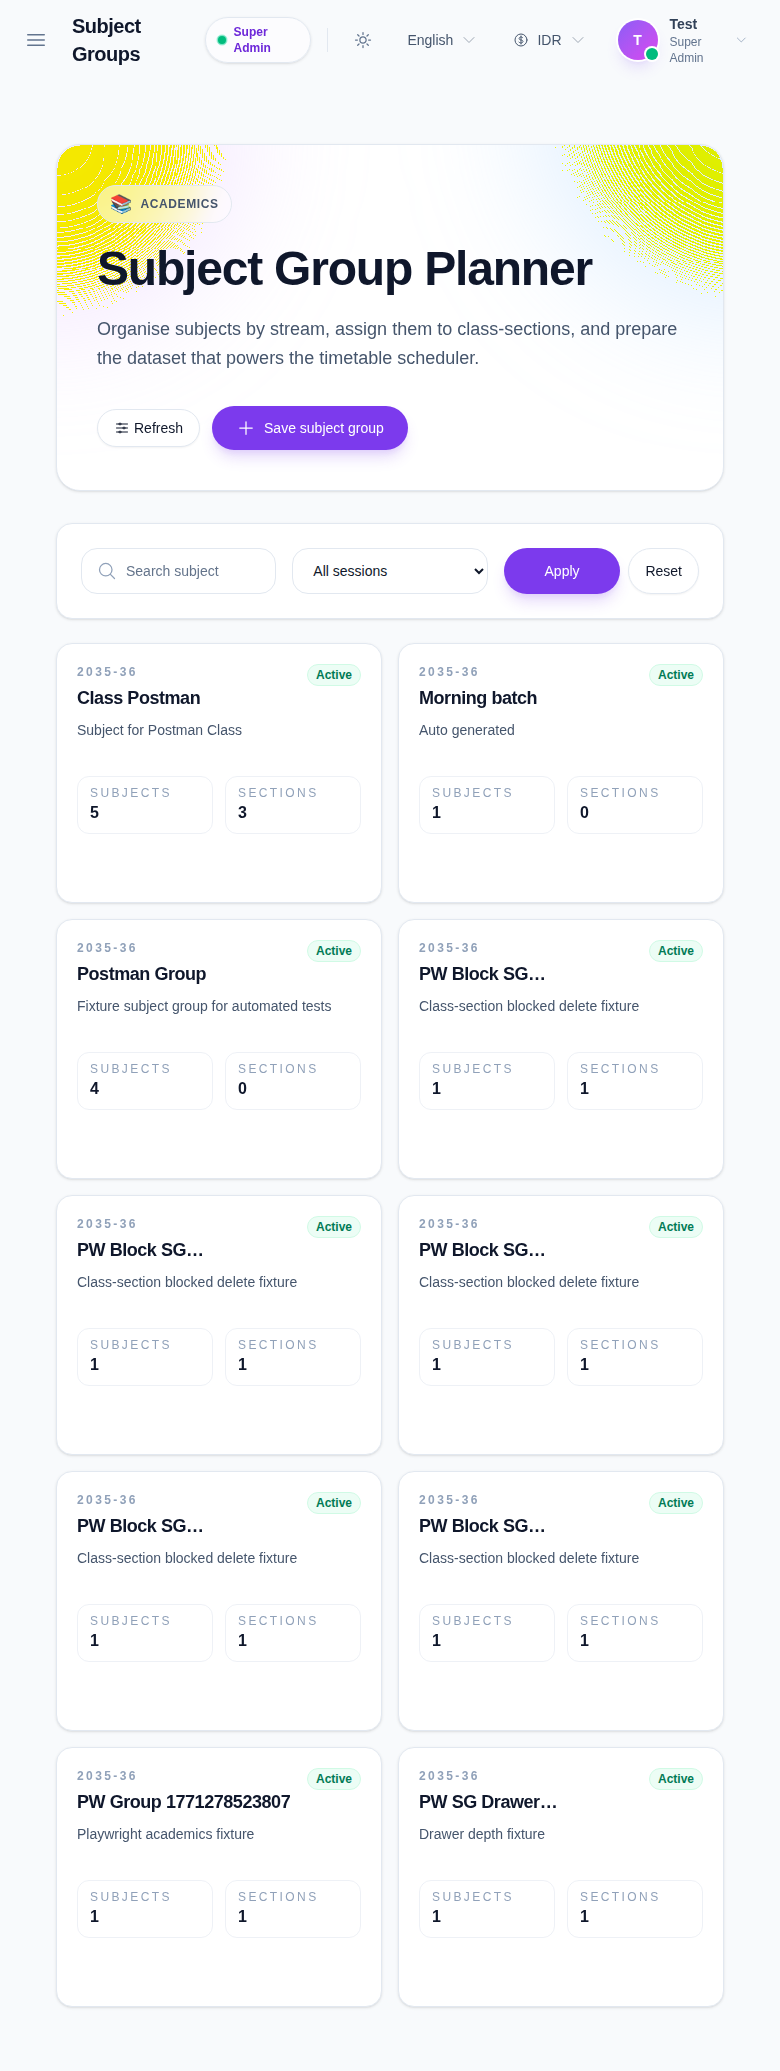
Step 2: Filter or search existing groups
Use the top controls to narrow the planner:
- Search subject
- Session
- Apply
- Reset
This is useful when the planner already contains many active groups across multiple academic sessions.
Step 3: Open the create drawer
Click Save subject group.
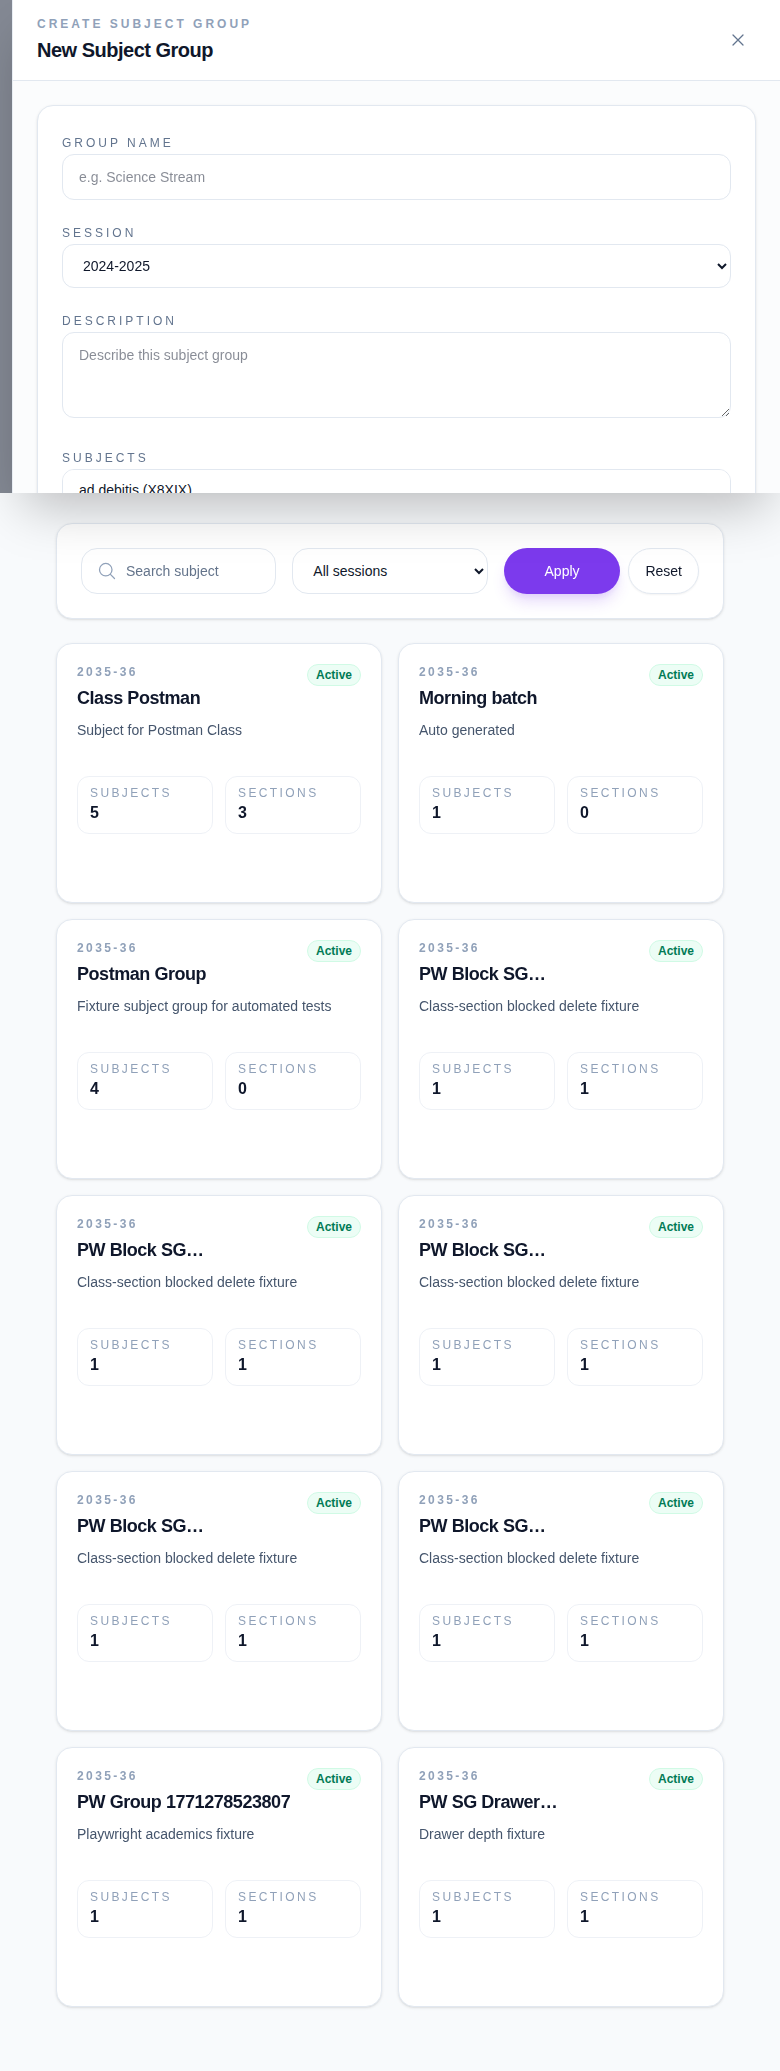
Step 4: Complete subject group details
Fill the available fields:
- Group name
- Session
- Description
- Subjects
- Active
The subject selector supports multiple values. Use Ctrl/Cmd multi-select when you want one group to include several subjects.
Step 5: Save the subject group
- Review the selected subjects and session.
- Click Create.
- Return to the planner and confirm the new card appears in the expected session view.
Step 6: Review or manage an existing group
Click an existing subject-group card to open its details drawer.
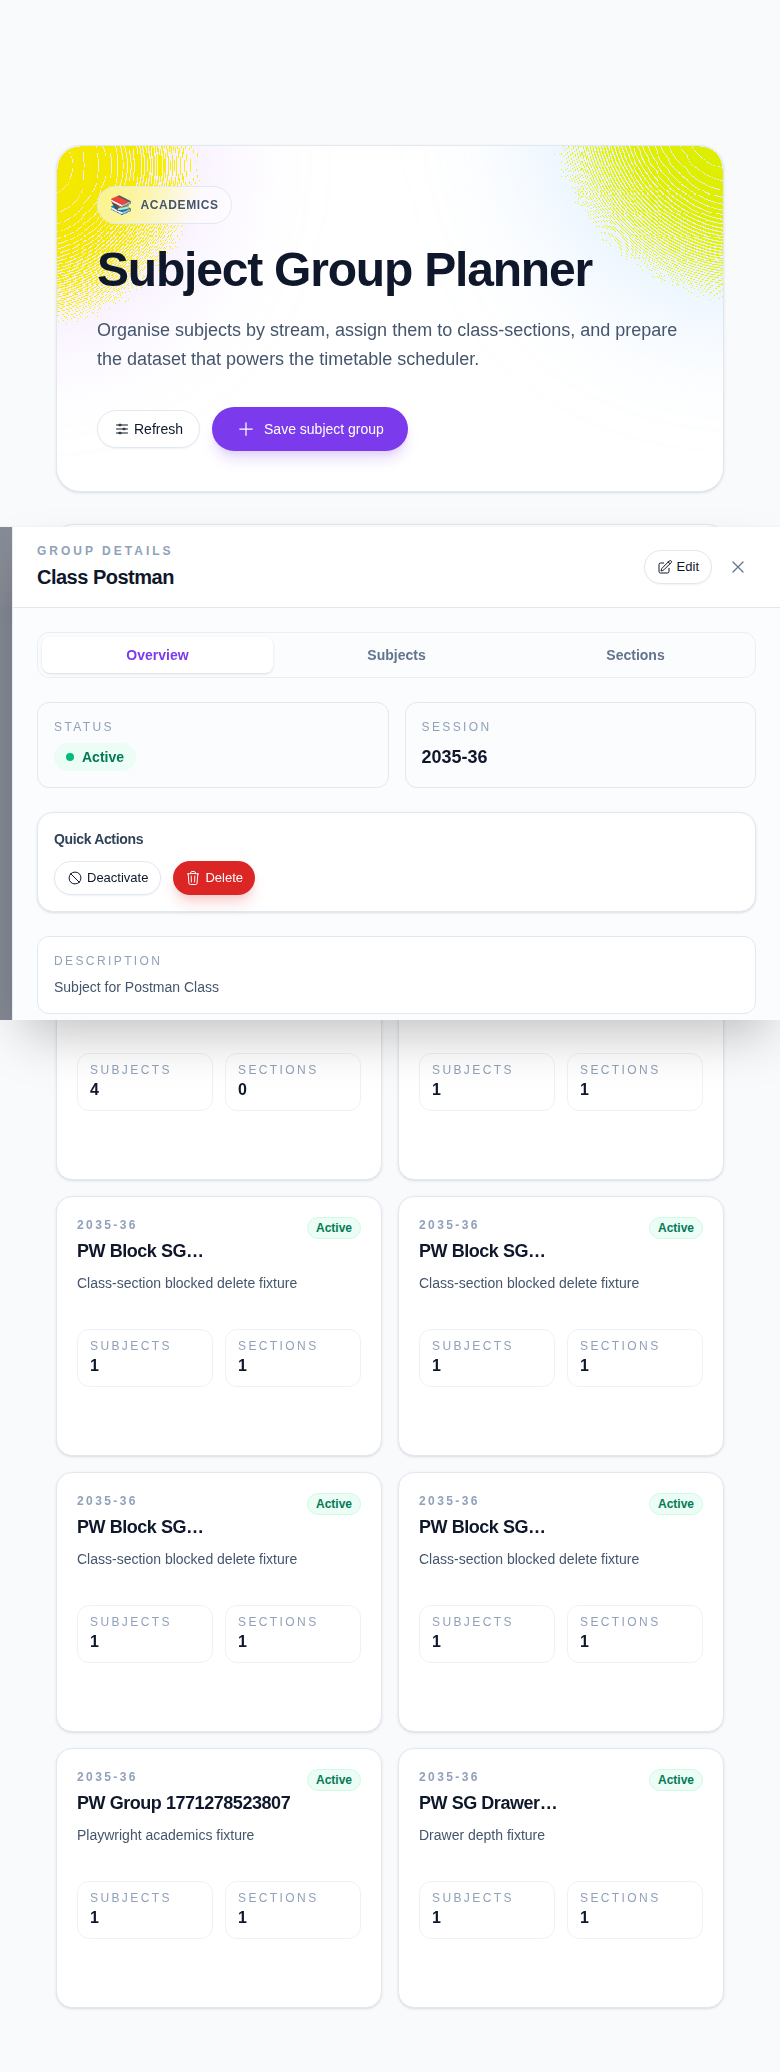
From the details drawer you can:
- open Overview
- inspect Subjects
- inspect Sections
- use Edit
- use quick actions such as Deactivate or Delete when appropriate
Important notes
Important: subject groups feed timetable and class-section workflows. Review the assigned subjects and active state carefully before deactivating or deleting a group that may already be in use.
Verification checklist
- The correct academic session is selected.
- The subject group card appears with the expected name and status.
- Subject count matches the subjects chosen in the create drawer.
- Existing group details open correctly for overview, subject, and section review.
Expected result: the subject group is available in the planner and can be reviewed or maintained from the group-details drawer.
Troubleshooting
| Issue | Likely cause | What to do |
|---|---|---|
| New group is not visible | Session filter does not match the created record | Reset filters or switch to the matching session |
| Required subject is missing | The subject record is not available in the academic dataset | Create or activate the subject first, then reopen the drawer |
| Wrong card opens | A different subject-group card was selected from the planner grid | Close the drawer and reopen the intended card |
| Delete or deactivate should not be used | The group may already be tied to timetable/class-section setup | Review the details drawer before making destructive changes |