This guide explains how to build or update a student resume from the Build CV workspace in Migdafa Smart School.
Before you start
- Confirm the student’s base profile details are already present.
- Decide which resume sections need content, such as work experience or qualifications.
- Use class and section filters if the school has a large student roster.
- Check the current CV settings first if a section seems unavailable.
Important: the Student CV builder depends on the quality of the underlying student profile. Missing identity, guardian, or contact data will flow through into the final resume output.
Navigation path
Student CV -> Build CV
Step 1: Open the Build CV workspace
Go to Student CV in the sidebar and choose Build CV. The page opens a student table with filtering controls and a row-level Build CV action.
The current list includes:
- admission number
- student identity
- class
- section
- mobile
- action
Step 2: Filter the student roster
Use the top controls before opening the editor:
- Search with Search by student name or admission number.
- Choose Class when you want to narrow by class.
- Choose Section after the class is selected.
- Use Reset Filters when you need to clear the current context.
In the current UI, the Section selector remains disabled until a class is chosen.
Step 3: Open the CV editor
Click Build CV on the correct student row.
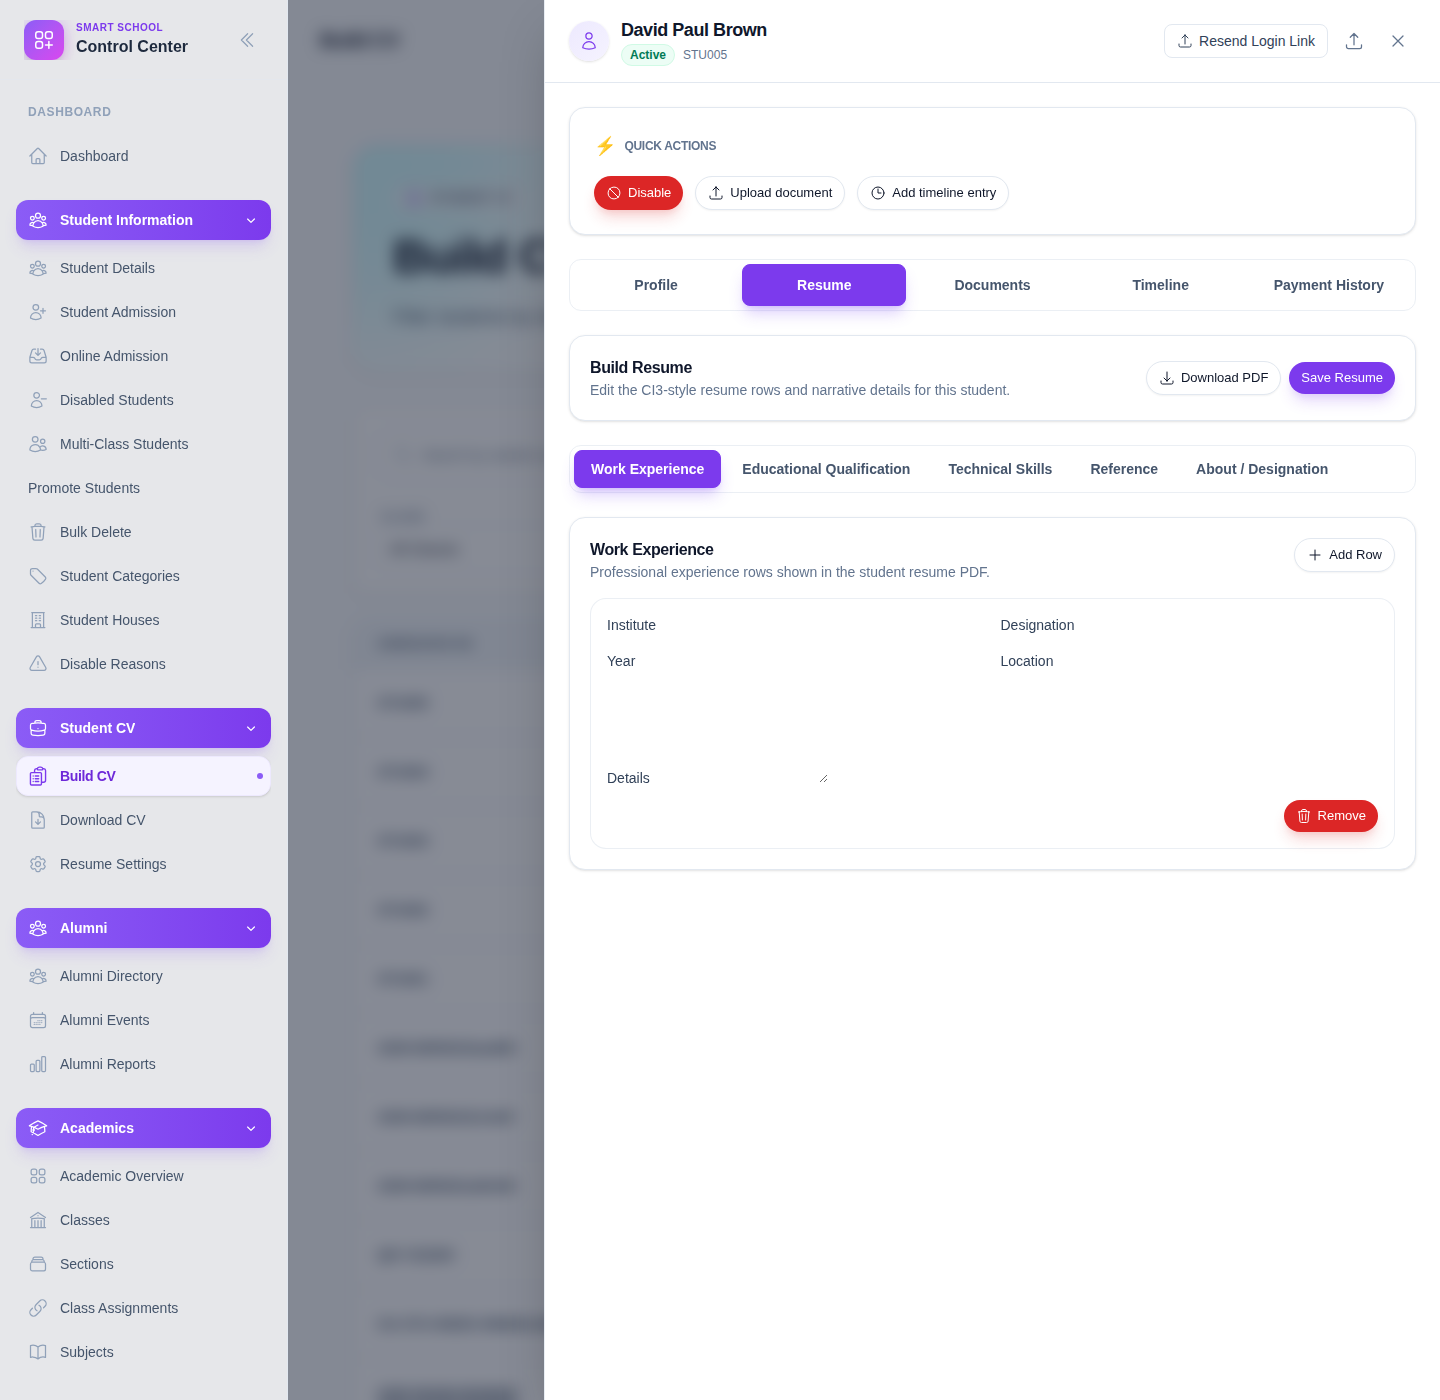
The builder opens the student drawer and exposes several working areas:
- Profile
- Resume
- Documents
- Timeline
- Payment History
The resume editor also includes quick actions such as:
- Download PDF
- Save Resume
Step 4: Complete the resume sections
Inside the builder, use the resume form to add or refine extended CV content.
The verified editor currently exposes grouped sections such as:
- Work Experience
- Educational Qualification
- Technical Skills
- Reference
- About / Designation
Some rows support repeated entries through Add Row and Remove controls. Use those controls when the student has more than one work item, qualification, skill group, or reference.
Step 5: Save the resume
After entering or updating the content, click Save Resume.
Before saving, recheck:
- names, institute, year, and location values
- course or university details where applicable
- reference contact data
- narrative content in the About / Designation block
This helps avoid saving a partial CV that later gets downloaded as if it were complete.
Step 6: Review the resume output
Use Download PDF if you need to preview the output immediately after saving. This is useful for checking how the saved resume content appears in the rendered CV format.
If the PDF content is missing expected sections, review the resume editor and the global resume settings.
Verify the result
Use this checklist after saving:
- the correct student drawer is open
- resume rows were added to the right sections
- the save completed without losing the new content
- the PDF output reflects the intended resume information
Expected result: the student's CV content is updated in the builder and is ready for PDF download with the expected resume sections.
Troubleshooting
| Issue | Likely cause | What to do |
|---|---|---|
| The student is hard to find | Too many students are visible in the roster | Search by admission number or filter by class and section |
| Section stays disabled | A class has not been selected yet | Choose the class first, then select section |
| A resume section seems missing from the final output | The section may be disabled in Resume Settings | Review the global CV settings and re-save if needed |
| The PDF looks incomplete | Base profile data or resume rows are missing | Review both student profile details and the extended resume sections |
| The wrong student drawer was opened | The row action was clicked on the wrong record | Close the drawer, recheck admission number, and reopen the correct student |