This guide documents result publication as it appears in the current local Smart School UI.
In the current interface, publish actions are handled in Print & Email as render and email actions. There is no separate visible Publish Results button in this local workspace view.
Short summary
This guide covers the verified local exam-result output flow from Print & Email, including when the flow is ready to render and how to proceed when required templates are not yet available.
Before you start
- Confirm marks entry is complete for the selected exam or ensure the intended publish scope is intentionally empty.
- Confirm exam group, class, section, and session context.
- Confirm required templates exist:
- admit card template (for admit card mode)
- marksheet template (for marksheet mode)
- Confirm your role has the print permission needed for the selected mode.
- Confirm the school policy around fee clearance if the environment enforces it before rendering.
Navigation path
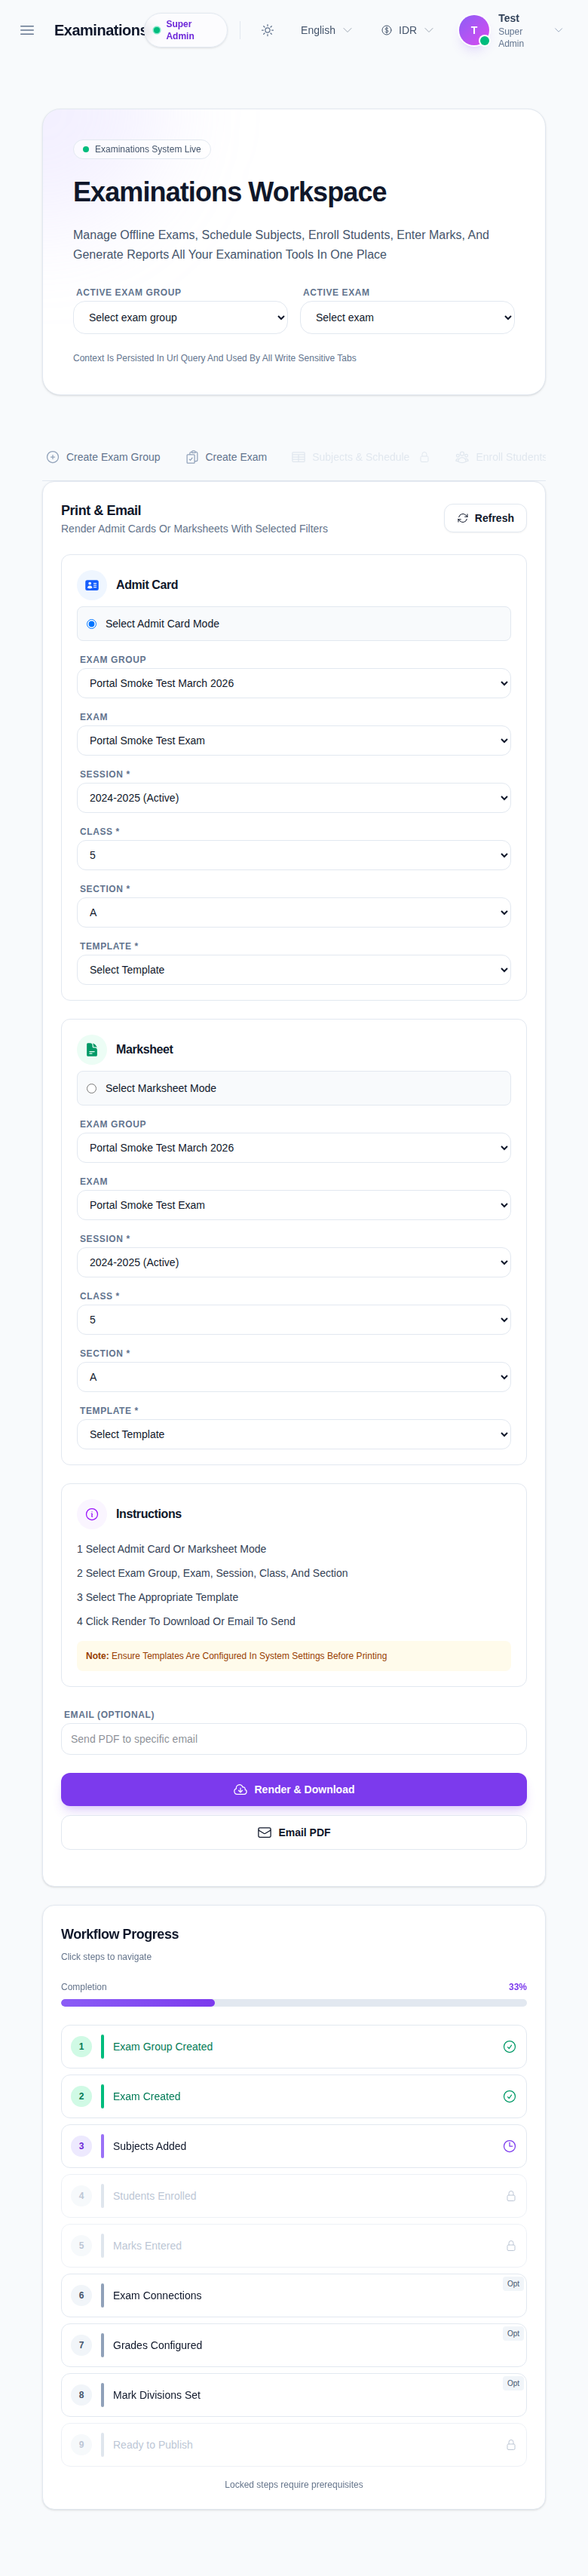
Examinations -> Exam Workspace -> Print & Email
Step 1: Open Print & Email
From Examinations -> Exam Workspace, open Print & Email.
You will see mode cards for:
Admit CardMarksheet
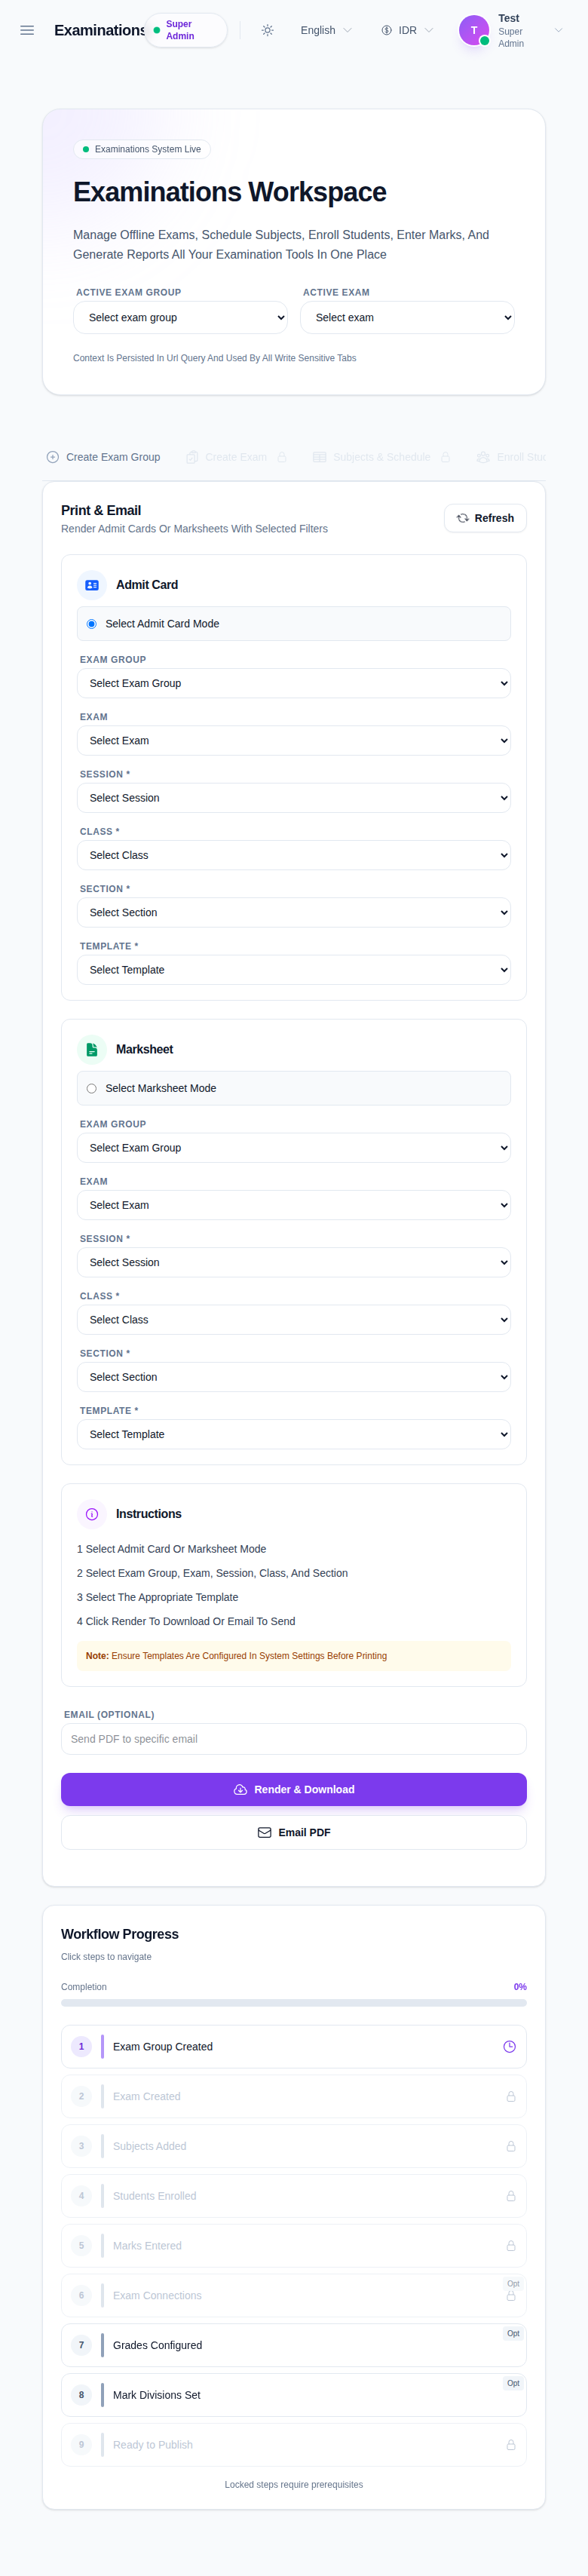
Step 2: Select output mode
Choose:
- Admit Card when you need admit card output
- Marksheet when you need result sheets
Mode-specific inputs share the same context fields.
Step 3: Fill required context filters
Set these values in order:
- Exam Group
- Exam
- Session
- Class
- Section
- Template
Selecting an exam can auto-populate dependent fields.
Local verification limitation:
- If Template has only
Select Template, rendering cannot proceed. - In the local environment during this audit, no exam output templates were available to complete a successful render or email send.
Step 4: Confirm mode/template pairing
Switch between mode cards and check that the template list matches the intended output:
- Admit card output should use an admit card template.
- Marksheet output should use a marksheet template.

Step 5: Render or send by email
After all fields are set:
- click Render & Download to generate a PDF and get a download link
- fill Email (Optional) and click Email PDF to send via email
On success, the page shows a message and generated path.
Expected result: the selected document type is rendered and ready for immediate download or email delivery.
Important notes
Important: this workspace maps publication to print actions, not a separate publish button. Document this in operations as the current source of truth until the UI exposes another publish entry point.
Local limitation: this audit path could verify all filters and controls, but could not complete a download/email output because no template was configured in the local Smart School data.
Verification checklist
- the selected context matches the intended publication target
- the correct mode is selected (Admit Card or Marksheet)
- a valid template is selected
- the render/download action works without error
- the generated file opens and belongs to the selected exam context
Troubleshooting
| Issue | Likely cause | What to do |
|---|---|---|
| Render action is disabled | Context is incomplete | Fill all required fields in order and wait for values to load |
| No template options | Template is not configured for mode | Set up templates in the system and return to this tab |
| Fee block message appears | Fee-based guard is active for the selected section | Clear/fix fee dependency before rendering |
| Email PDF is disabled | Email field is empty | Add a valid recipient address |
| Download link appears but file does not open | Local file-serving route issue | Retry render and open the link in the same browser session |