Use this guide when a student is being enrolled directly by staff rather than through a public online admission flow.
Before you start
- Confirm the active academic session.
- Know the target class and section for the student.
- Prepare guardian and parent contact information before opening the form.
- Decide whether your school will enter admission and roll numbers manually or generate them from a separate internal process.
Navigation path
Student Information -> Student Admission
Step 1: Open the Student Admission form
Open Student Information from the sidebar and choose Student Admission. The page is organized into four operational blocks:
- Admission
- Student
- Academic placement
- Guardian & parents
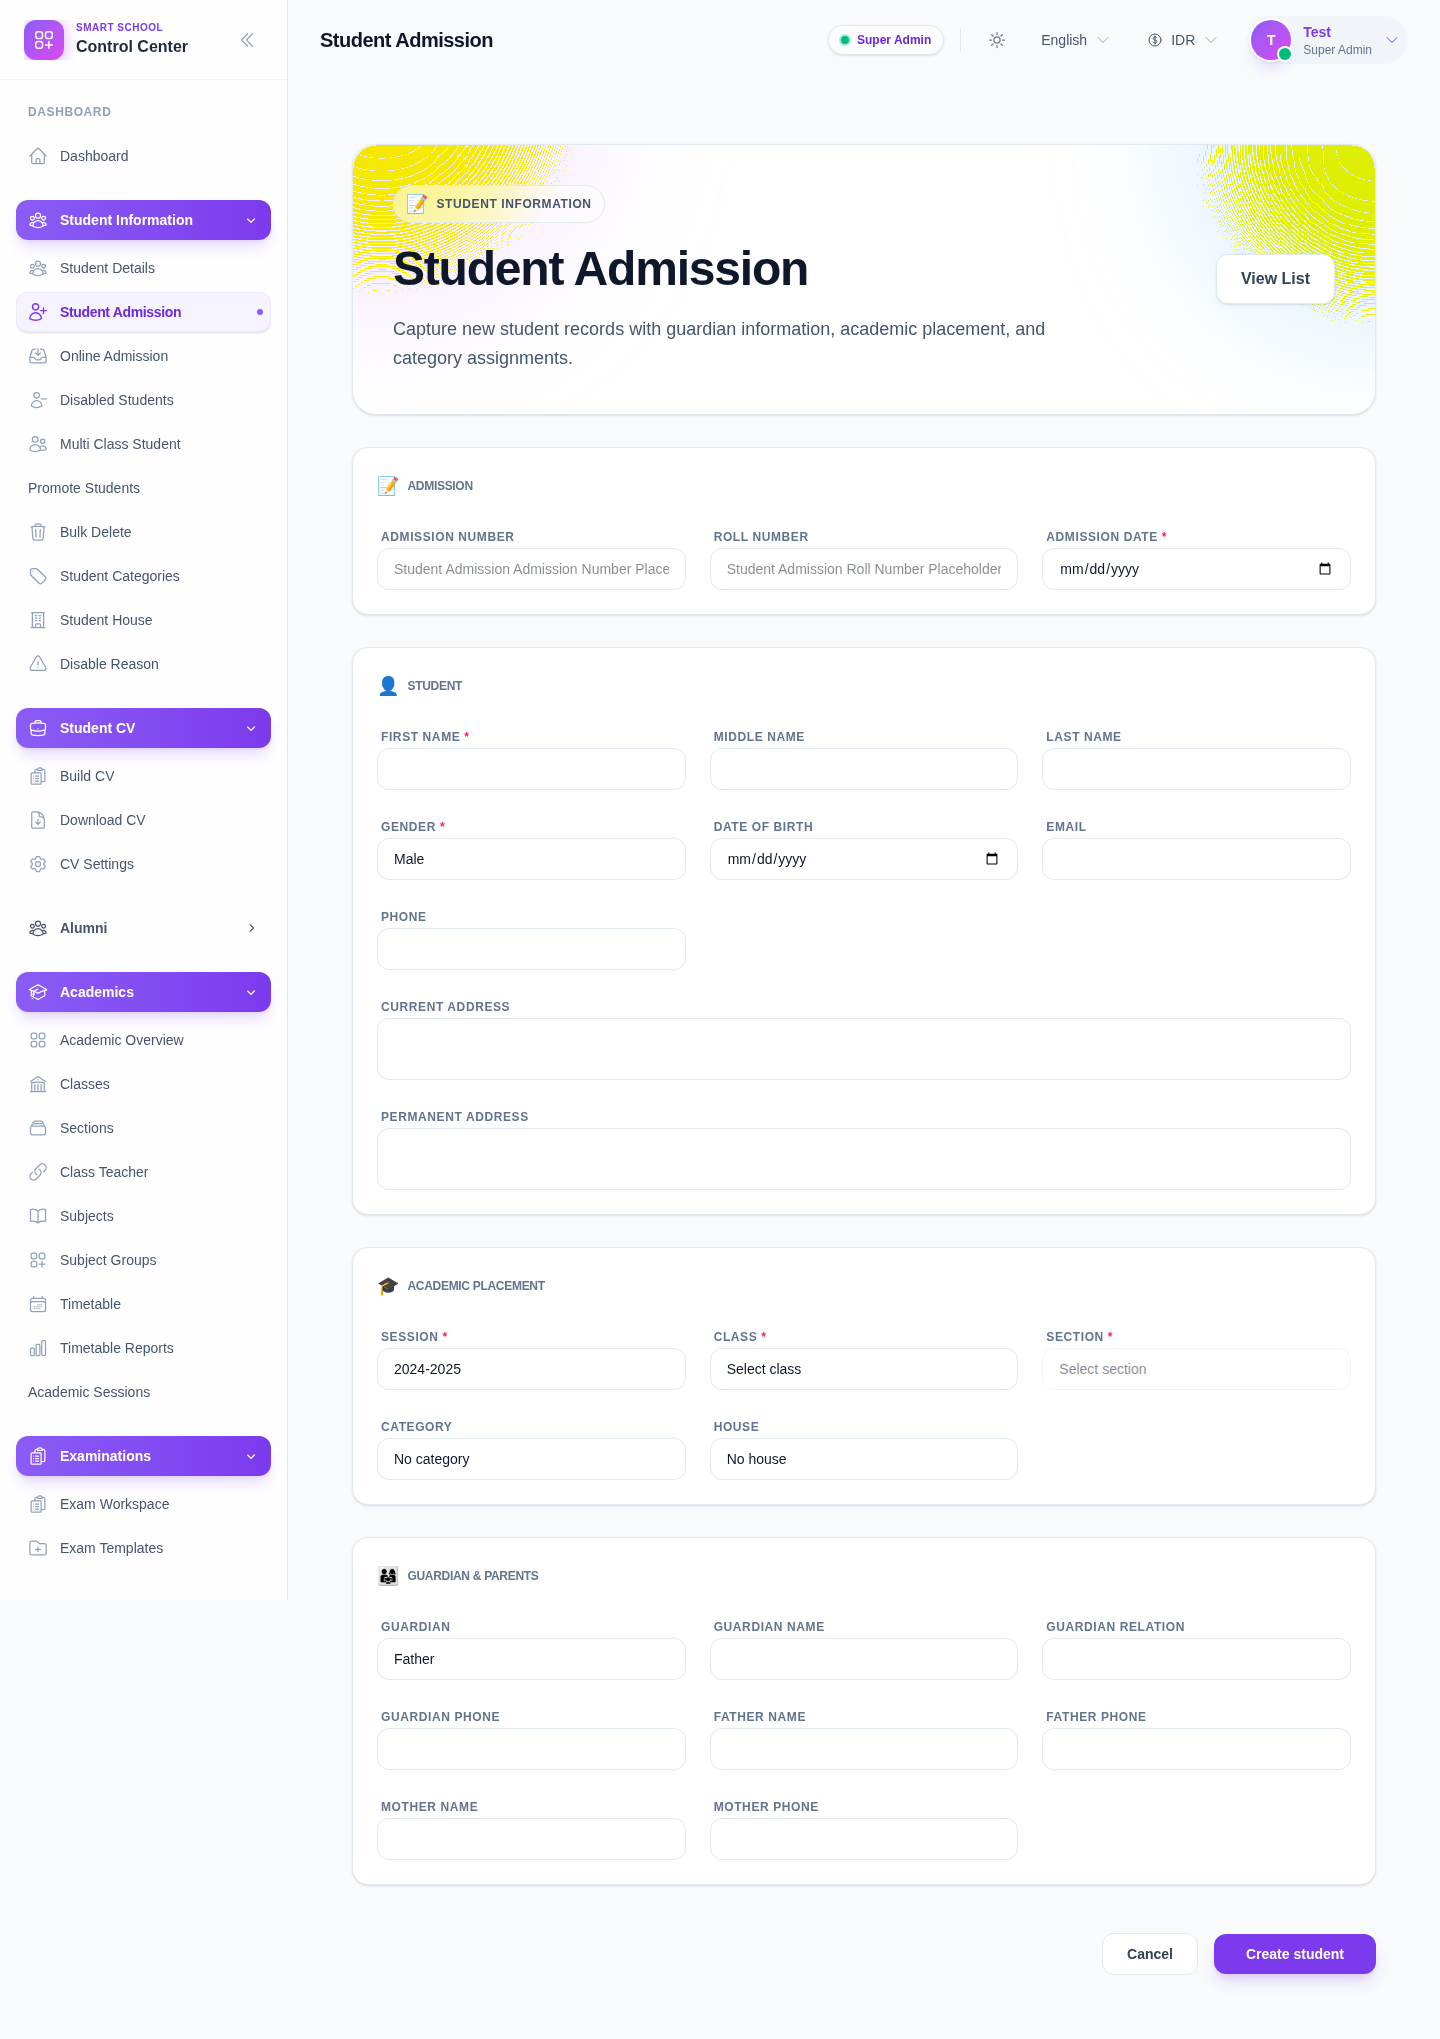
Step 2: Enter the admission details
The first block captures intake-specific information:
- Admission number
- Roll number
- Admission date
Recommended approach:
- use a consistent admission numbering rule
- record the real intake date rather than the date the form was opened
- leave optional fields blank only if your school truly does not use them
If your internal policy depends on external approval before assignment, settle the admission and roll numbering convention before you create the record.
Step 3: Fill the student identity section
The Student block collects core identity and contact data:
- first name
- middle name
- last name
- gender
- date of birth
- phone
- current address
- permanent address
Use the full legal or school-approved spelling for names. This matters later for certificates, attendance exports, fee records, and communication workflows.
Step 4: Set academic placement
The Academic placement block decides where the student will sit inside the school structure.
Required items in the current UI:
- Session
- Class
- Section
Optional but useful placement fields:
- Category
- House
Important behavior:
- section selection depends on the class choice
- if the correct section does not appear, stop and verify the academic setup before saving the student
Step 5: Enter guardian and parent information
The Guardian & parents block captures the contact and relationship context used in day-to-day operations.
Available fields in the current UI include:
- guardian type
- guardian name
- guardian relation
- guardian phone
- father name
- father phone
- mother name
- mother phone
Fill this section carefully because it supports follow-up communication, emergency reference, and other parent-facing workflows.
Step 6: Submit the record
Review the entire form, then click Create student.
Before submission, double-check:
- required fields are complete
- the student is assigned to the correct session, class, and section
- guardian contact details are usable
- dates use the intended values
If you need to abandon the form, use Cancel instead of leaving partial assumptions in your notes.
Step 7: Verify the student after creation
After the student is created:
- return to the student list using View List
- search by admission number or student name
- confirm the class-section placement
- verify guardian details if your process requires a second-person review
Expected result: the student appears in the roster and is ready for linked workflows such as fee assignment, attendance, and academic reporting.
Common mistakes to avoid
- saving the student before checking class and section
- entering temporary guardian numbers that staff cannot use later
- mixing current and permanent addresses without confirming the school standard
- leaving admission details blank when your school policy expects them at intake time
Troubleshooting
| Issue | Likely cause | What to do |
|---|---|---|
| Section cannot be selected | Class has not been chosen yet or has no linked sections | Select the class first, then verify section setup in Academics |
| Form cannot be submitted | Required fields are still empty | Recheck the Admission, Student, and Academic placement blocks |
| Student is created in the wrong class | Academic placement was chosen incorrectly | Review the student record immediately and correct placement before downstream work begins |
| Guardian data is incomplete | Intake information was not gathered before opening the form | Pause the process and complete the guardian details before closing intake |